Trigger
If you've ever done email marketing, you're probably familiar with the concept of a Trigger. In AhaChat, a Trigger works similarly: the system will automatically perform an action (like sending a message) when a customer meets certain conditions. This helps you automate nurturing, upselling, or syncing data quickly and effectively.
Here are some real-life examples to help you better understand and apply this feature:
Example 1: Upsell women’s watches to users who joined the lucky spin campaign
Scenario: You have a group of users who joined the “lucky spin” campaign (viral1), and now you'd like to re-engage them to promote women’s watches.
Steps:
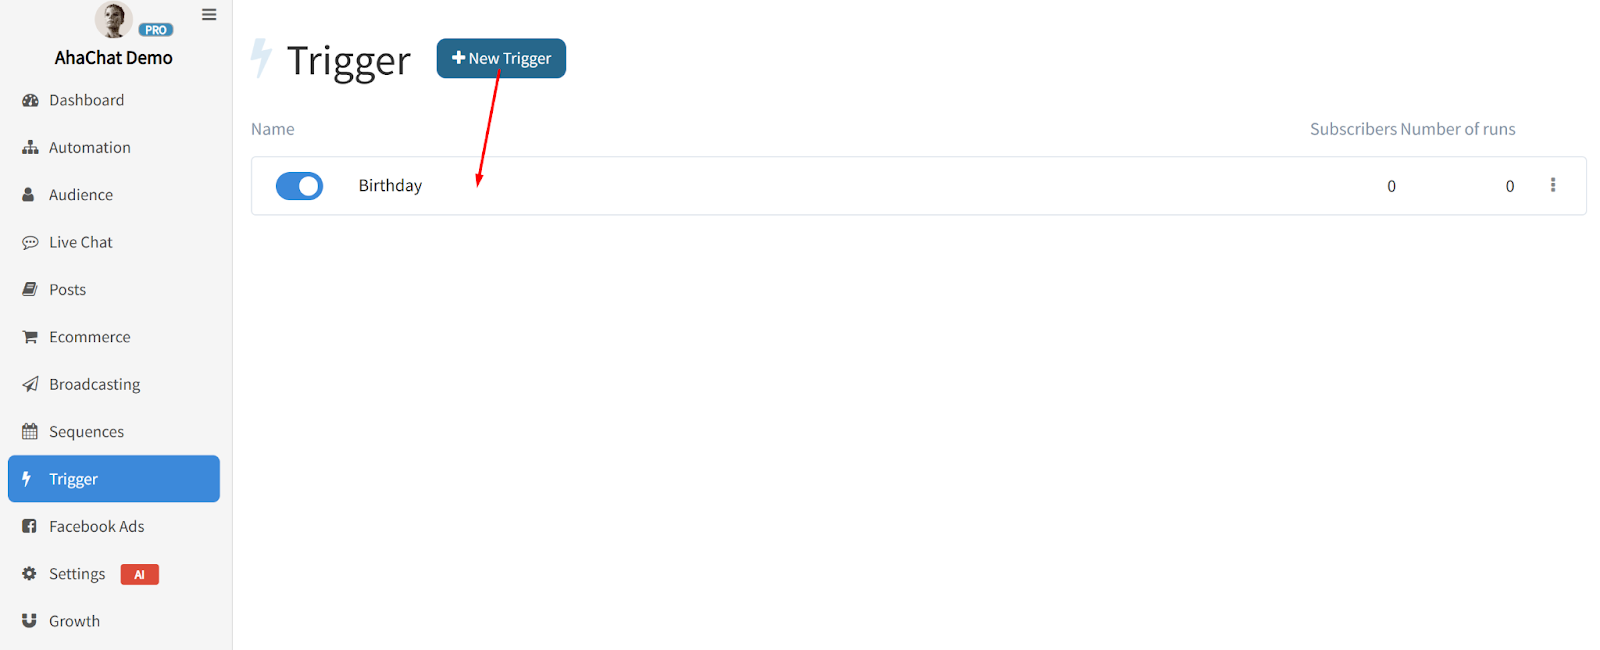
1. Create a new Trigger
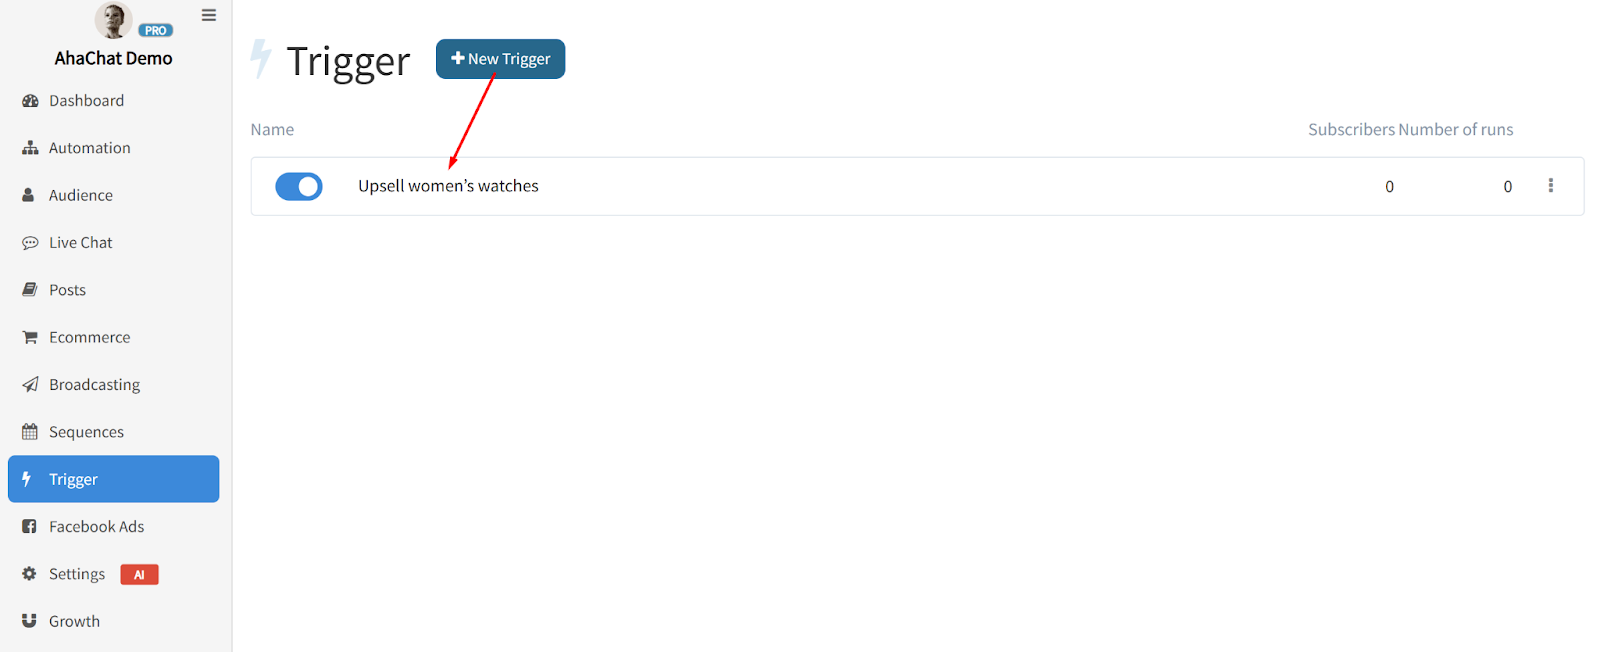
2. Set the conditions:
Gender is Female
Tagged with Joined viral1
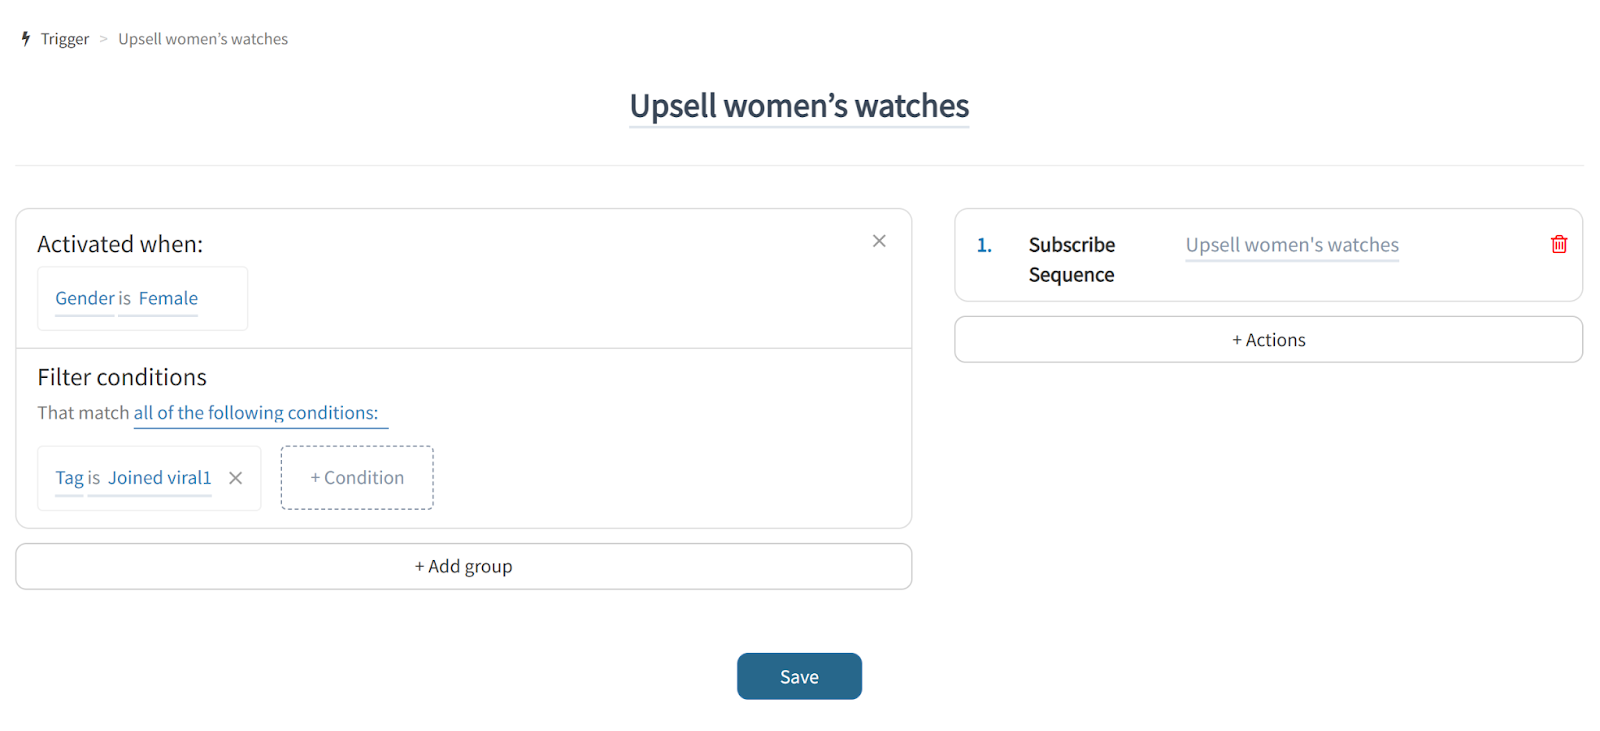
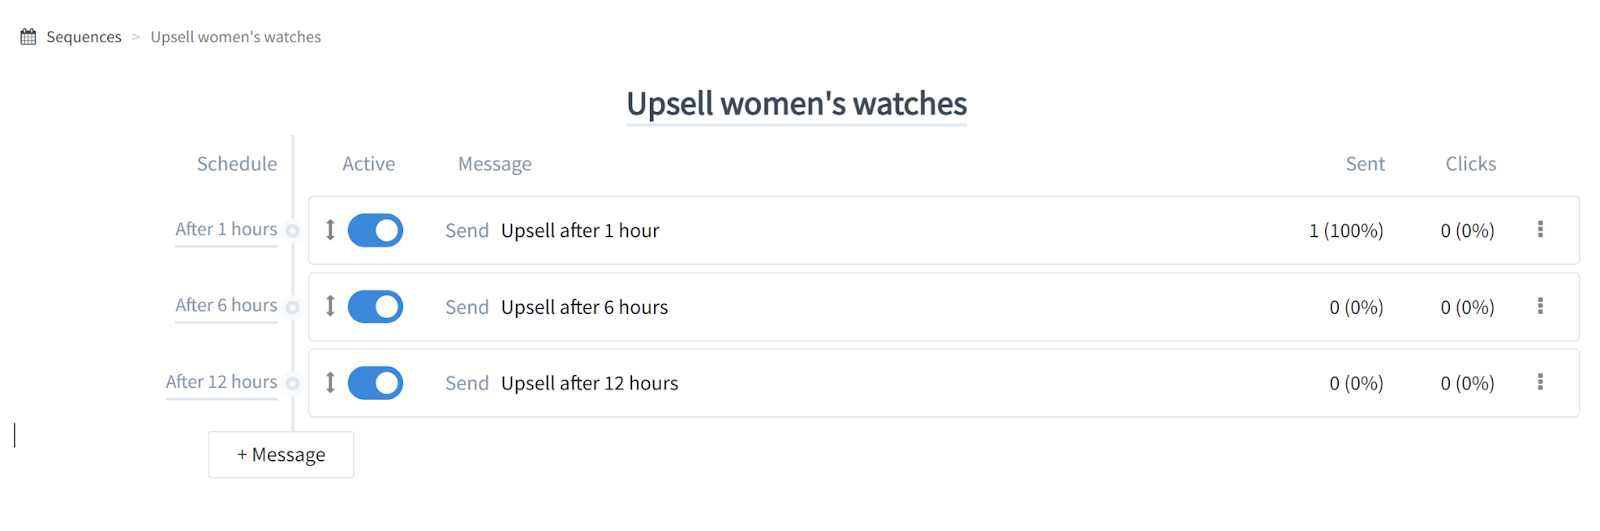
3. Select a Sequence:
- Sequence name: Post-viral1 gift – upsell women’s watches
4. Save the Trigger
5. Result: The system will automatically send the upsell message to the right target group.
Example 2: Automatically segment based on whether the user left a phone number
Goal: Nurture two separate groups:
Users who have not provided a phone number
Users who have provided a phone number (upsale)
How to do it:
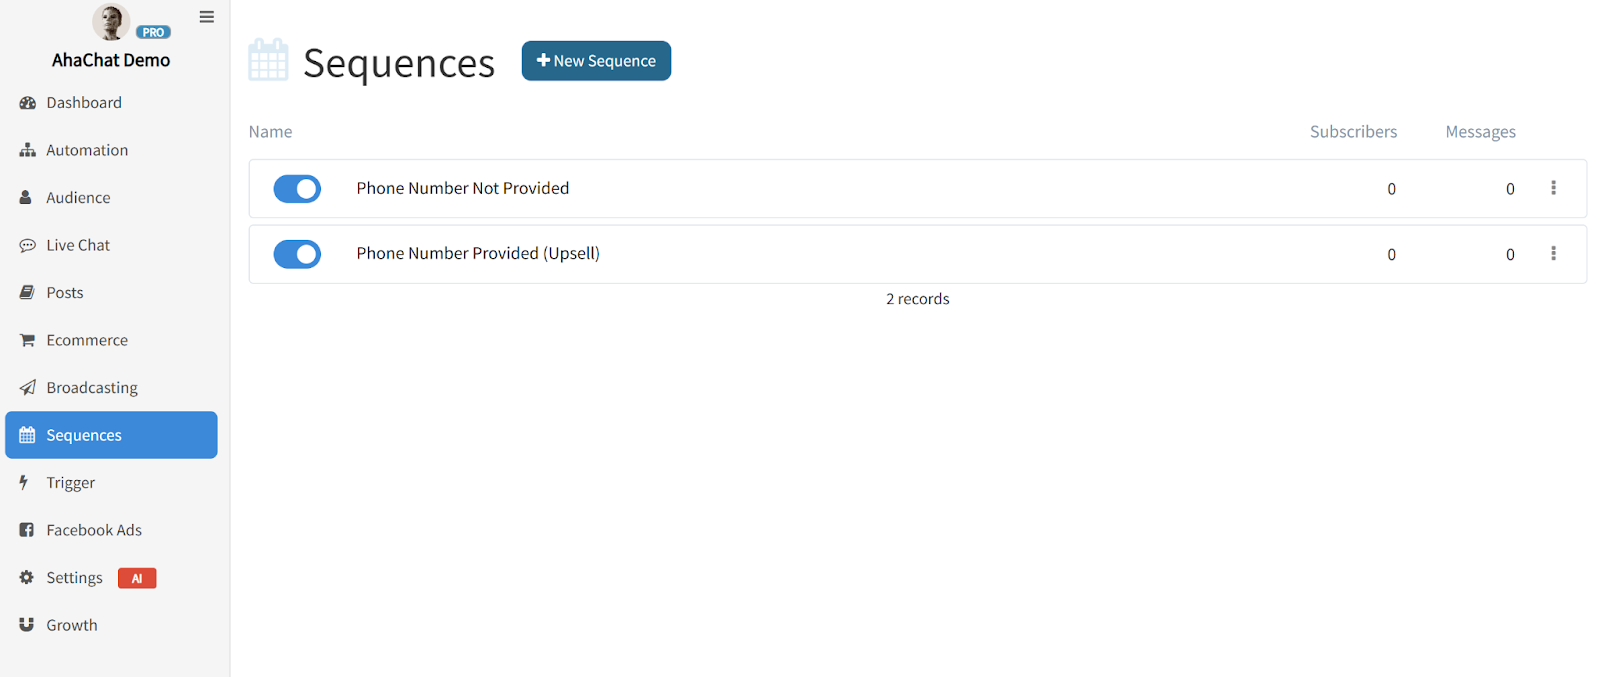
1. Create two Sequences:
One for users without a phone number
One for users with a phone number
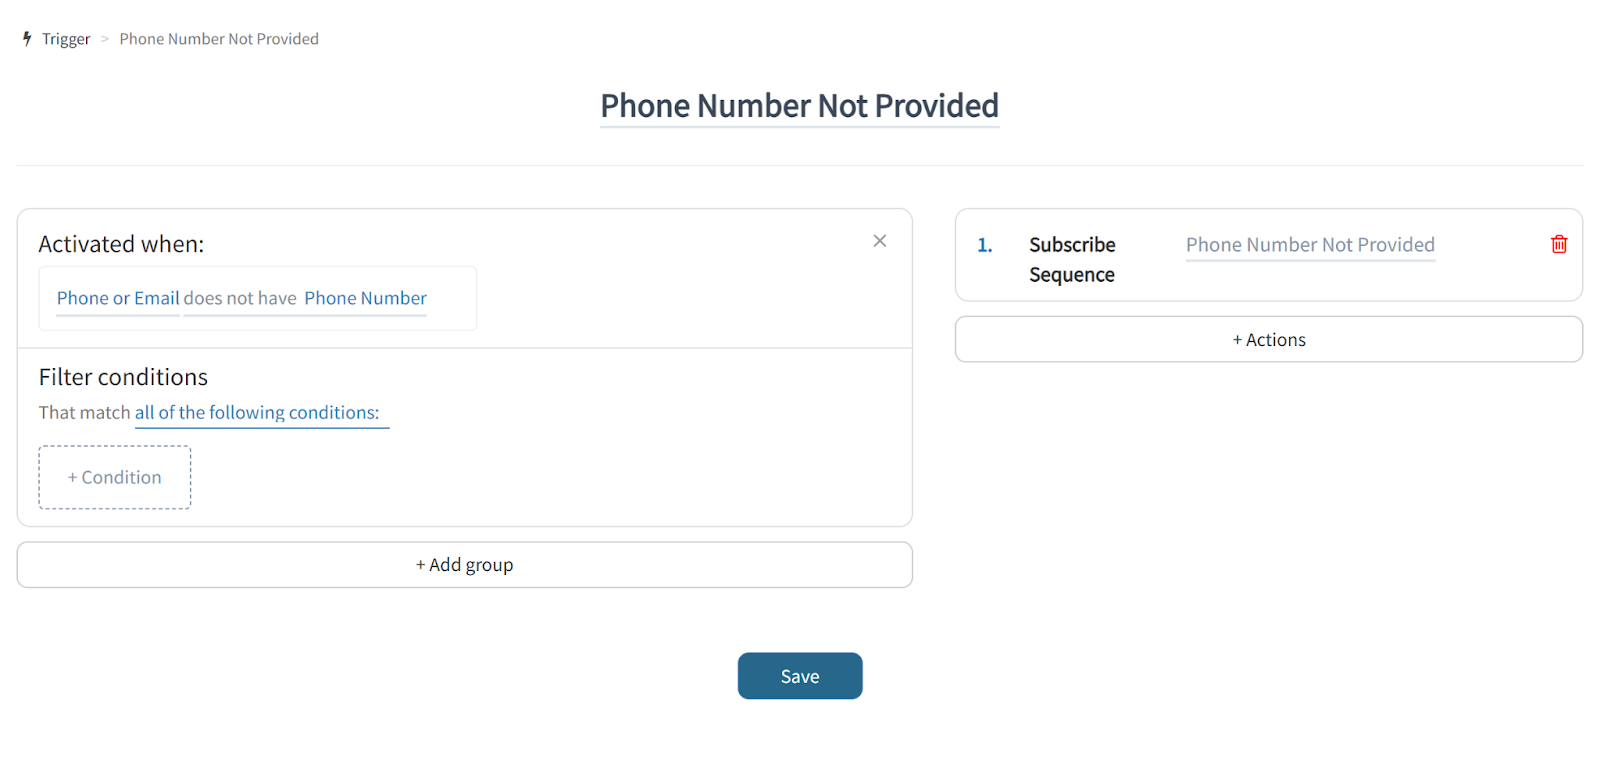
2. Create two corresponding Triggers:
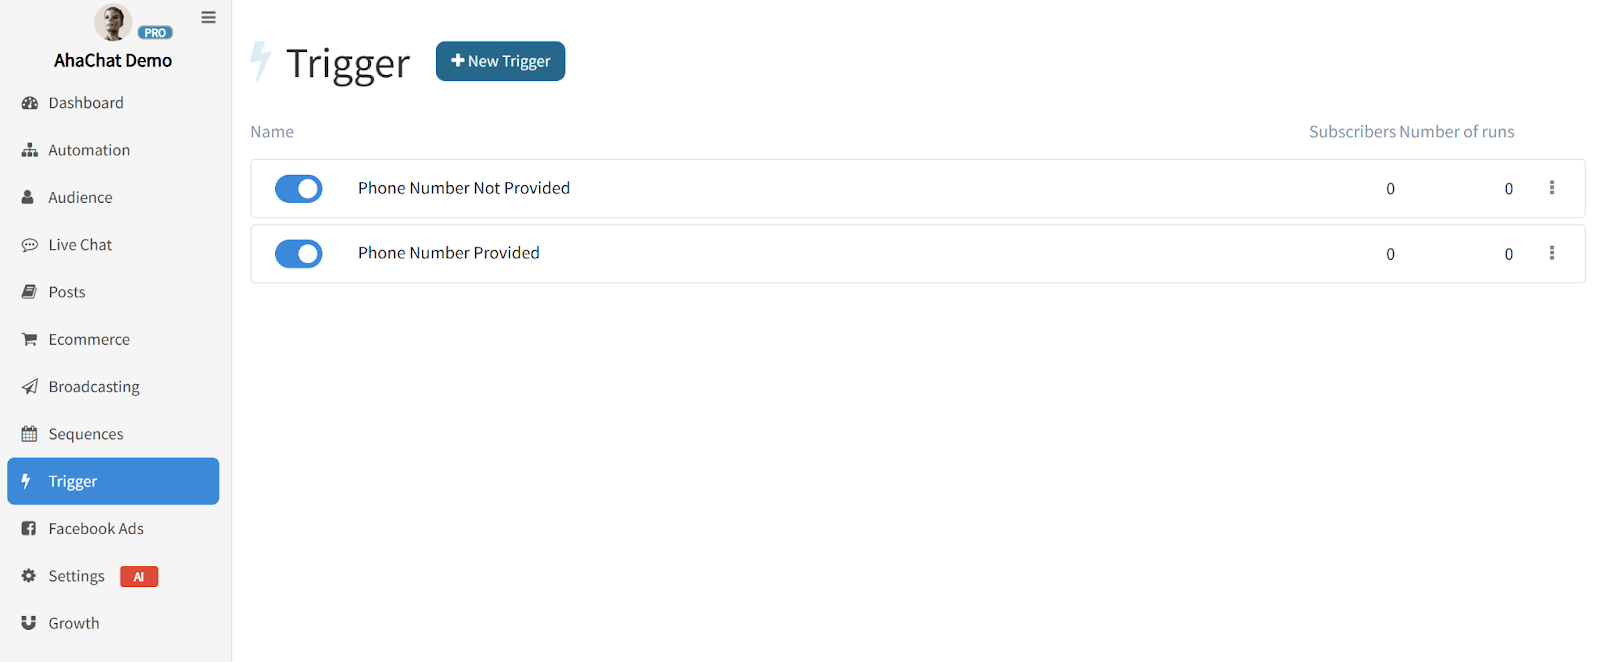
- Trigger 1: Condition = Phone or Email does not have a Phone number → Assign Phone Number Not Provided Sequence
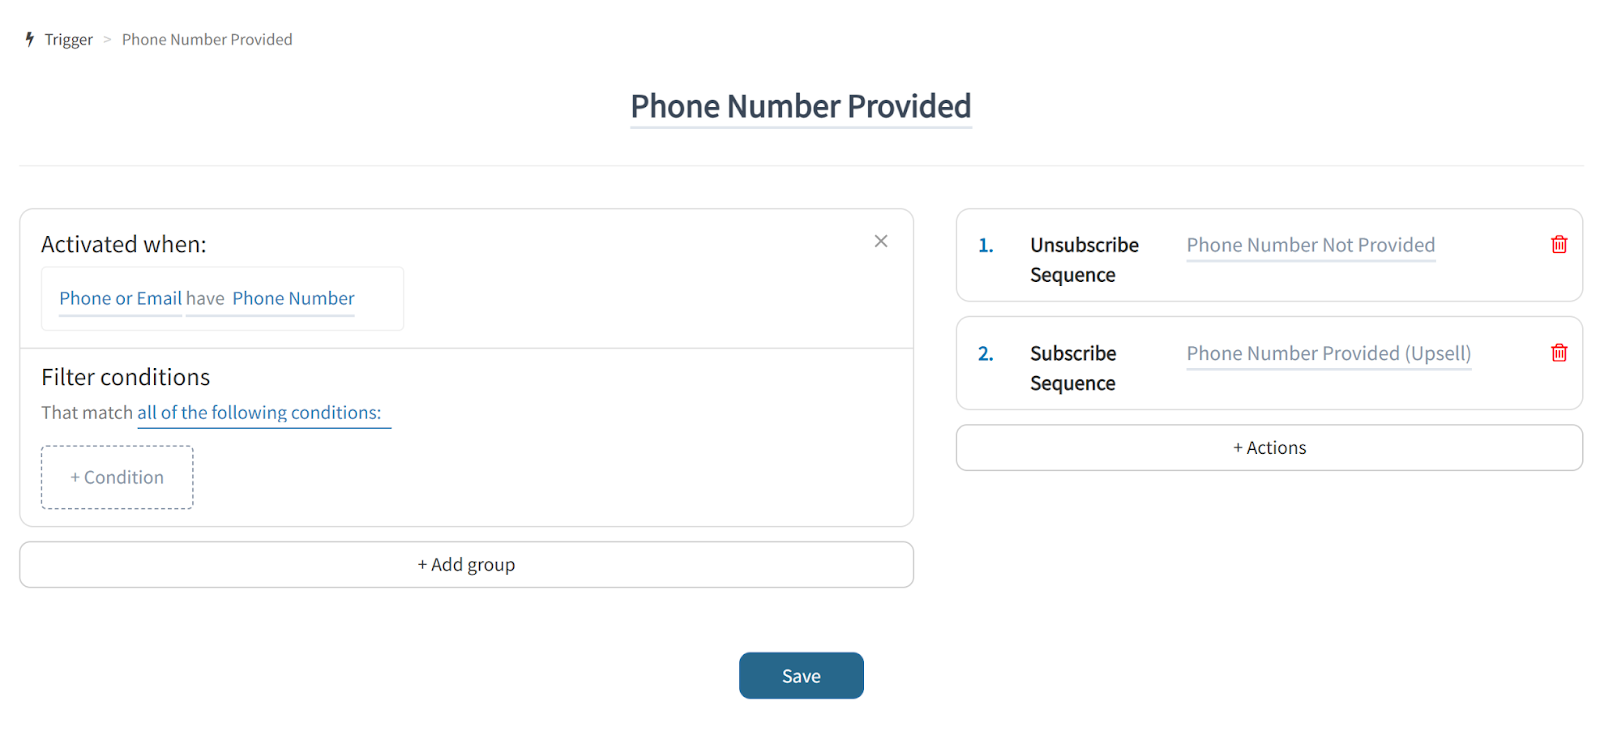
- Trigger 2: Condition = Phone or Email has a Phone number → Remove Phone Number Not Provided Sequence and assign Phone Number Provided (Upsell) Sequence
Result: Each group will receive a tailored message flow.
Example 3: Auto-sync new users to your CRM via API
Goal: Whenever a new user registers with your chatbot, you want to send that info to your CRM via AhaMake.
Steps:
- Create a Flow with an API block:
- Create a new Flow
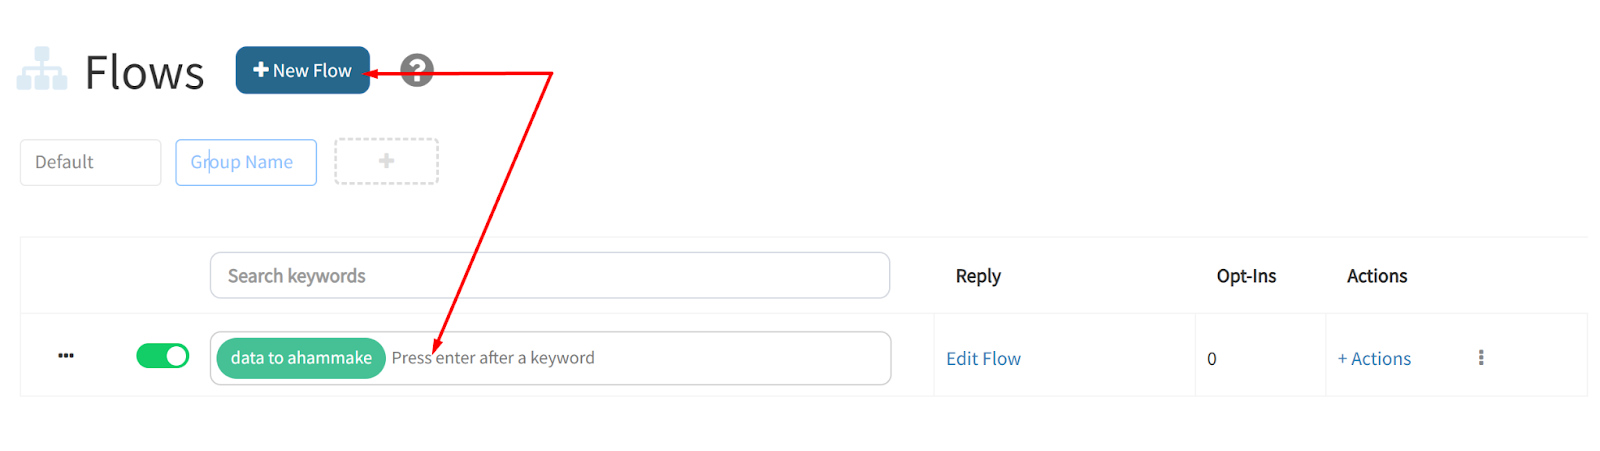
- Add a
JSON APIblock
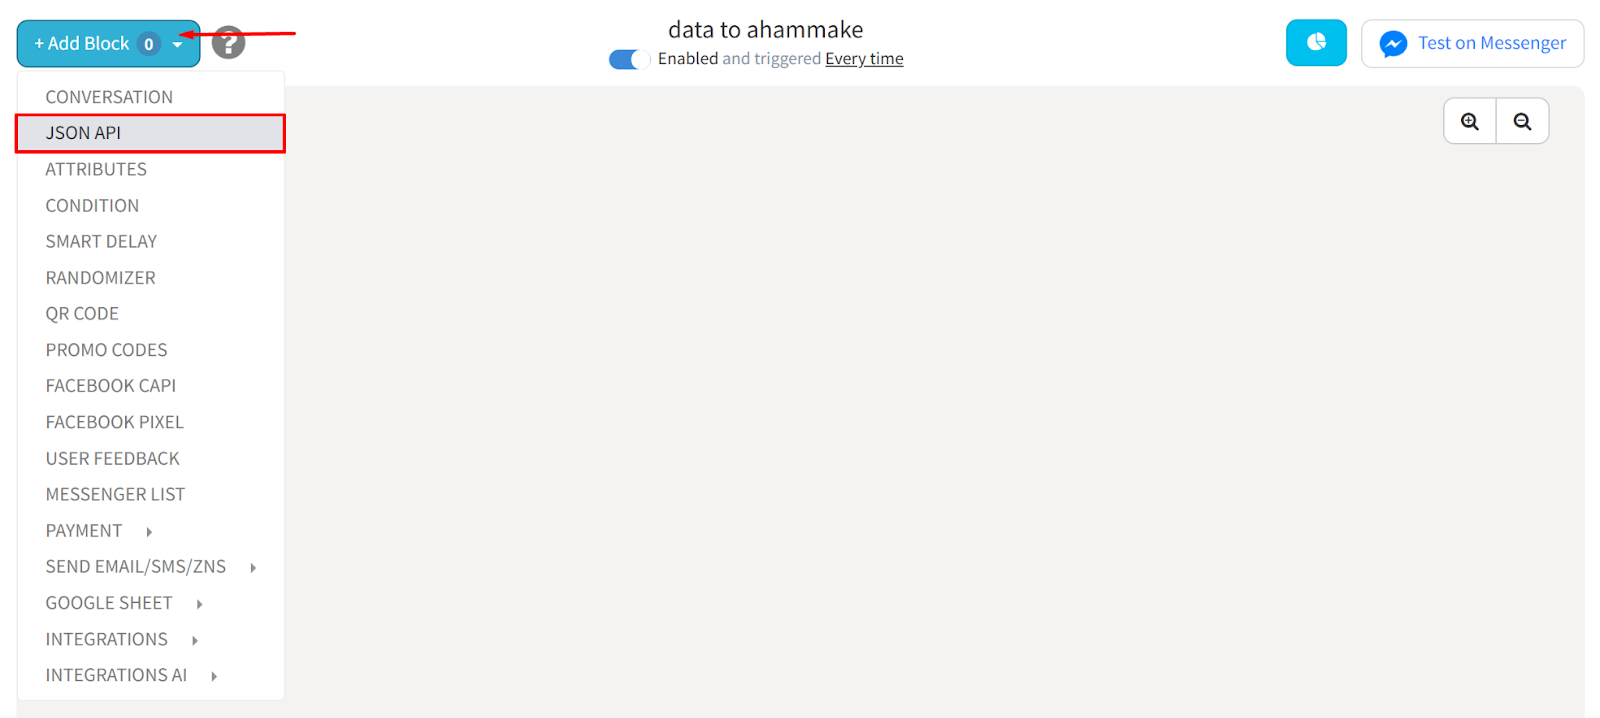
- Enter your AhaMake webhook URL to push data from the chatbot to your CRM

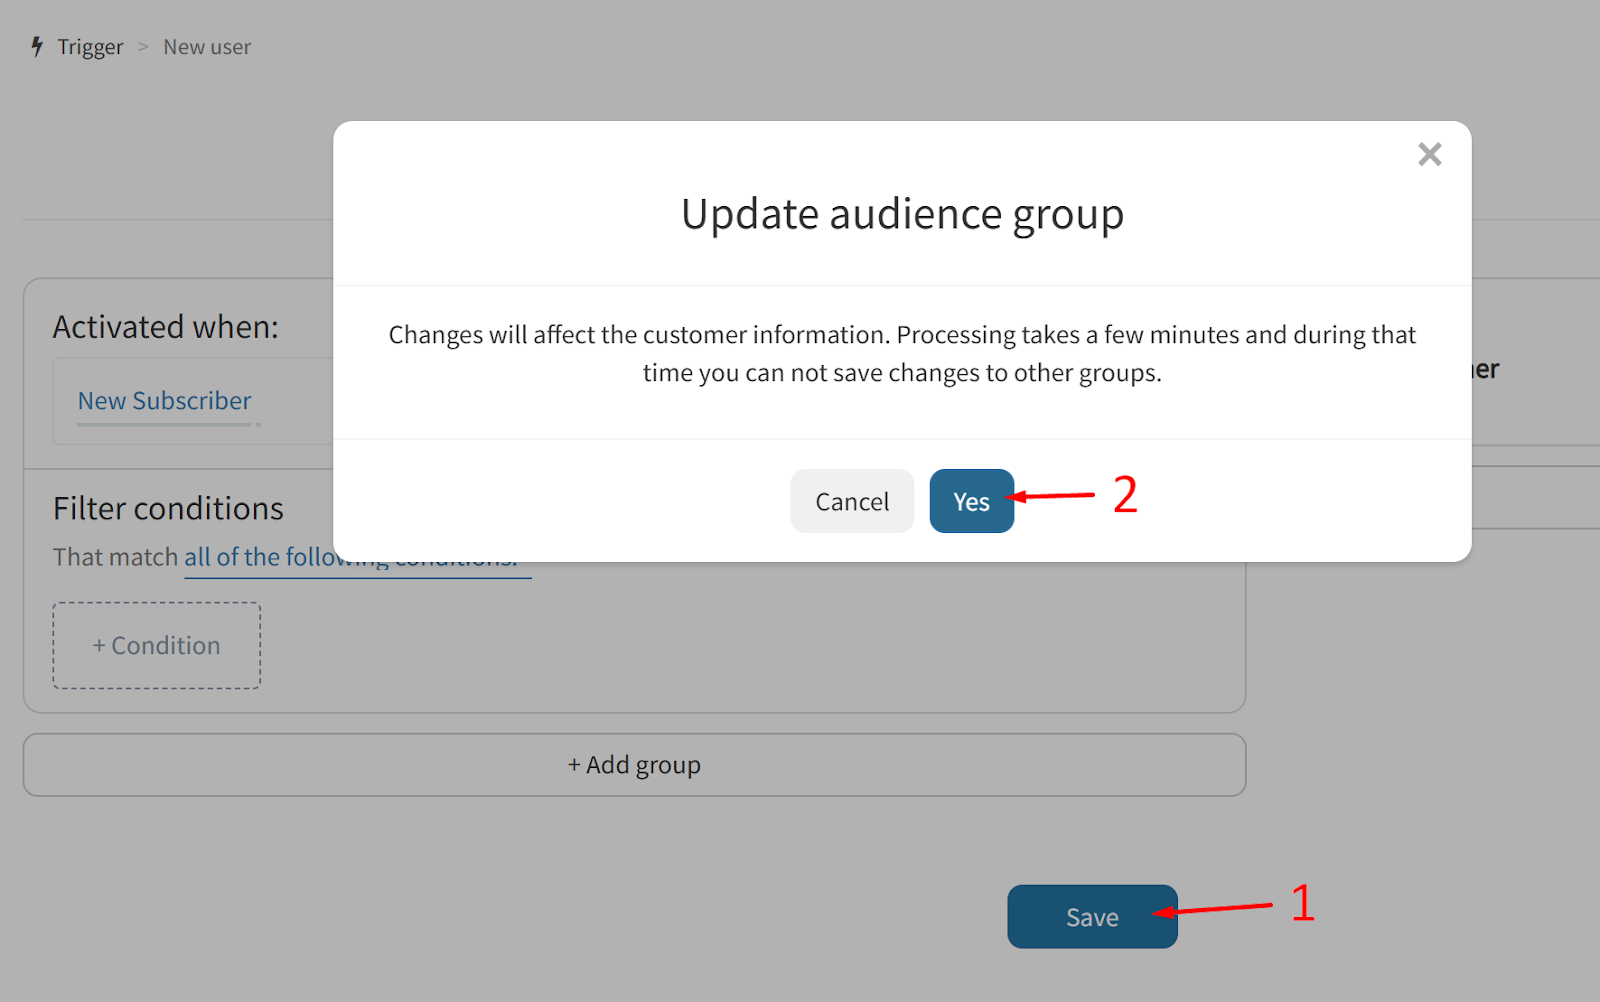
- Create a Trigger:
- Activated when: New Subscriber
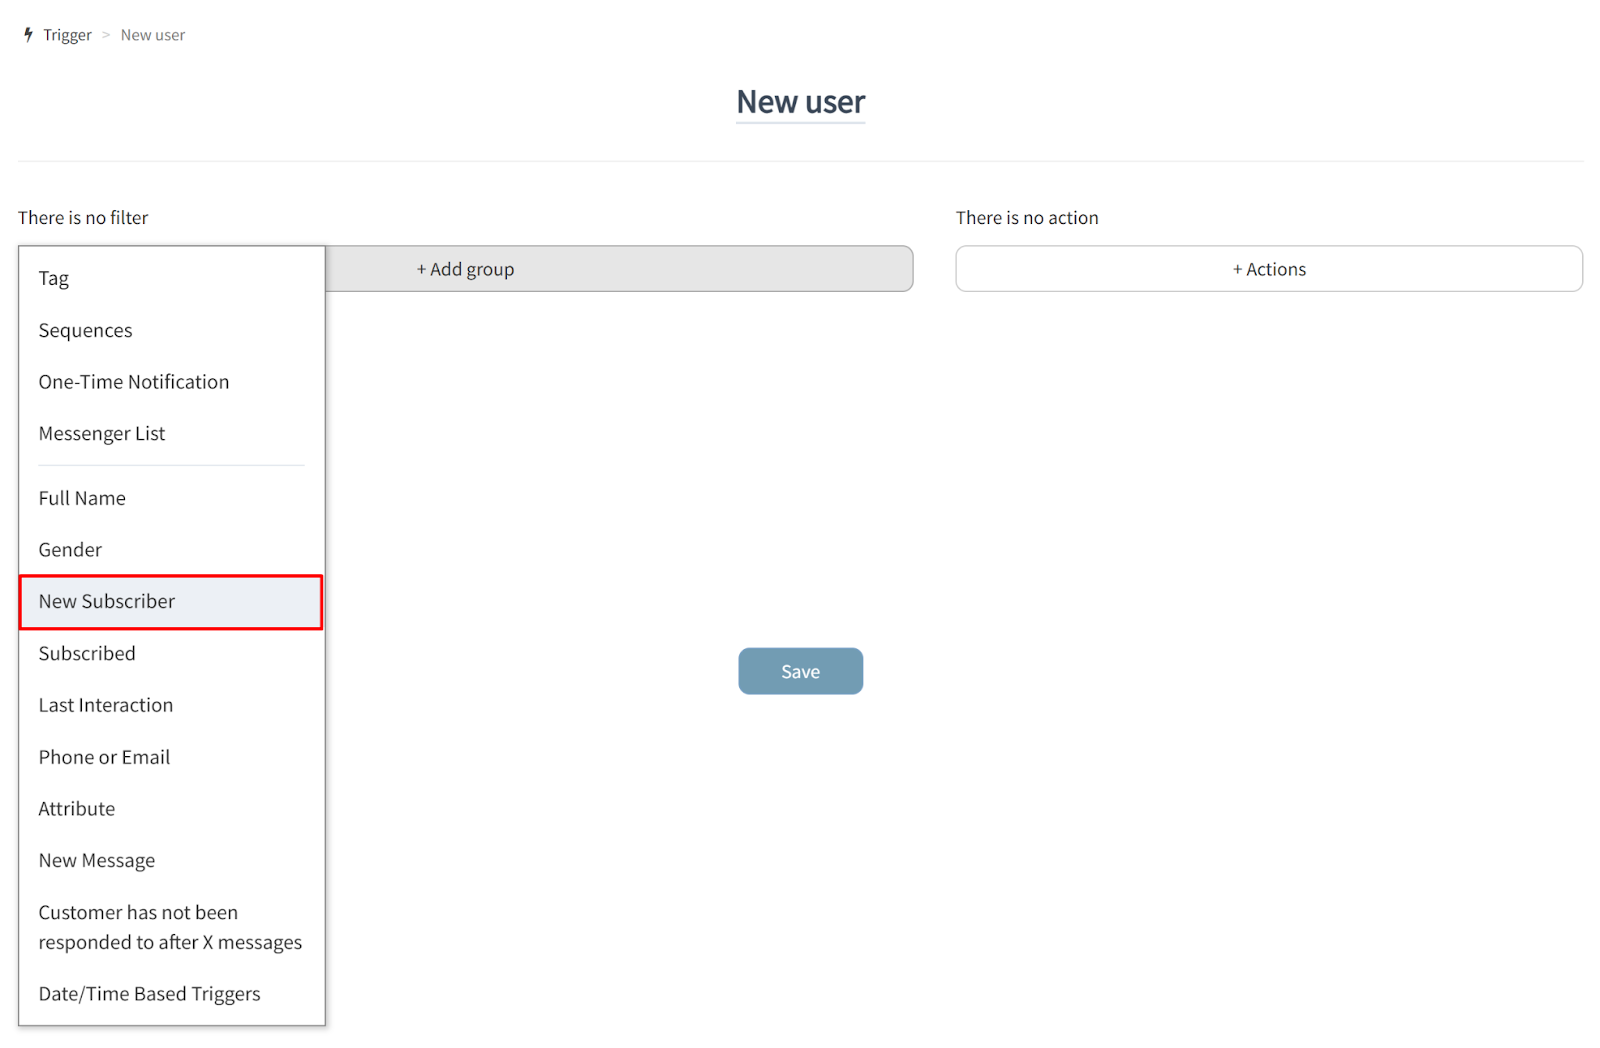
- Action: Start another Flow to run the API Flow created above

- Click Save and Yes to activate
Result: New user info will automatically be sent to your CRM.
Example 4: Automatically send birthday wishes
Goal: Automatically send birthday wishes to users who subscribed to Marketing Messages.
Steps:
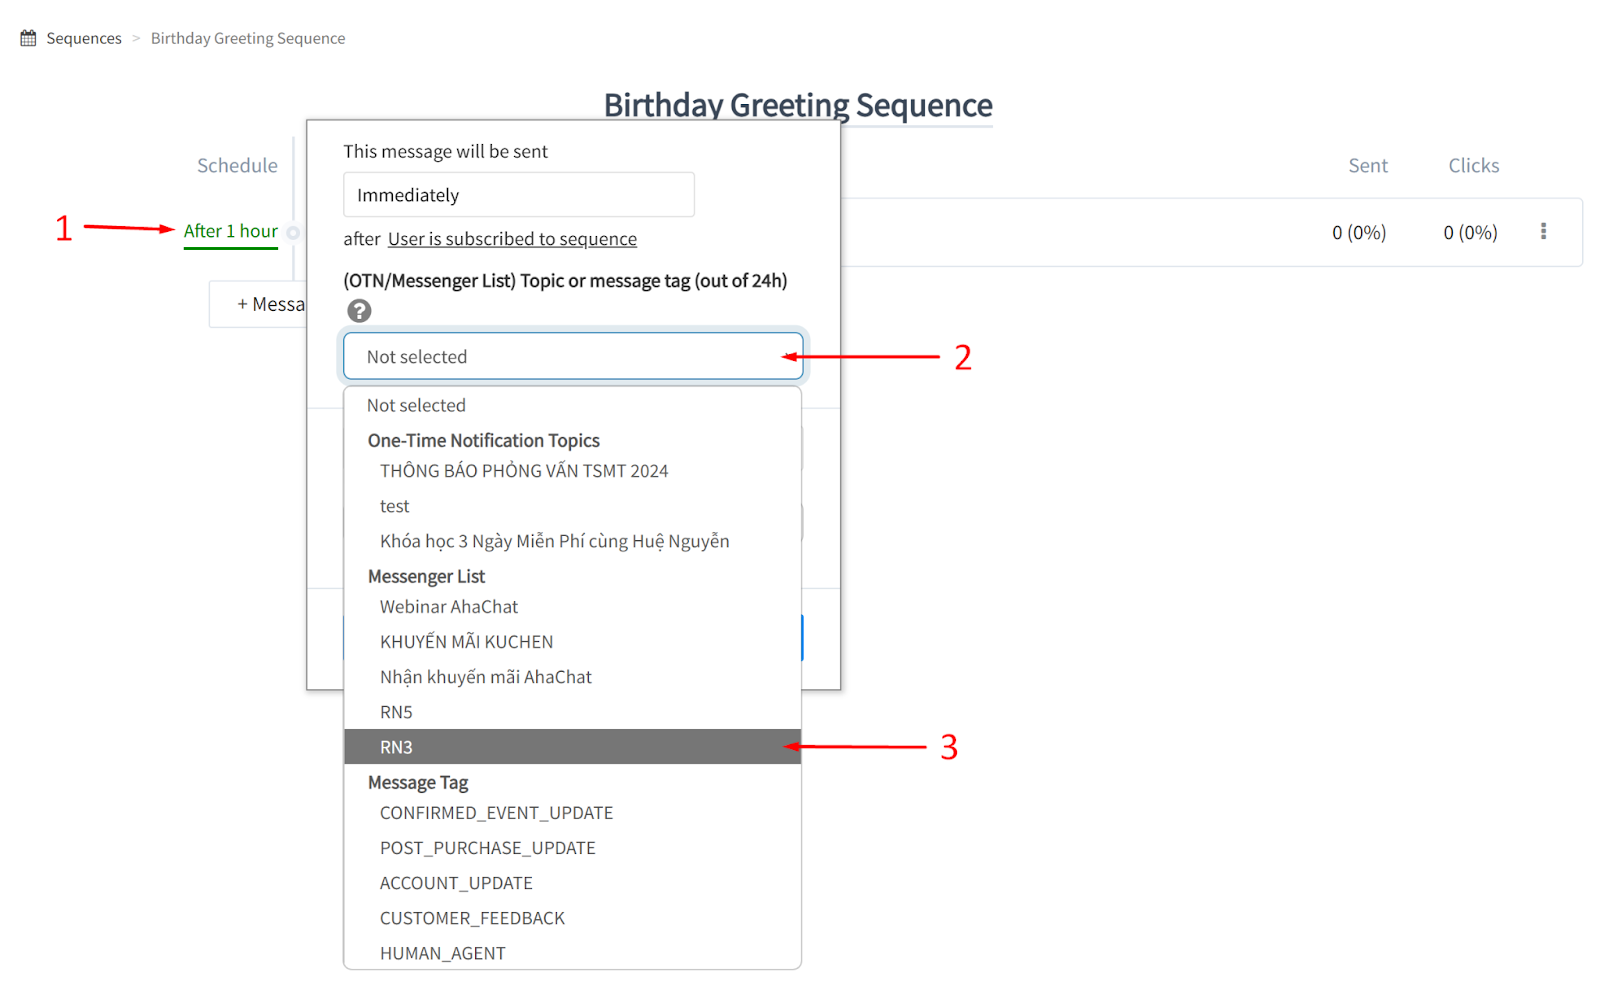
1. Create a Sequence:
- Write a happy birthday message

- Tag the Sequence as Messenger list (required) → See how to create Marketing Messages here
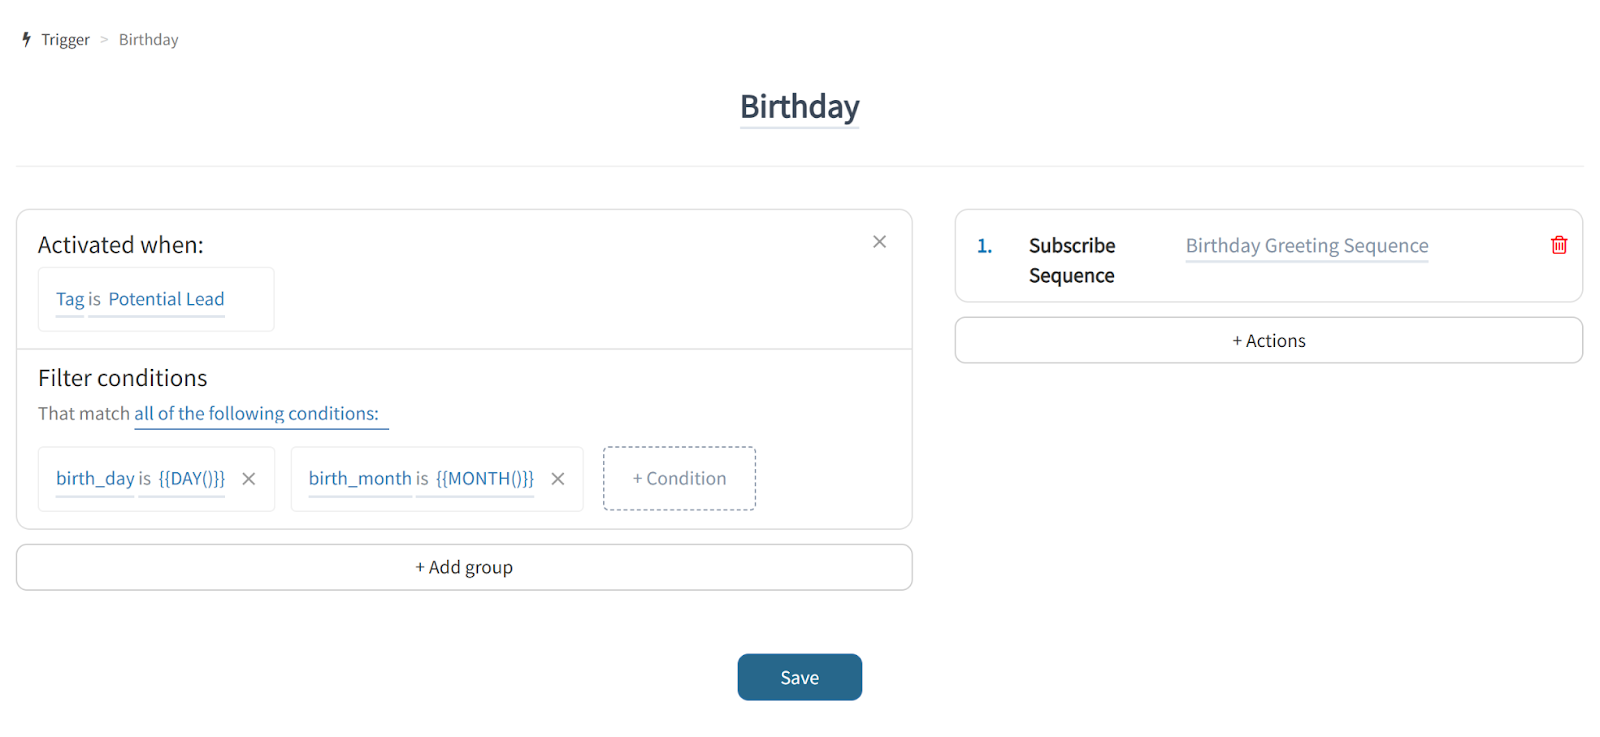
2. Create a Trigger:
Go to Trigger Menu → Create New Trigger
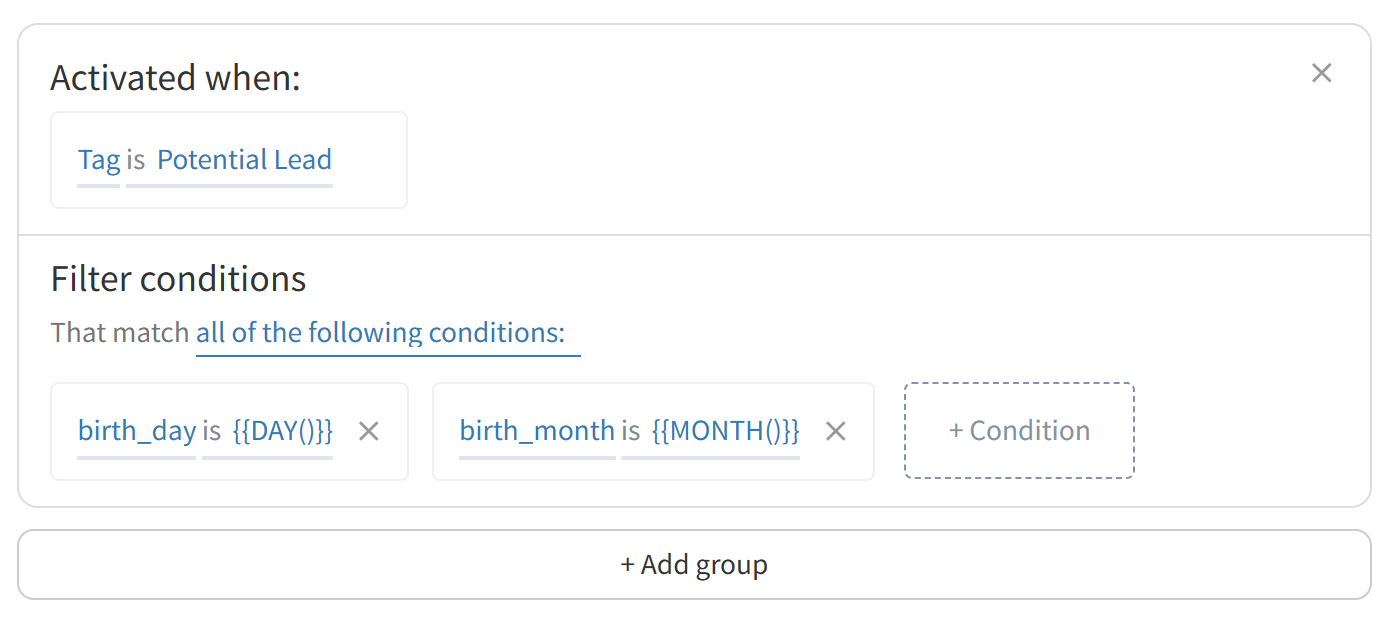
- Triggered when:
Tag=Potential Lead
- Conditions: Match all conditions
birth_day={{DAY()}}birth_month={{MONTH()}}
- Action: Assign the Birthday Greeting Sequence Sequence
Note: You must collect the birth_day and birth_month attributes beforehand via your data collection campaigns.
Example 5: Trigger by source (Ref URL, QR Code, Web Form, Button, Popup)
Goal: Automatically trigger the right Sequence depending on where the customer came from (Messenger Ref URL, QR Code, Web Form, etc.)
Trigger setup:
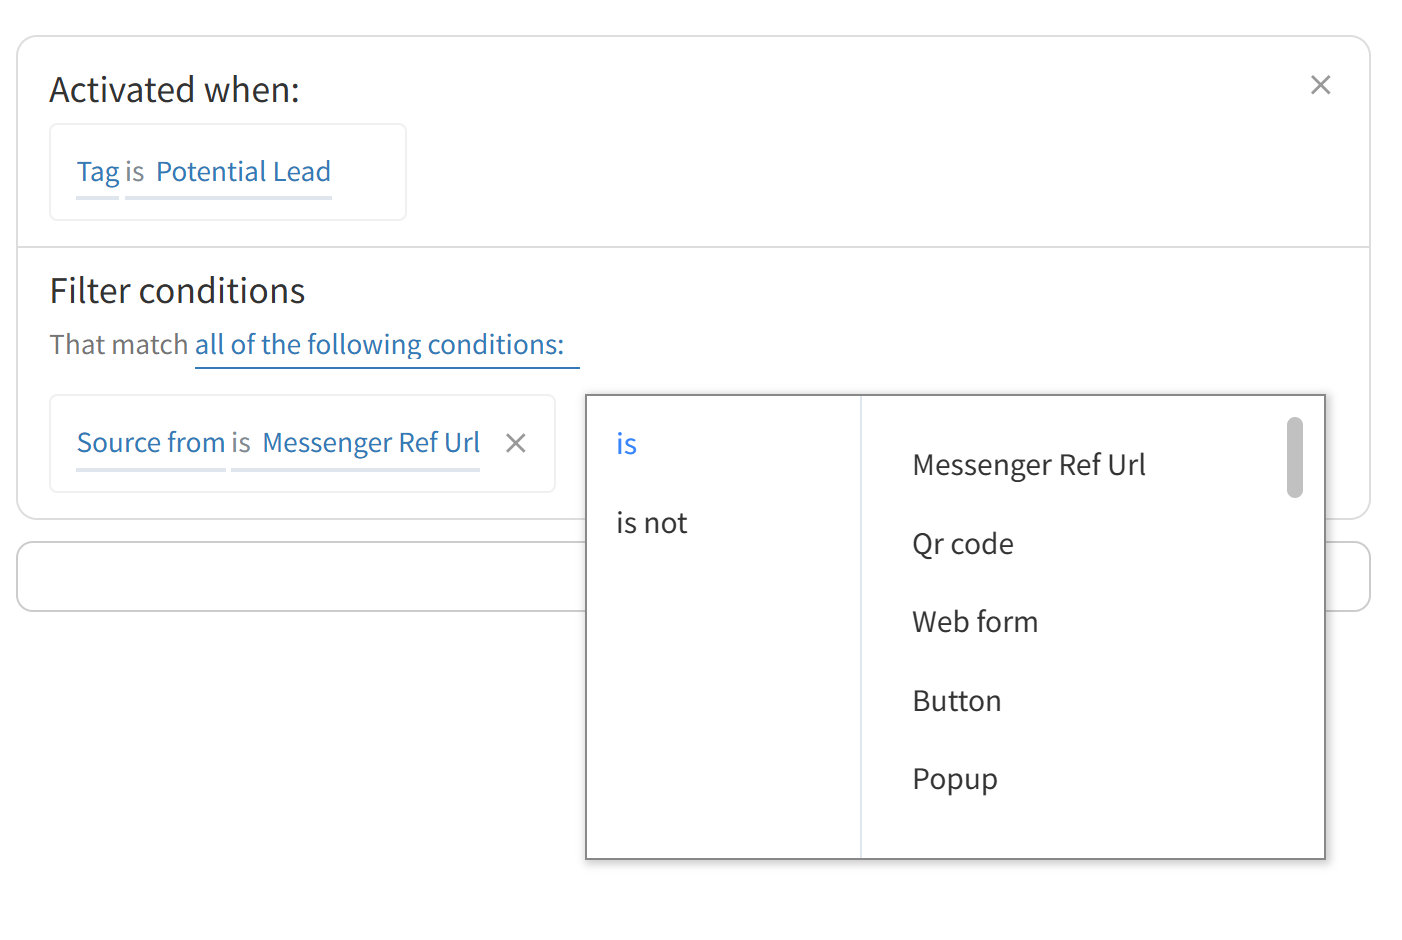
Triggered when: Tag is
Potential LeadFilter condition:
- Source from is:
Messenger Ref URL(or other sources such asQR Code,Web Form,Button,Popupdepending on the use case)
Real-world applications:
If the user comes from a Popup → send an exclusive "website-only" offer
If from a QR Code in-store → send a welcome + product usage guide
If from a Web Form → continue with a follow-up sales Sequence
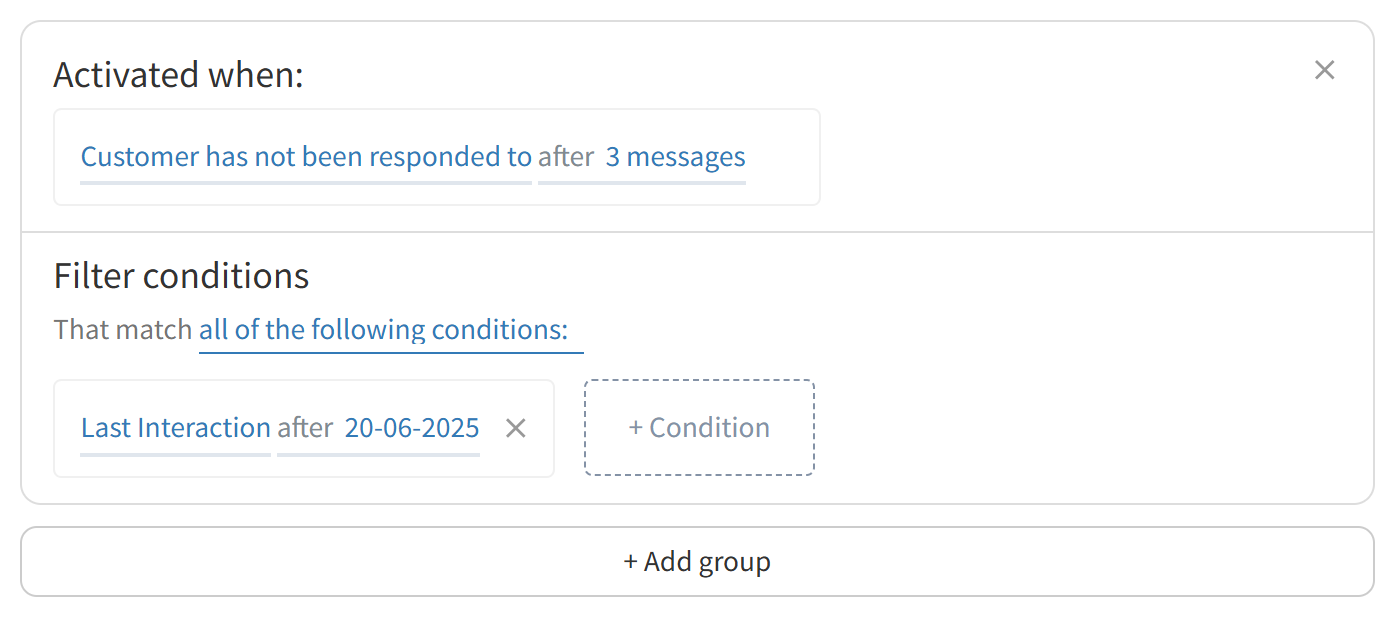
Example 6: Trigger “Customer has not replied after X messages”
Goal: Automatically remind or re-engage customers who haven’t replied after a few messages.
Trigger setup:
- Triggered when:
Customer hasn’t replied after 3 messages
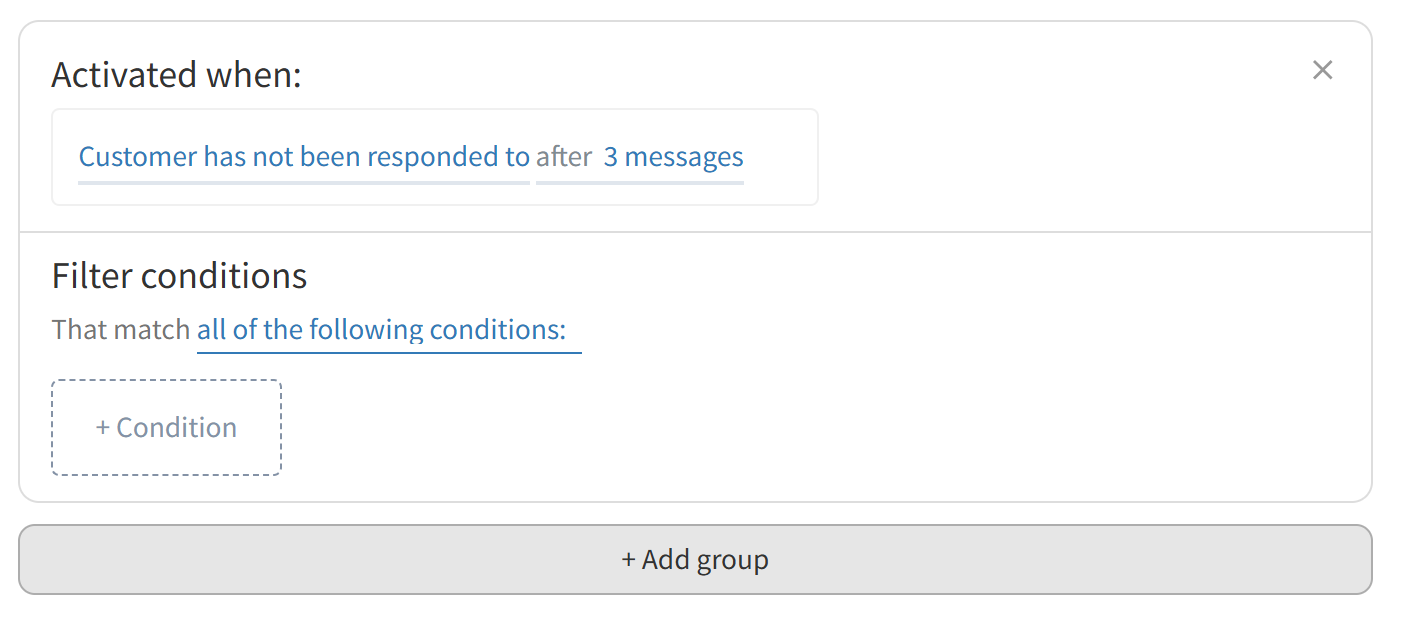
- Optional filter conditions, for example:
Last Interactionafter20-06-2025
Real-world usage:
- If there’s no reply after 3 messages, automatically send:
"Hi! I noticed you haven’t had a chance to respond yet. I’m here if you need any help 😊"
Example 7: Date/Time Based Trigger
Objective:
Automatically send messages at a specific point before, after, or on the exact date stored in the booking_date attribute (e.g., the customer’s scheduled appointment or consultation).
How it works:
The system compares the current time with the booking_date and triggers an + Actions when the time condition is met.
Detailed Setup:
- Select Filter: Date/Time Based Trigger
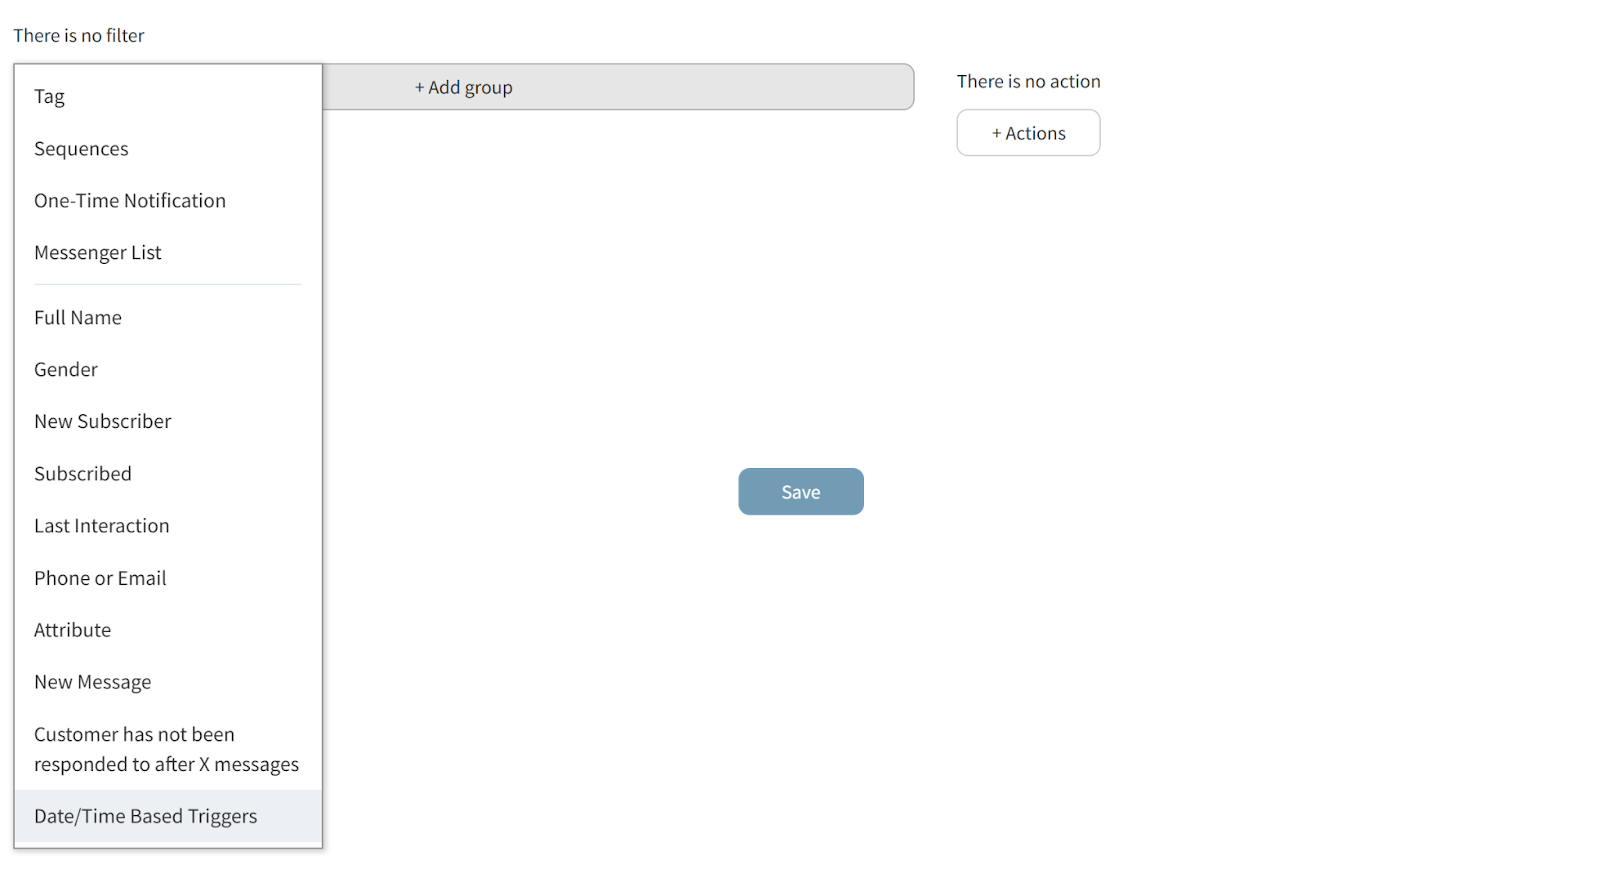
- Reference Date:
booking_date
Choose Timing:
Before
xdays/hours/minutes
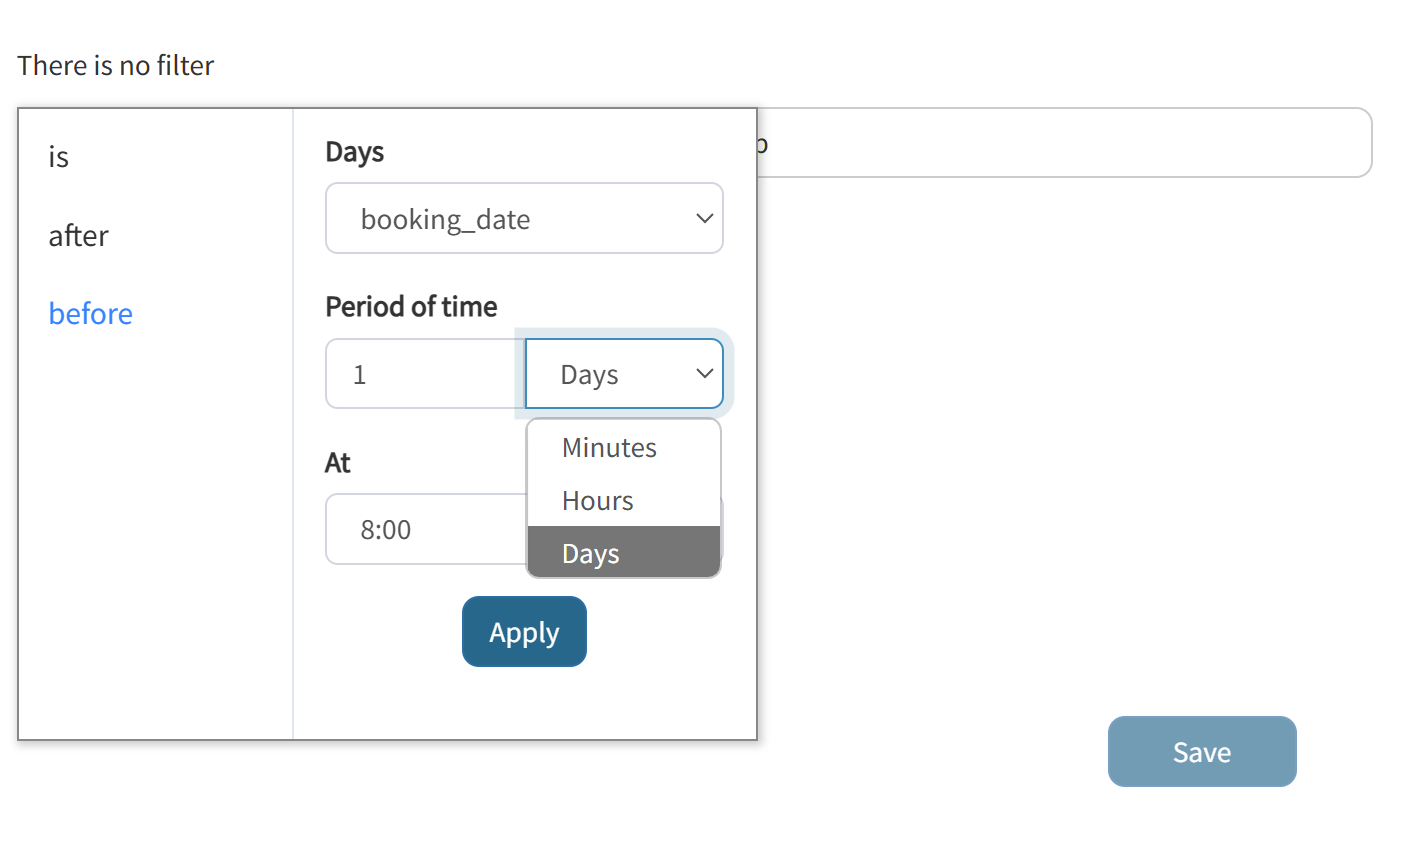
- After
xdays/hours/minutes
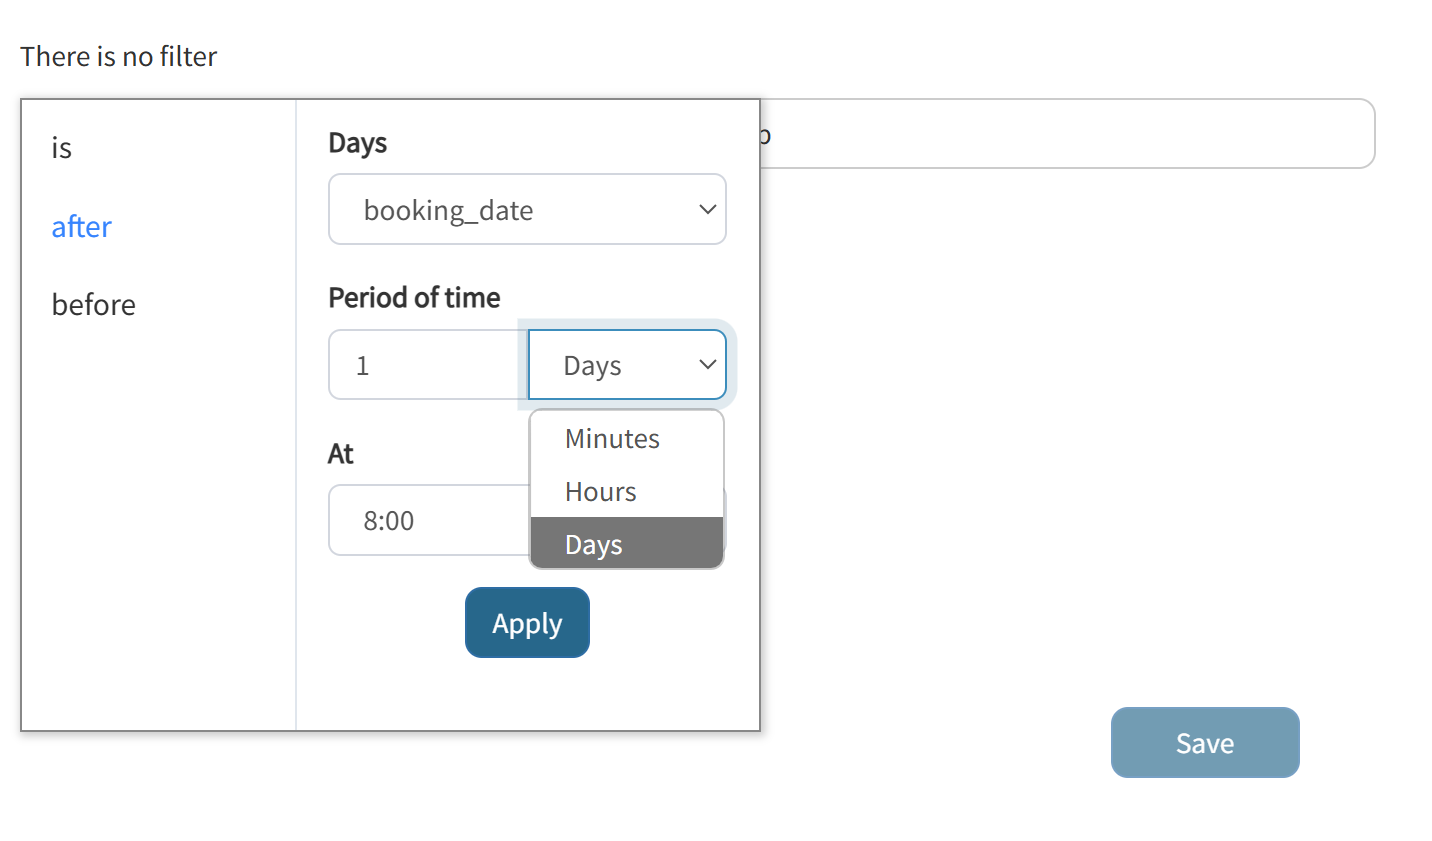
- On the day of
booking_dateattime

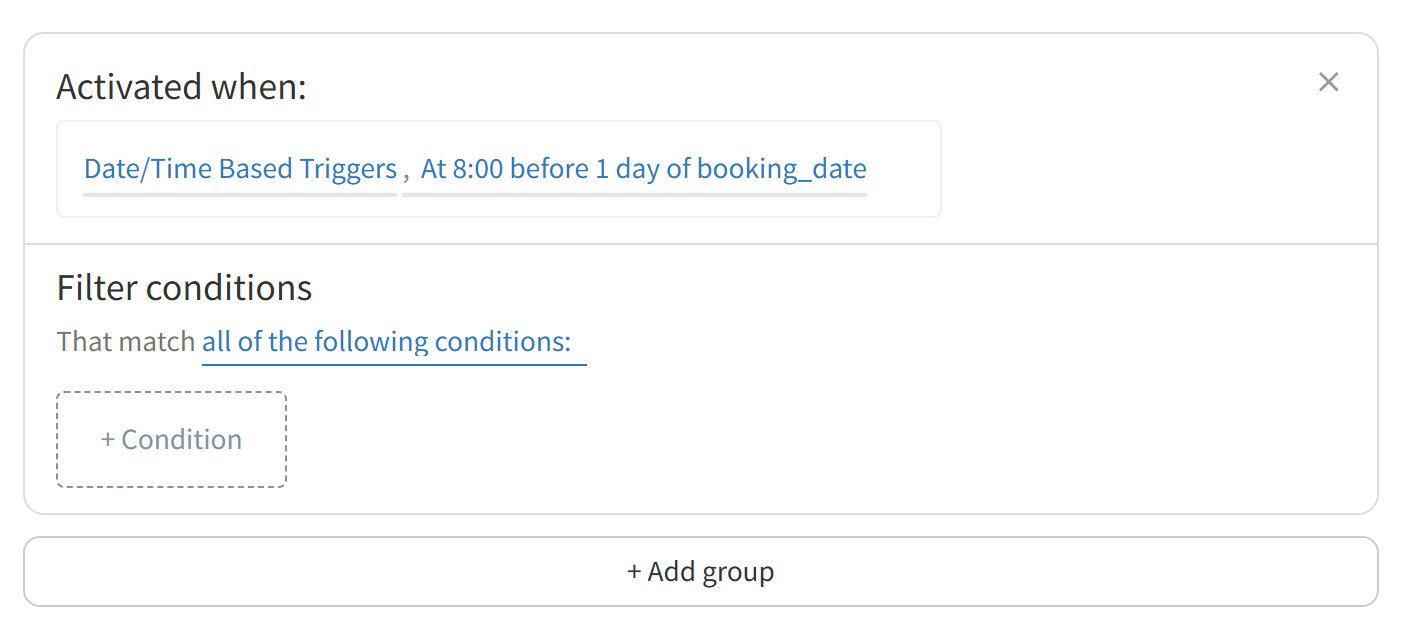
- Example Setup:
Send a message at 08:00, before 1 day of the booking_date
Use Cases:
Remind customers of their appointment 1 day in advance
Send a survey 3 days after the appointment
Send a special offer on the exact appointment date (e.g., “Today is your consultation day, wishing you a great day…”)
Notes:
booking_datemust be a date or datetime formatThe system checks hourly to determine if the condition is met and the flow should be triggered
Summary
Triggers in AhaChat are a powerful way to automate customer nurturing and timely engagement. Whether you're upselling, sending reminders, or syncing with a CRM system—it's all possible with just a few steps.
Need more help?
Have any questions about the Trigger feature in AhaChat? Want expert guidance to launch your customer engagement campaign with a chatbot, from an official Facebook Marketing Partner? Don’t hesitate to contact us here for fast and effective answers!
Enjoy our free chatbot tool—no cost required!