Make Whatsapp Chatbot Ready To Use
To automate the process of communicating with your customers on WhatsApp, you need to create business accounts on Facebook and WhatsApp to connect your number to the WhatsApp Business API and use your chatbot. With a simple WhatsApp chatbot connection wizard, you can do this in three steps.
In this article, we will learn how to create a chatbot on a new number. If you've already used a number with a different WhatsApp Business API provider, migrate the number first.
Getting Started
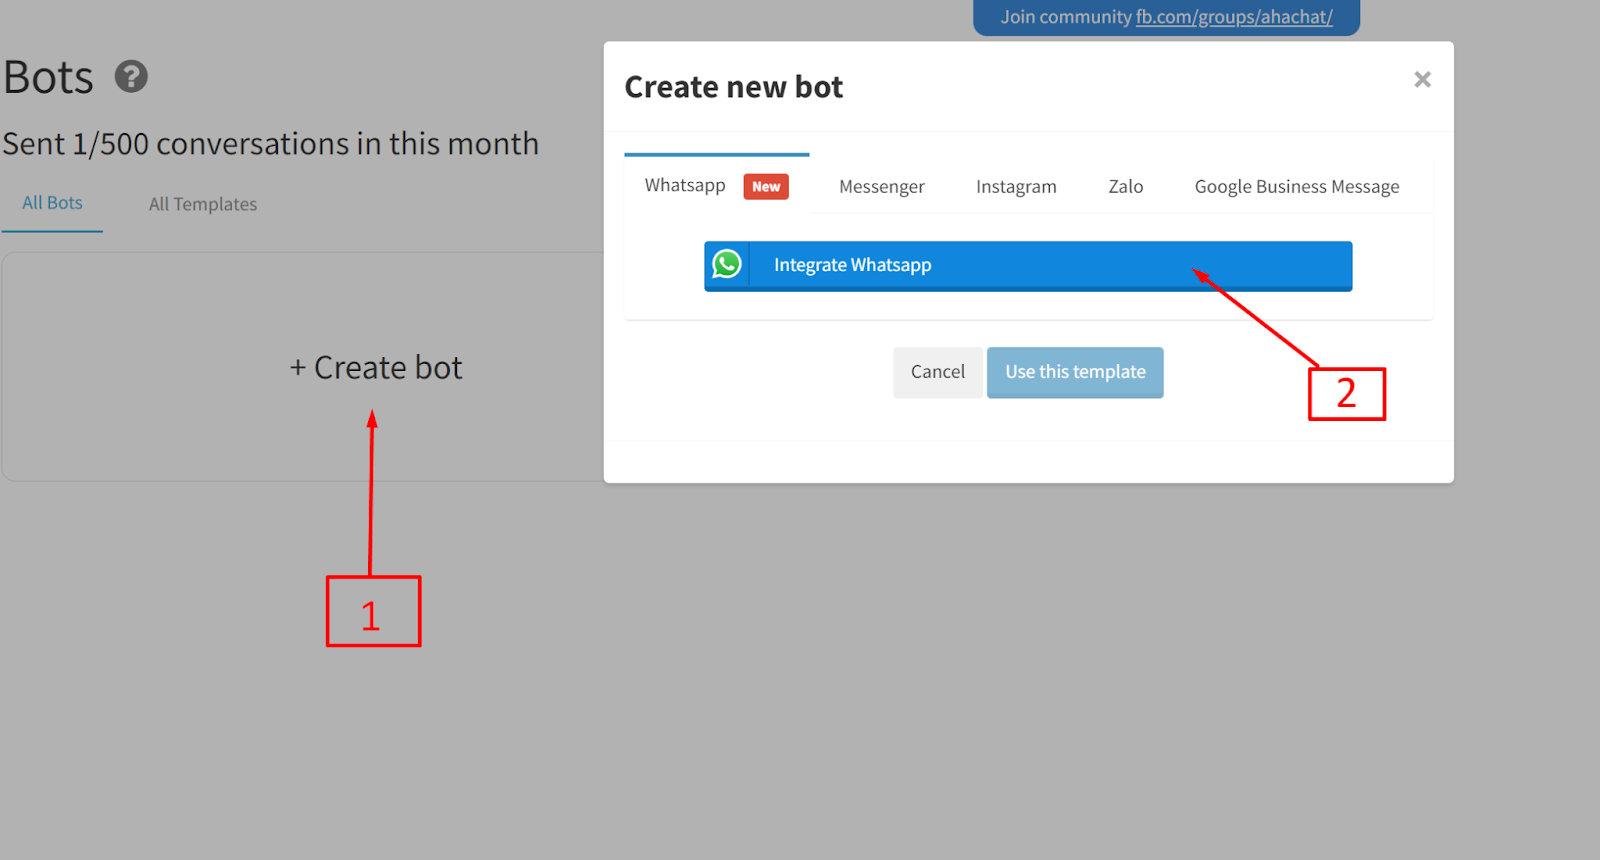
Go to the "Chatbots" section in your AhaChat Account. you only need a facebook account to log in to AhaChat
To create a WhatsApp chatbot, click Create bot and click Intergrate Whatsapp
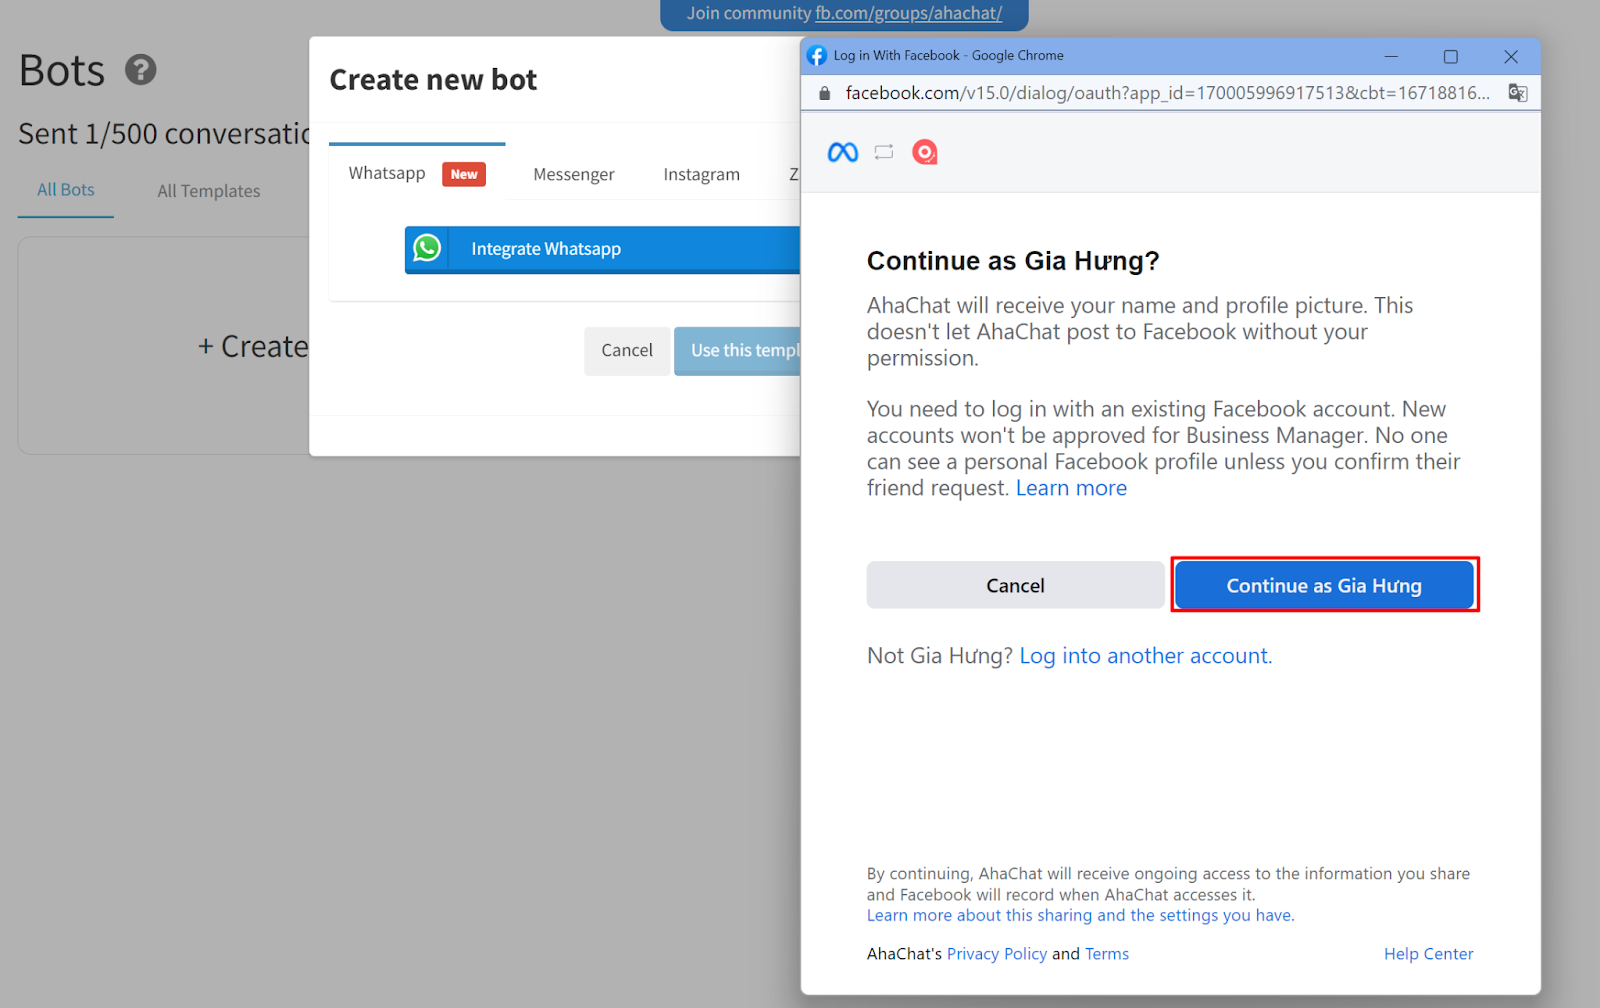
Log in to the Facebook account you used to create or will use to create your Facebook Business account.
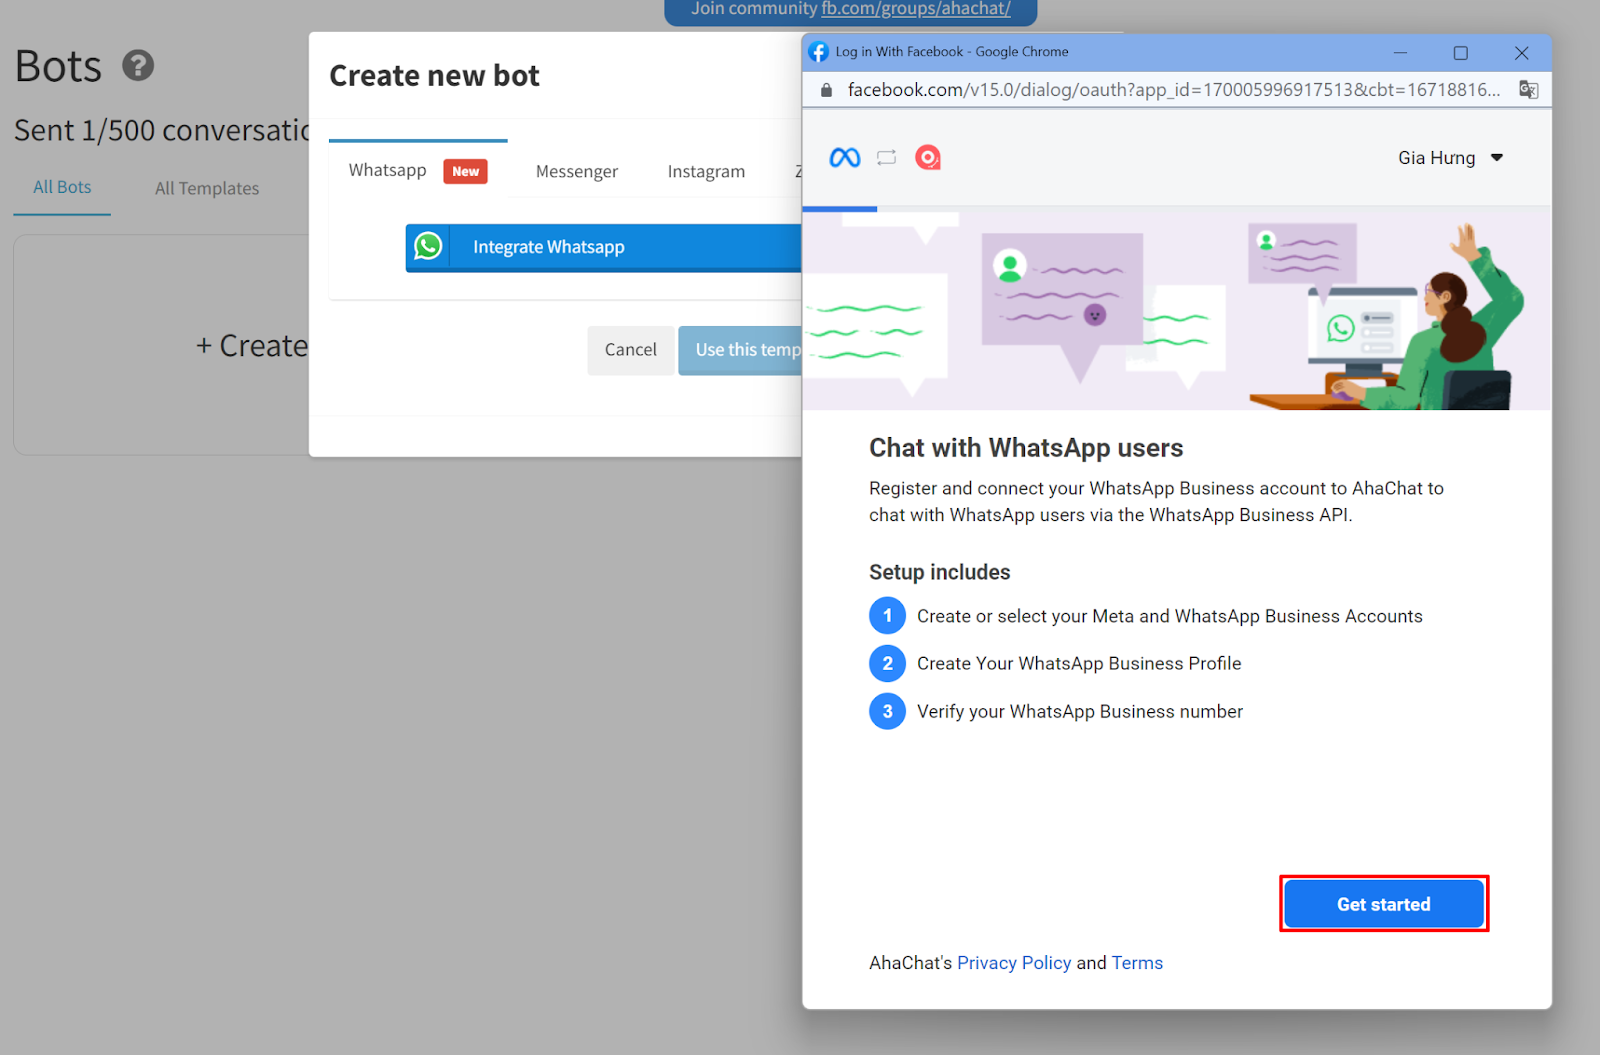
Next, the account setup wizard will launch to create a WhatsApp chatbot. Click Get started.
Grant the required account and payments permissions, and click Continue.
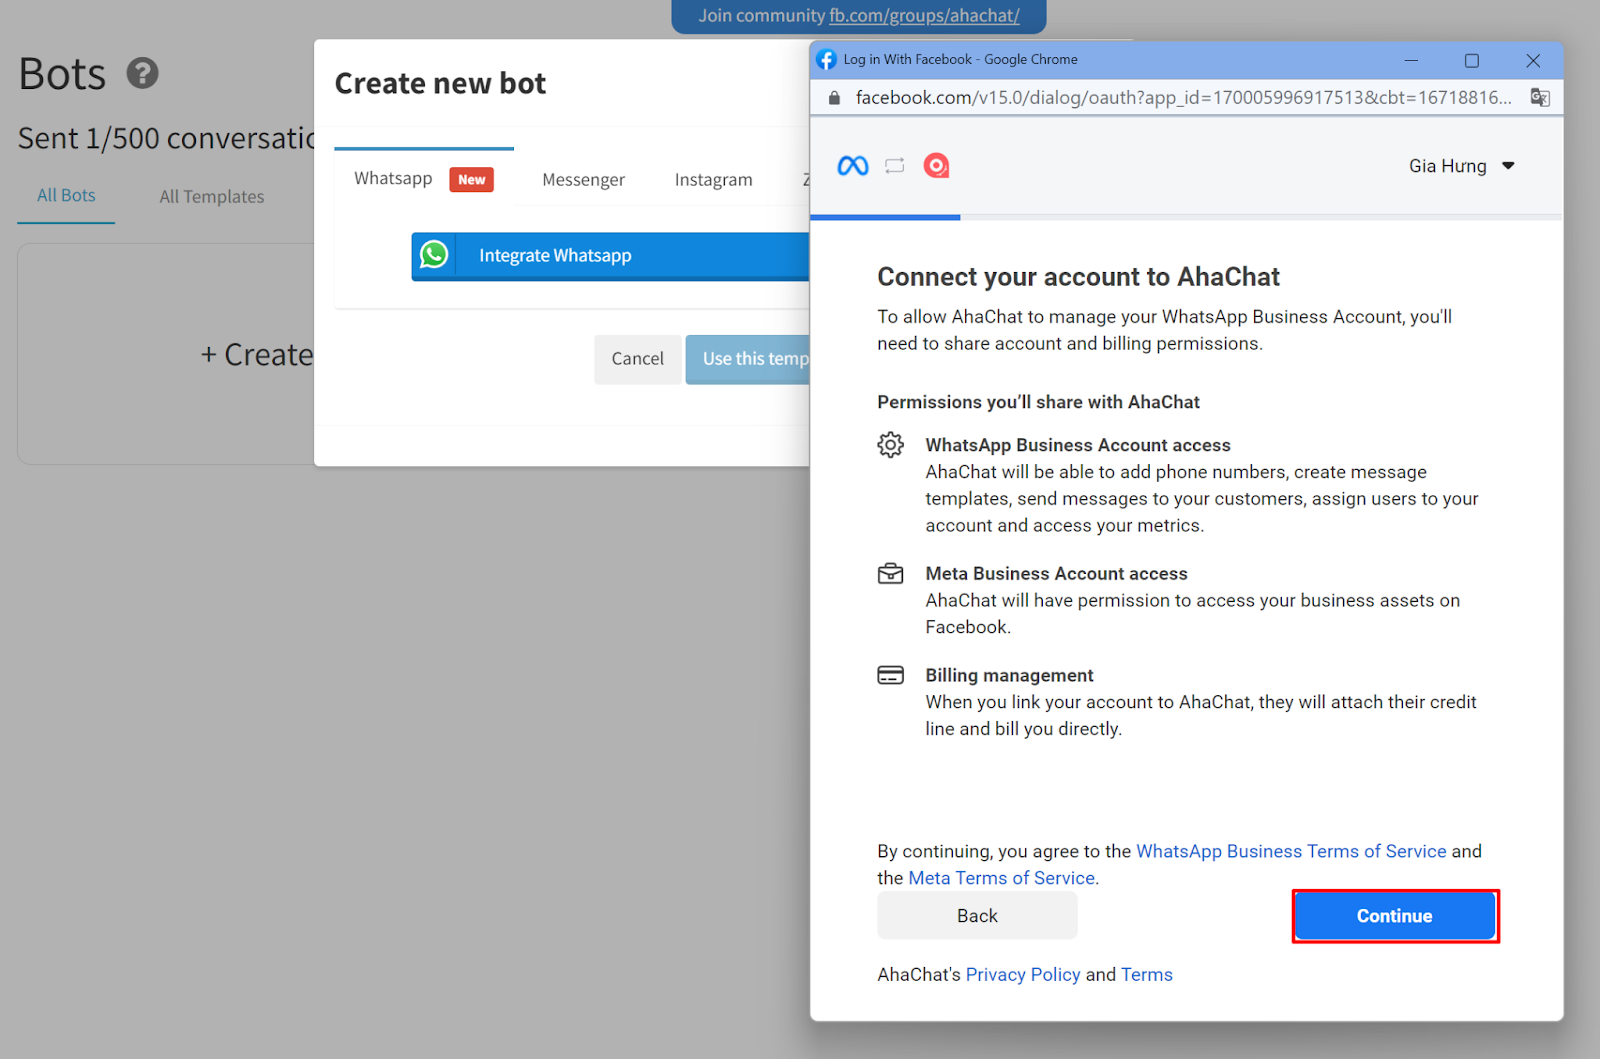
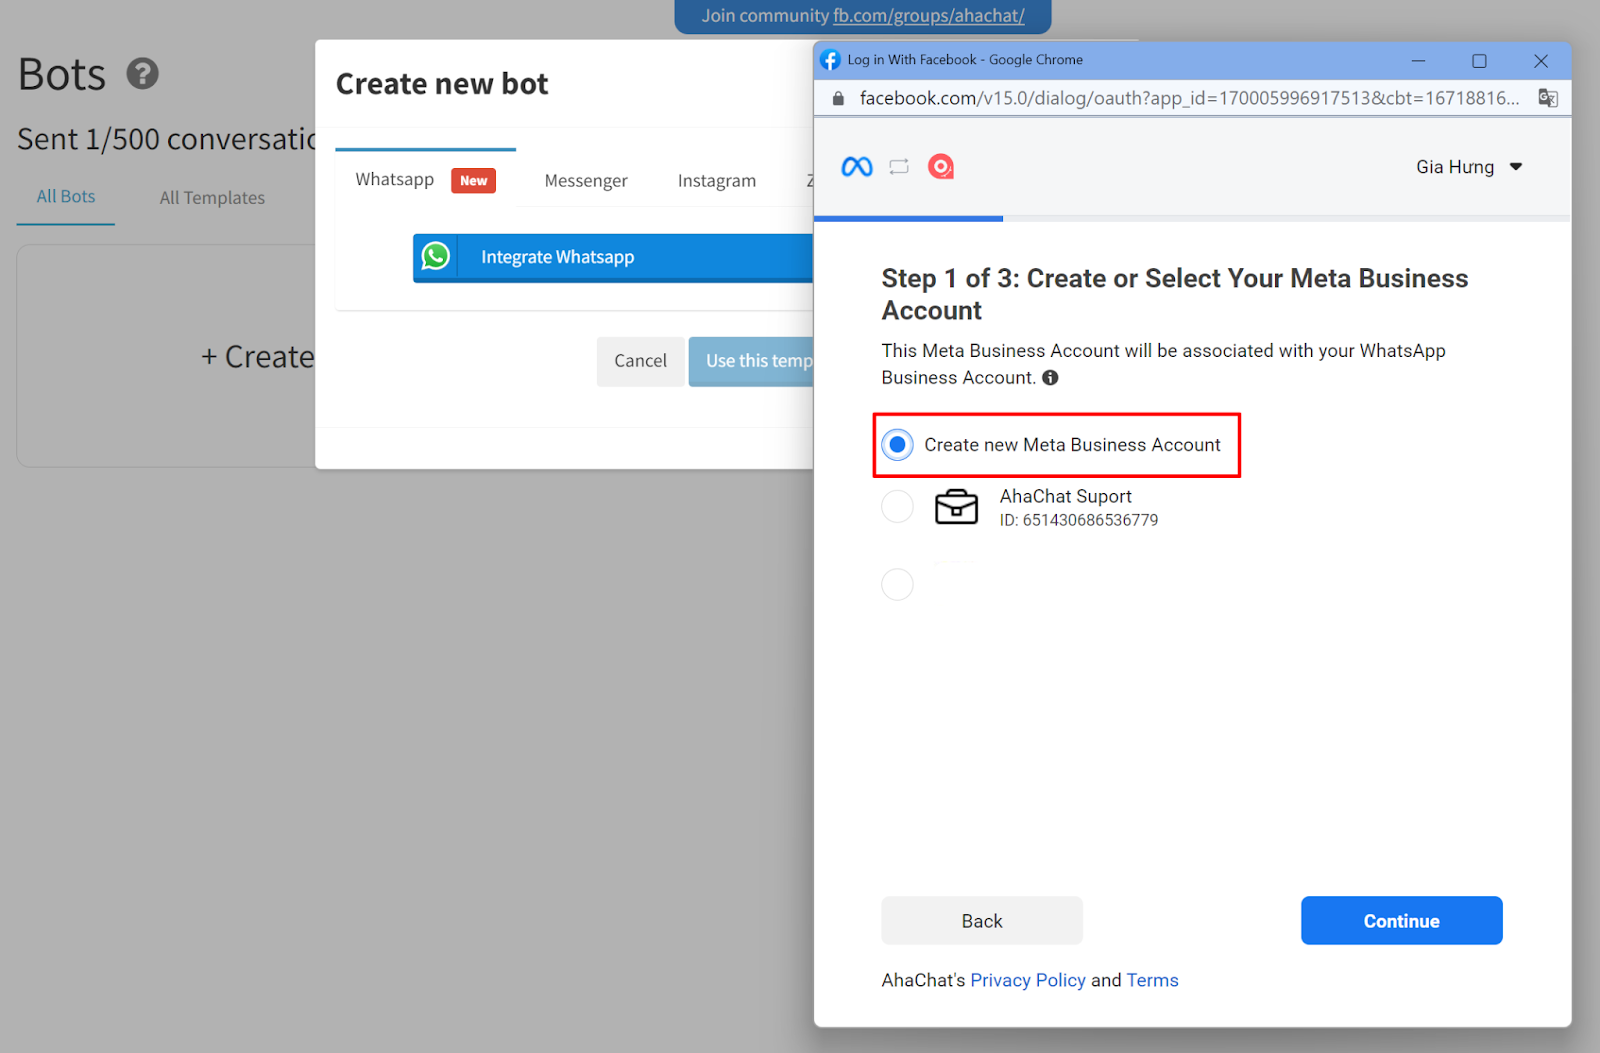
Step 1. Connect Your Facebook and WhatsApp Business Accounts
Create a new Facebook Business account or select an existing one.
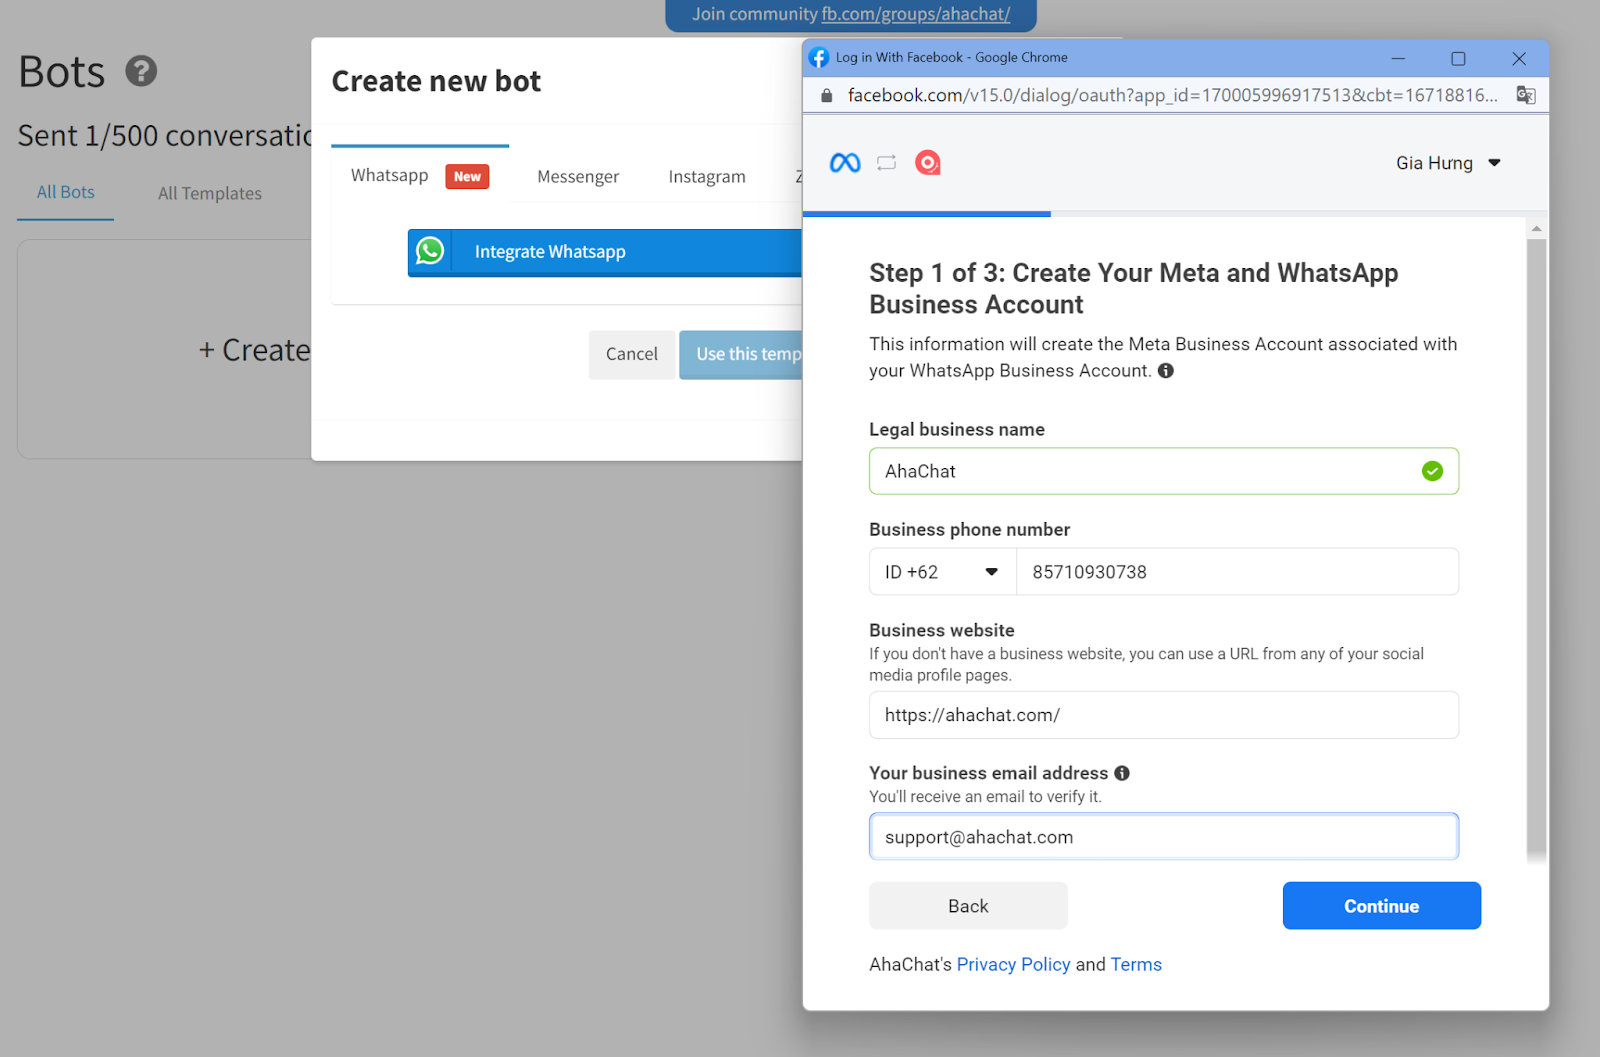
When creating a new Facebook Business account, include information about your company: the legal name used in payment documents, phone number, website, and email address.
Prepare:
- An active website address
- An email address with the same domain name as the website, look like name@domain
- A phone number that has not registered a personal WhatsApp account (if registered, you can delete your personal WhatsApp account to use to create WABA)
- Create a name for the business related to the website
Next, to create a WhatsApp Business account for the selected Facebook Business account, enter your Business name, Business phone number, Business website, email address and click Continue
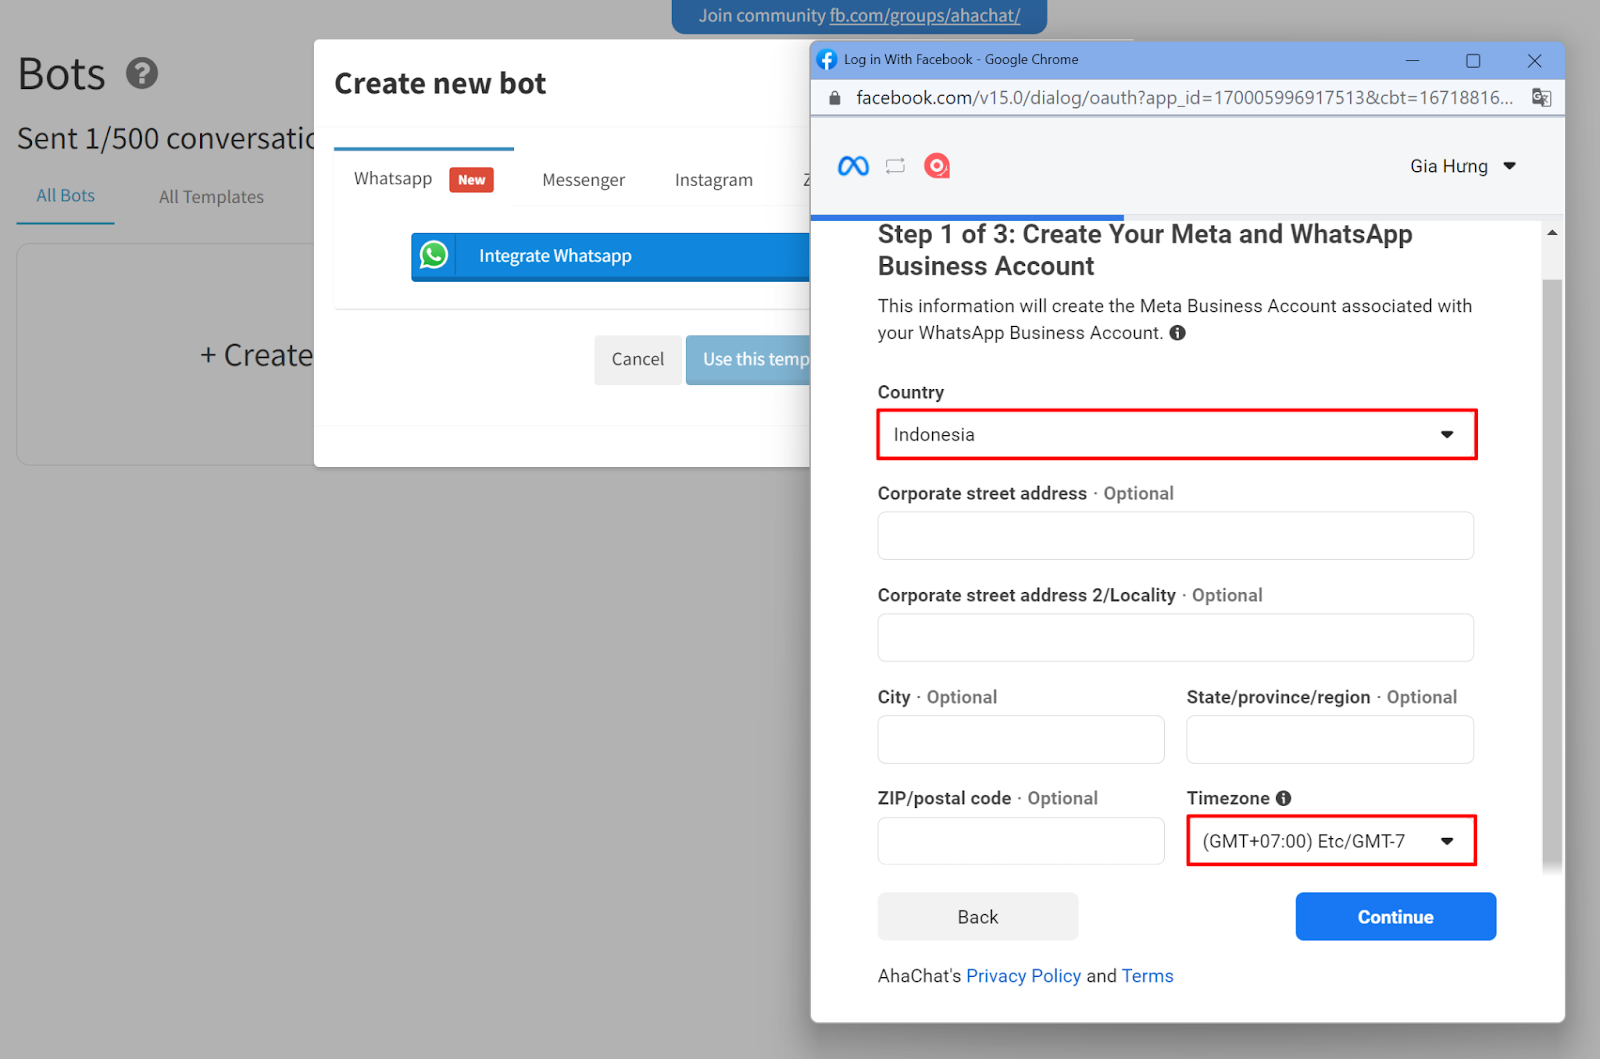
Select Country, Timezone and click Continue
If you are creating a bot for an unverified Facebook Business account, you can use the WhatsApp chatbot in test mode. In this mode, you have access to up to 10 chats and can send campaigns with confirmed templates to two numbers.
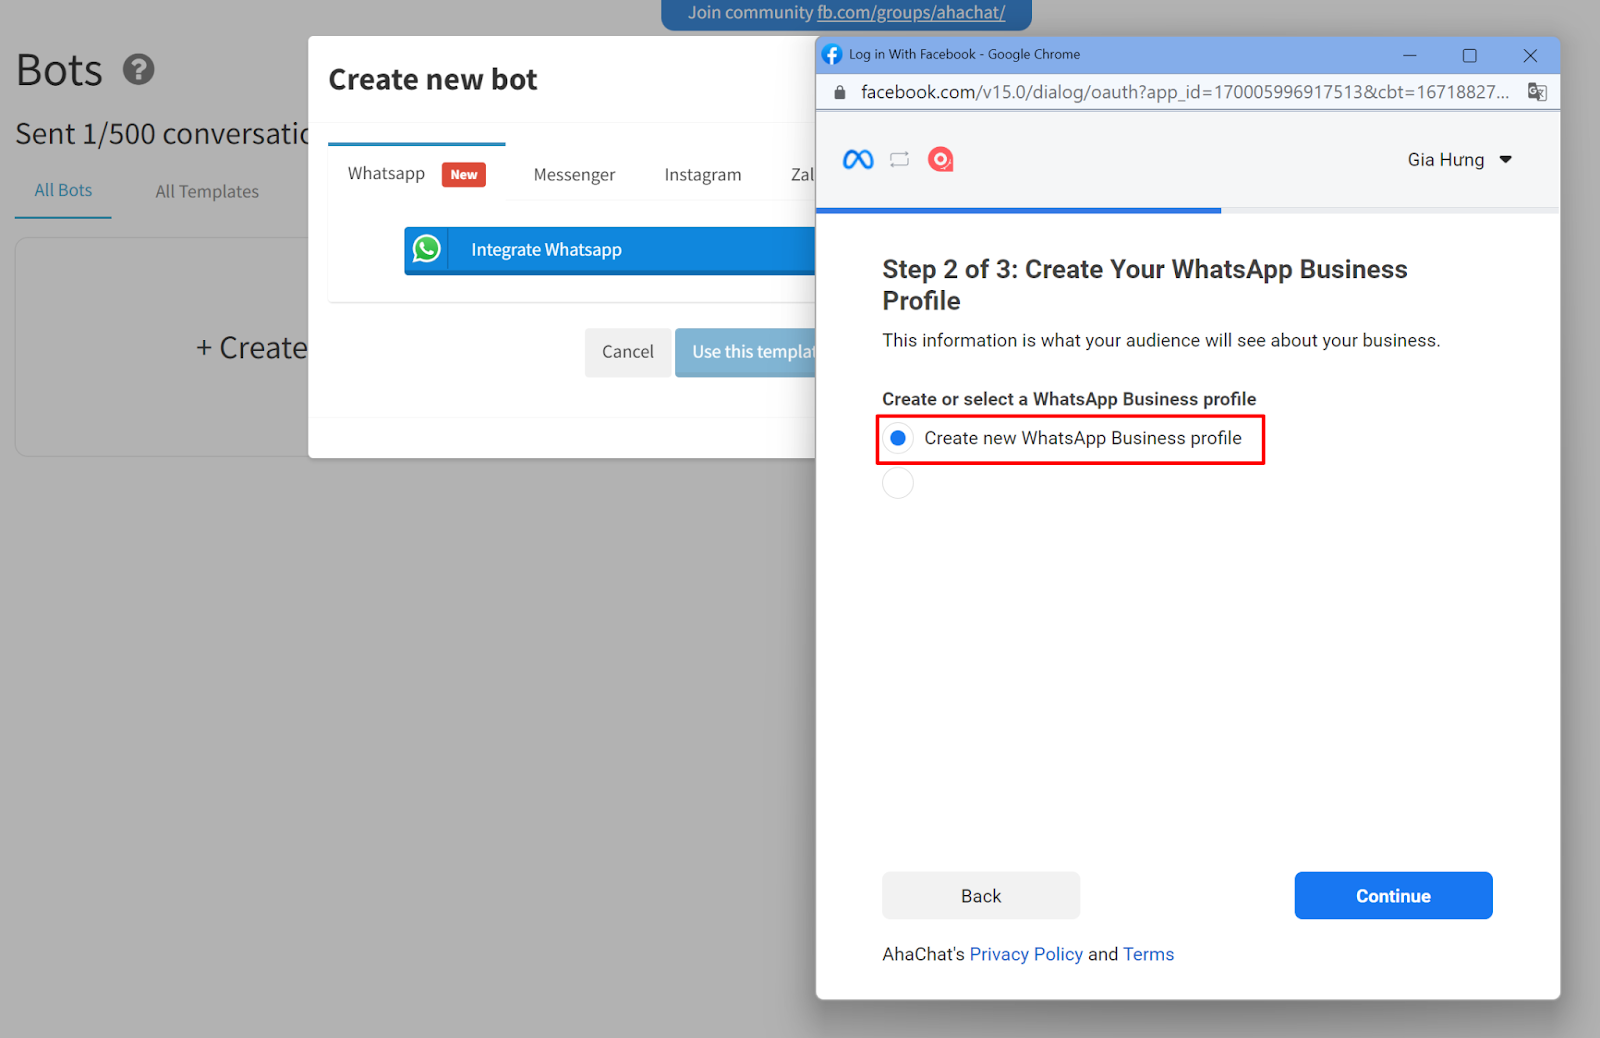
Step 2. Set up your WhatsApp Business Profile
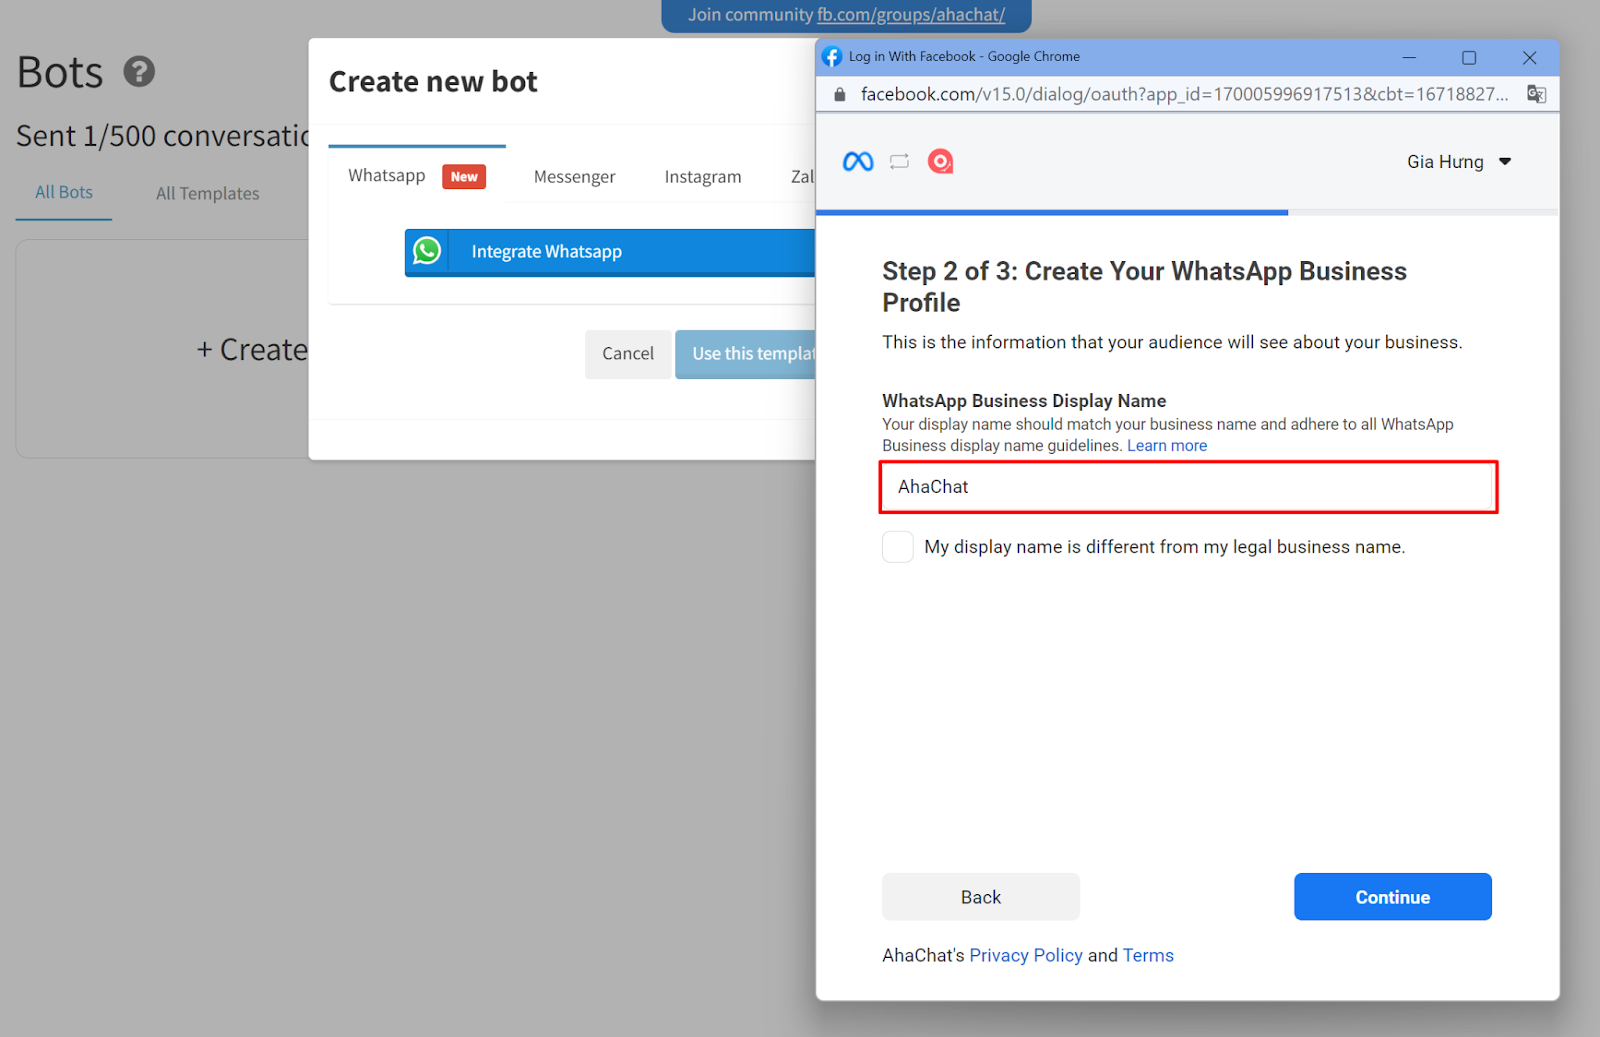
Enter a name for your WhatsApp Business profile. This name is what will appear as the name of the chatbot you created.
The display name must be associated with your company and be in accordance with the WhatsApp Trade Policy and WhatsApp Business Policy.
If your display name is different from your company's legal name, please provide a site that confirms your company's relationship to your display name.
The name of the company and the green check mark in the chat are displayed only for the Official Business WhatsApp account (usually these are only world-famous companies). In other cases, the phone number will be displayed in the chat and profile.
Choose Create new WhatsApp Business profile and click Continue
Enter a name for your WhatsApp Business profile. This name is what will appear as the name of the chatbot you created.
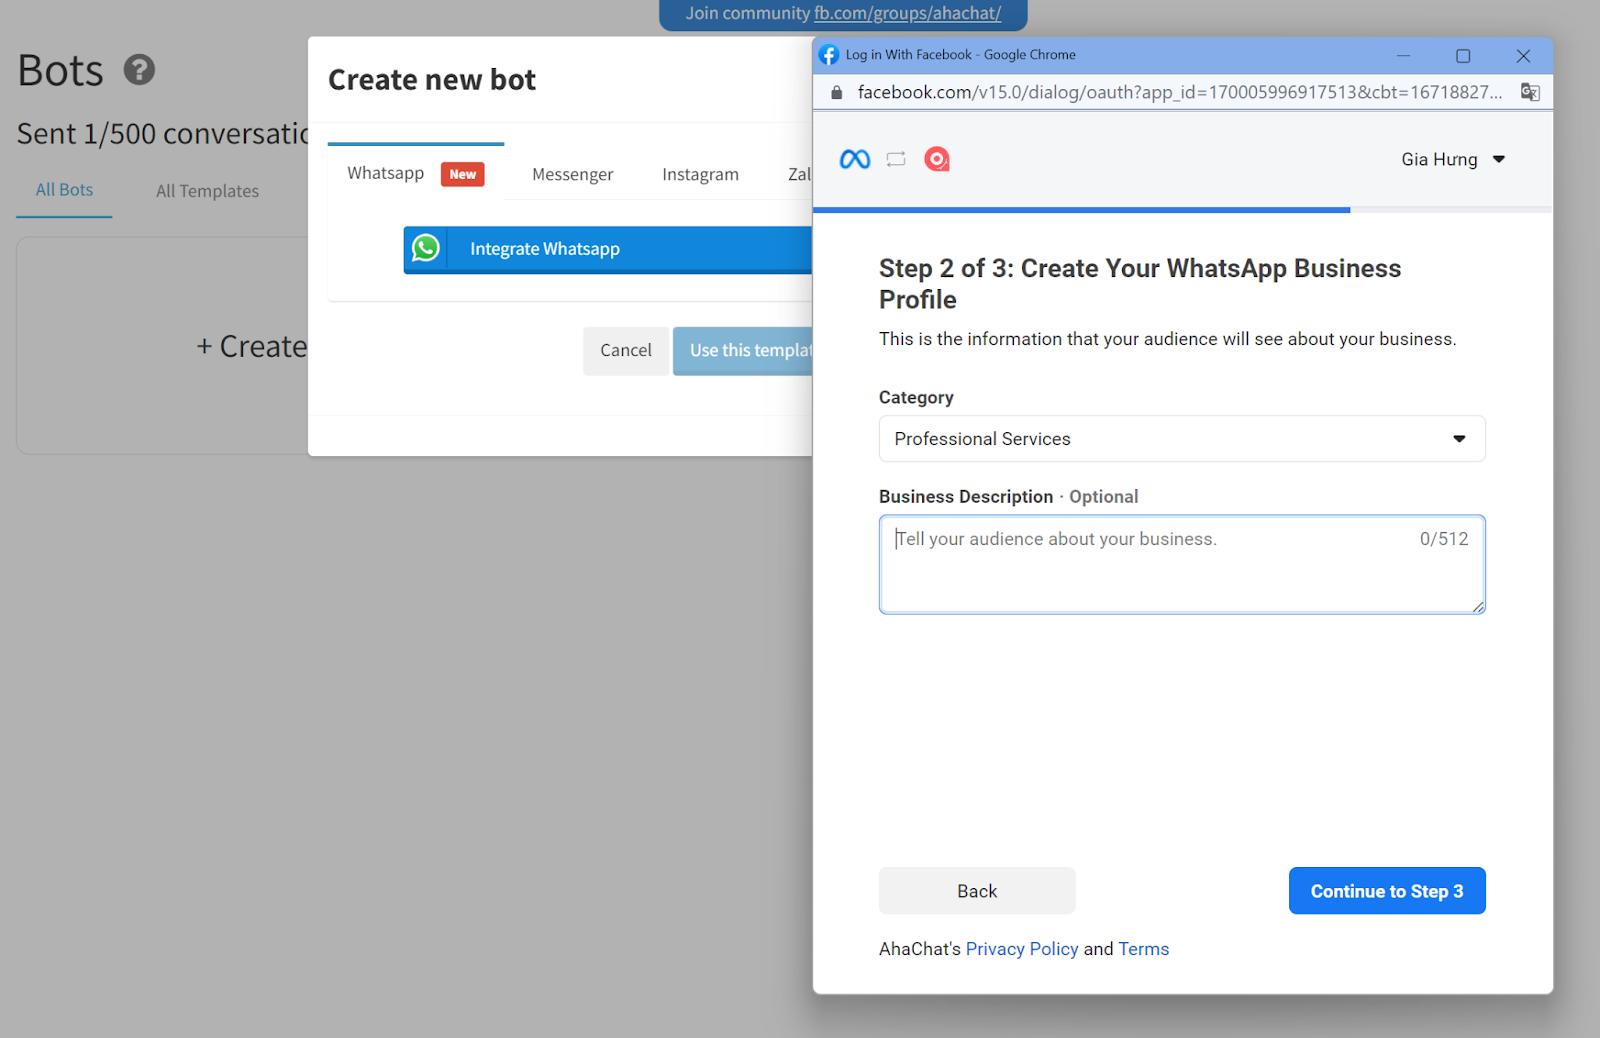
Select a profile category and fill in a business description that will be displayed to your subscribers.
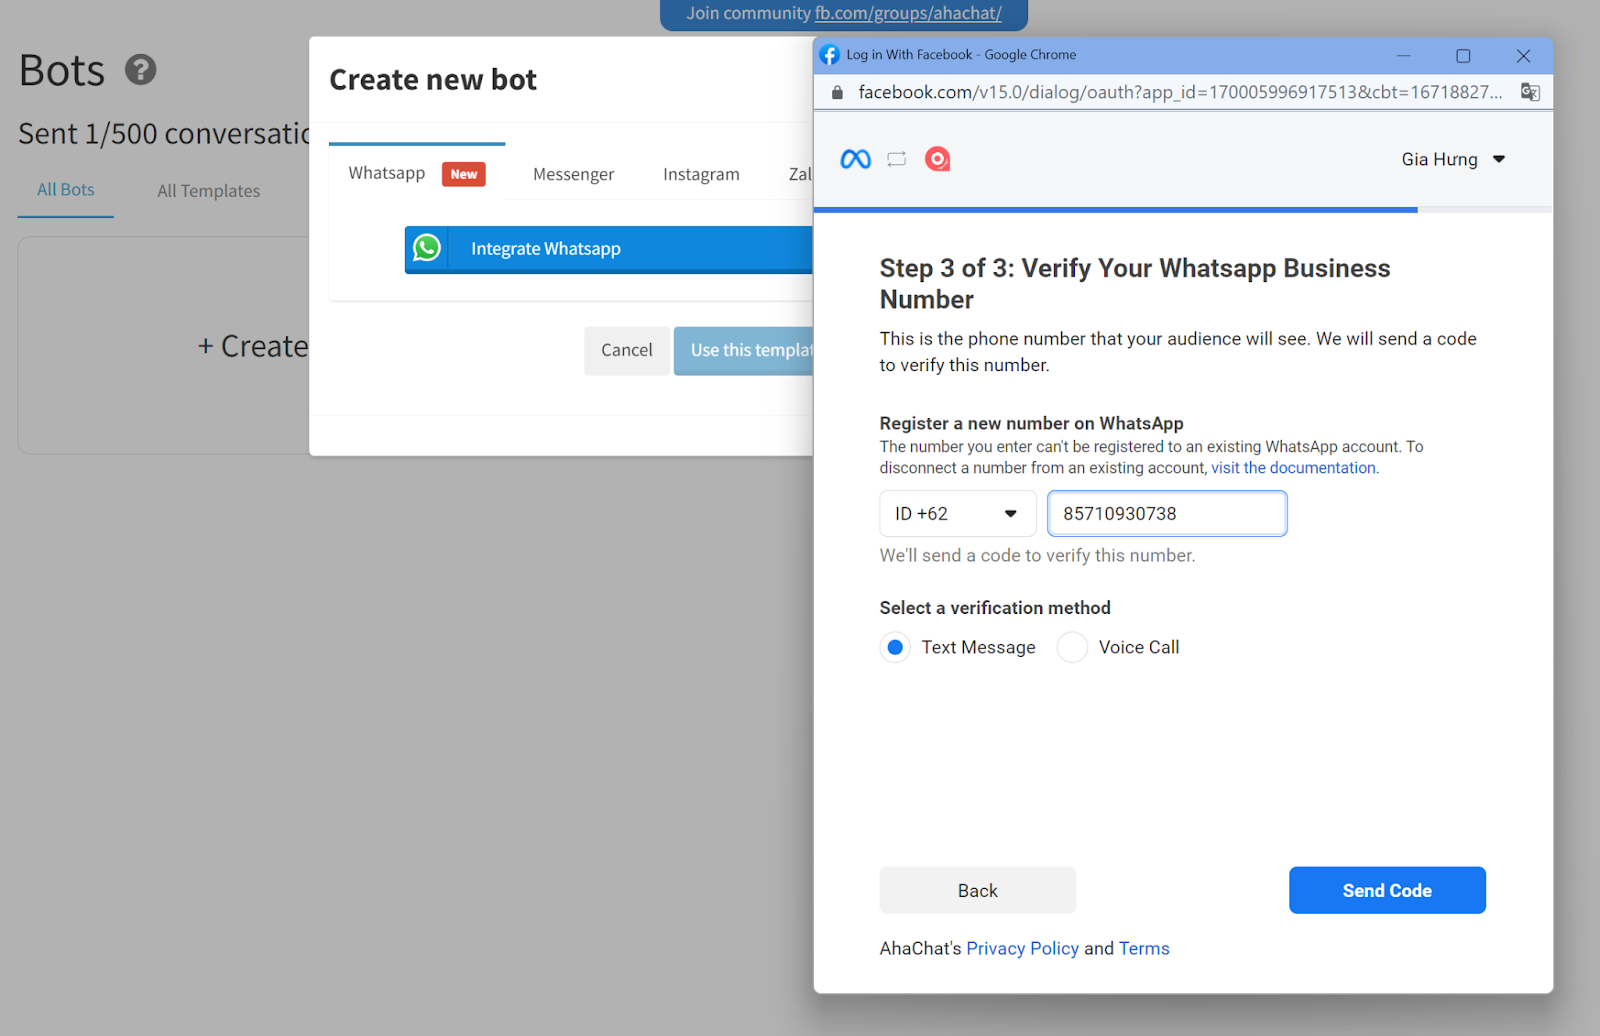
Step 3. Register a Phone Number with WhatsApp
Enter a phone number for registration. This phone number will be linked to the created WhatsApp account for sending campaigns. Next, select a method of confirming the number.
Use a number from which you can receive an SMS or a voice message with a code.
If this is the first time you are connecting WhatsApp Business API to this number, make sure that this phone is removed from the WhatsApp consumer application. If your number has already been connected to another provider, migrate the number first.
Please note that after you tie your phone number to the WhatsApp Business API, you will no longer be able to see your chat history or manage conversations in the WhatsApp application. Also, you won't be able to switch back to using the application with this number. Using this number, you can only communicate with clients through the AhaChat "Live chat" option.
If you haven't received the code, refer to Reasons Why Users Fail to Receive a Registration Code for more information.
In the next window, enter the code that you receive via SMS or voice message.
If you enter the correct data, your account will be successfully activated. Setting up the environment for the bot usually takes a few minutes, and after that the chatbot will be ready to use.
The bot mode will depend on whether you have a verified Facebook Business account or not. If one of the above conditions is missing, your account will be limited in the number of WhatsApp contacts to whom you can send messages.
Step 4. Subscribe to Your WhatsApp Chatbot
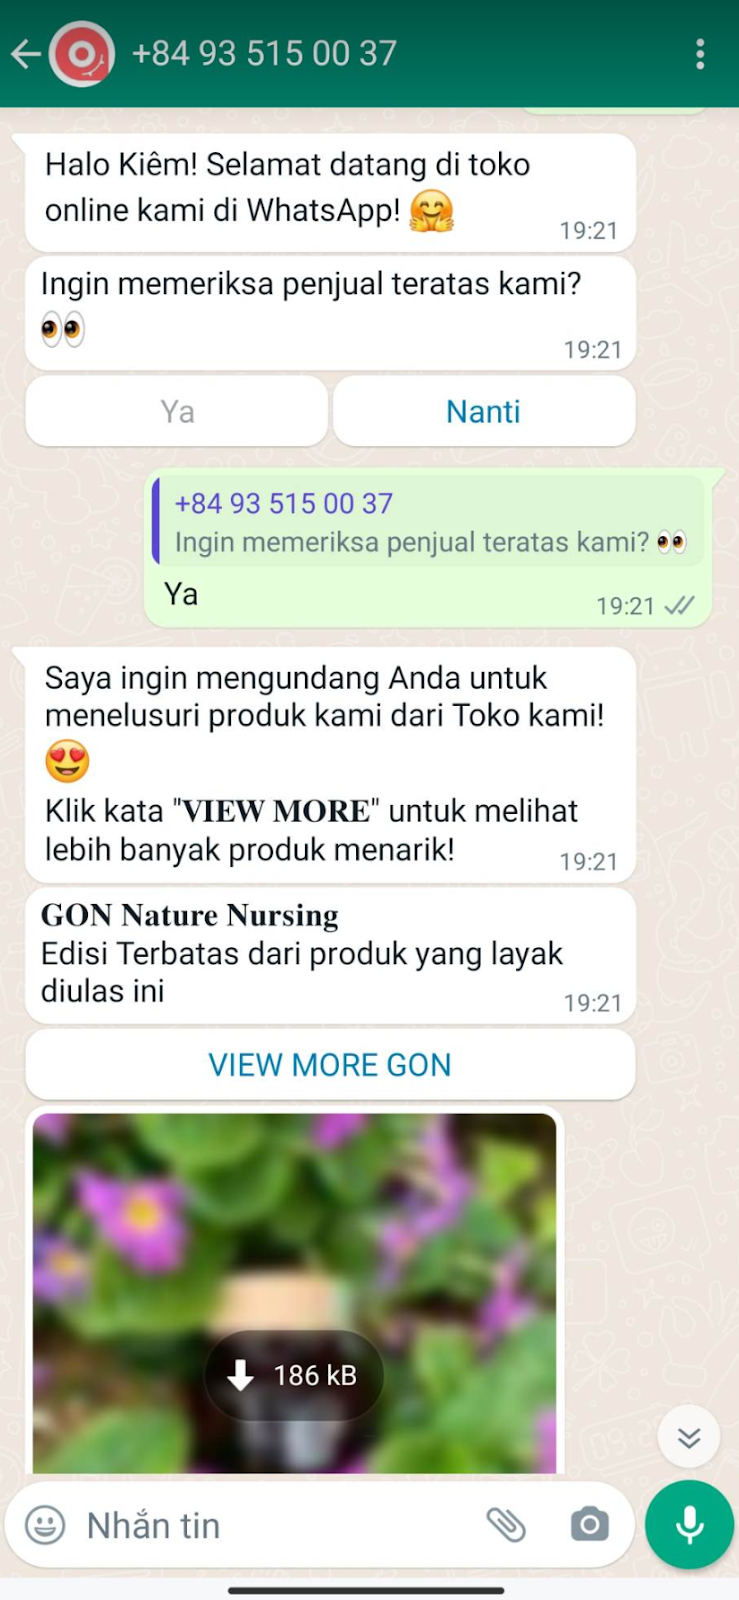
To test your WhatsApp chatbot, you need to use a personal whatsapp account. To do it, send a code you see on the screen from your personal account on WhatsApp to the WhatsApp business account with your chatbot.
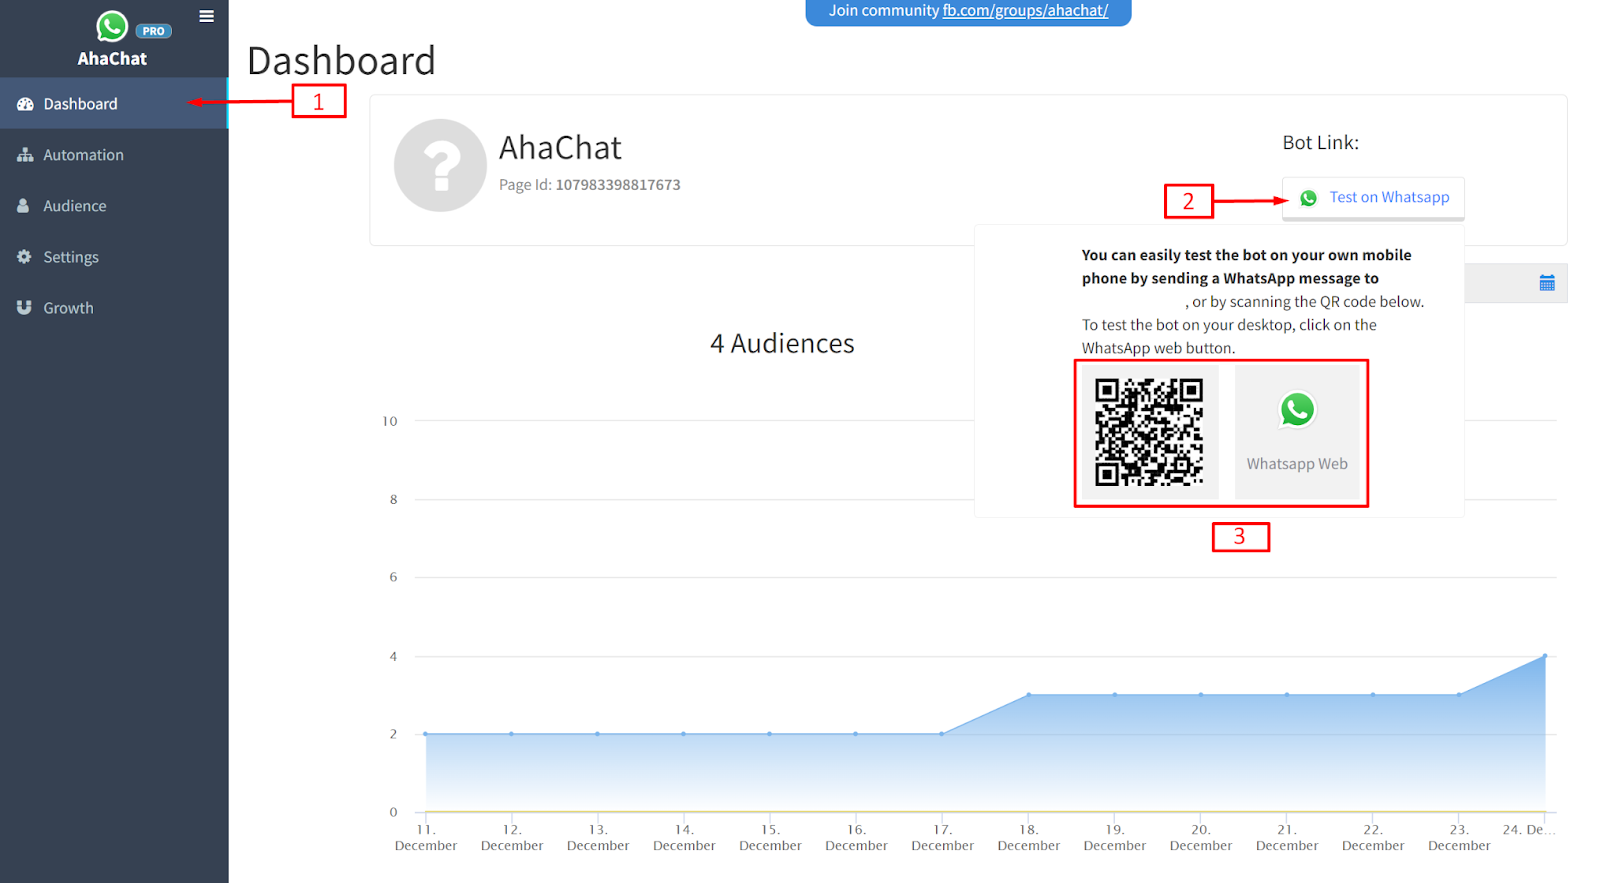
To open the WhatsApp application and send a message to your bot, go to your chatbot on AhaChat → Dashboard → Click Test on Whatsapp → you can follow the link in the pop-up window or scan the QR code.
If you set it up correctly, you will get chatbot auto reply message on your personal whatsapp account