Facebook CAPI Lead Optimize

Conversion API (CAPI) is designed to create a connection between an advertiser's marketing data from various sources and Meta's system, optimizing ad targeting, reducing cost per result, and measuring outcomes.
Instead of maintaining separate connection points for each data source, you can leverage the Conversion API to send multiple types of events.
This article will guide you on setting up the Conversions API on AhaChat, allowing the chatbot to automatically send events when customers provide their phone numbers or emails directly to Meta. This helps businesses accurately track lead data, optimize ad campaigns, and improve conversion rates.
Terminology and Definitions
Dataset: A data source from Meta to collect conversion signals from external sources. This data is referred to as "Events."
Event: Information describing customer (subscriber) actions. There are the following types of events:
- Purchase
- Lead Submitted
- Qualified Lead
- Order Created
- Order Shipped
- Order Canceled
- Order Returned
- View Content
- AddToCart
- Initiate Checkout
Conversion: Simply put, it is the transition from entity state A to state B. It represents the ratio of users clicking on an advertisement based on a specific goal. For example, they might visit to look for product information, place an order, make a payment, or register as a member. Depending on the fanpage's specific field, objectives can be set to increase the conversion rate accordingly.
Specific Example:
For a fanpage specializing in children's toys, a recent Click-to-Messenger ad campaign recorded 300 messages, of which 700 were purchase registrations. The conversion rate can be calculated as follows:
CR = 400/700 * 100% = 43%
1. Set up a Dataset on AhaChat.
Check out the full guide in this article
2. Create and send events from the Chatbot to Meta.
Case 1: Automatically Sync CAPI Events
To enable this feature, go to the Settings menu → select the Integrations tab and scroll down to find the CAPI section → enable Lead.

The Lead event will be automatically sent to the Dataset when a customer leaves a message containing a phone number on Messenger.
Case 2: Create a flow to send conversion events.
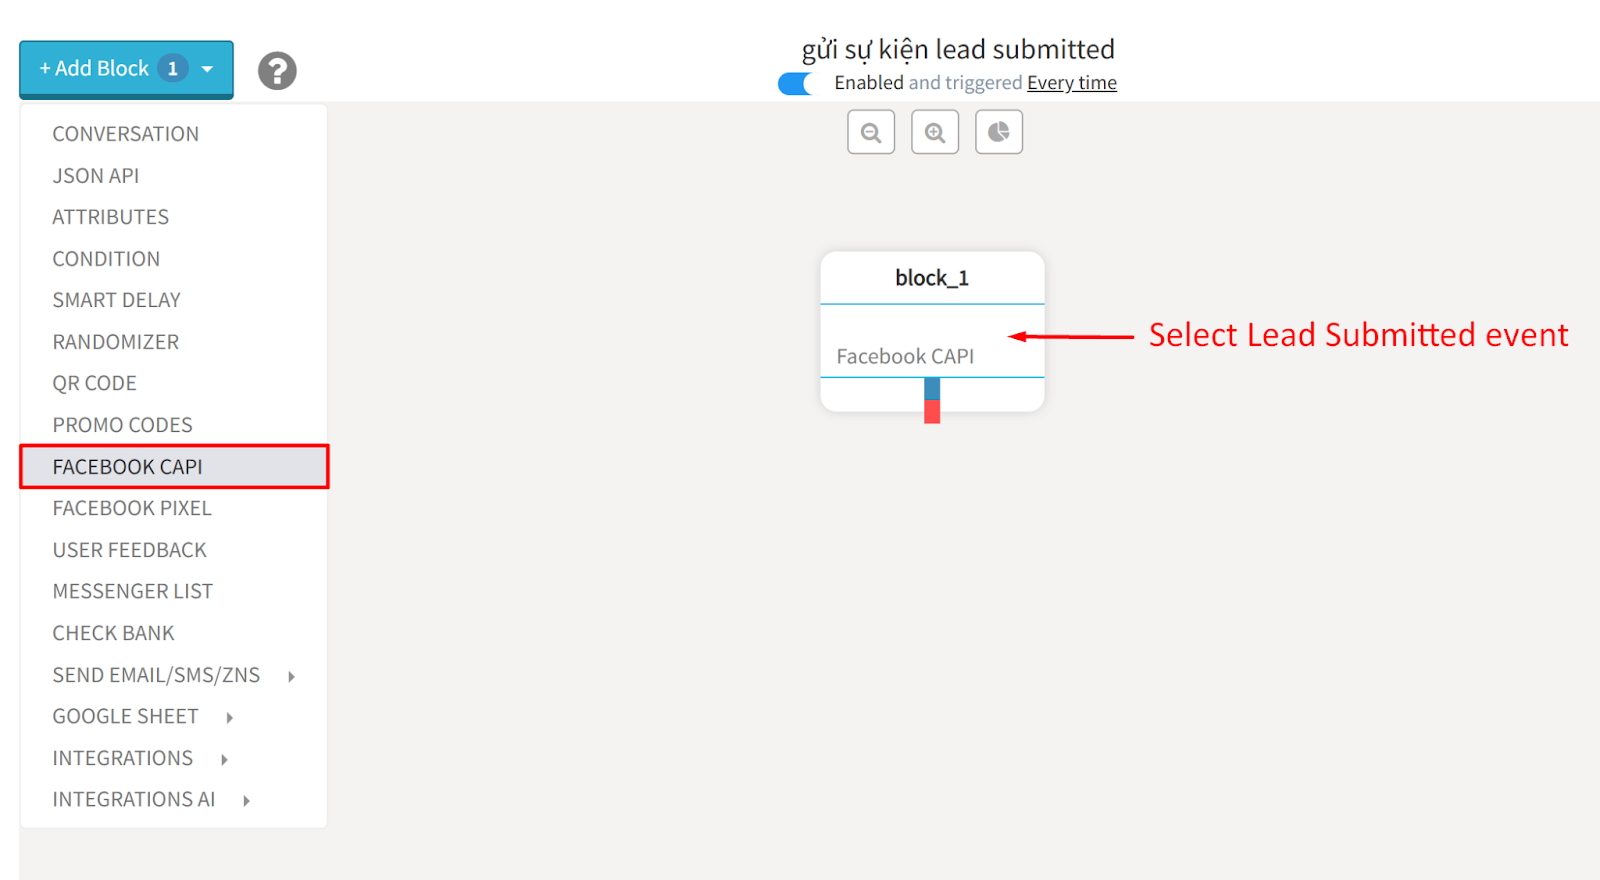
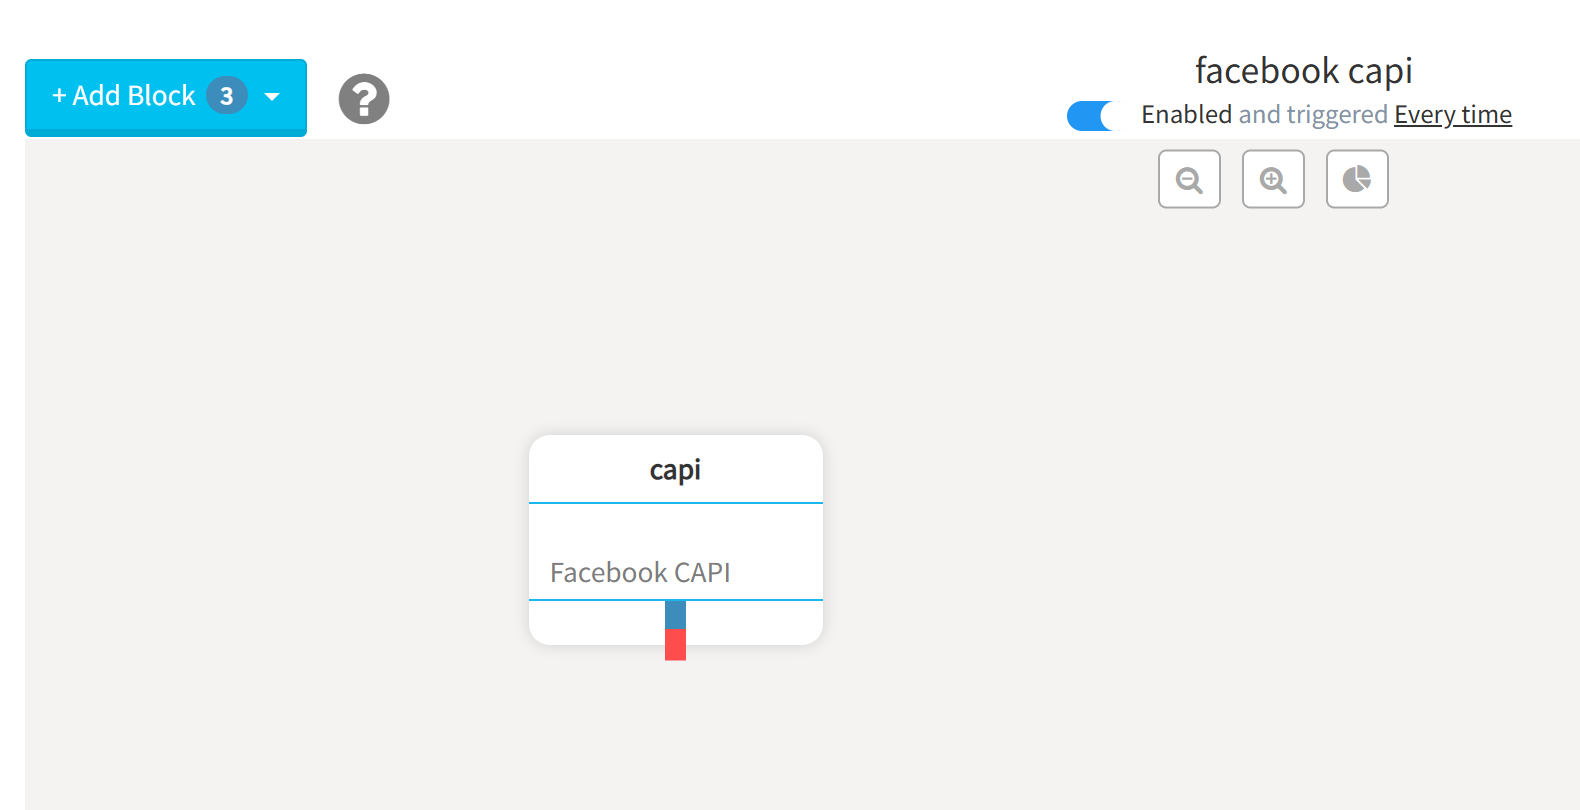
In a flow on AhaChat, you need blocks to collect information from customers, then connect the Facebook CAPI block at the final step of the flow.
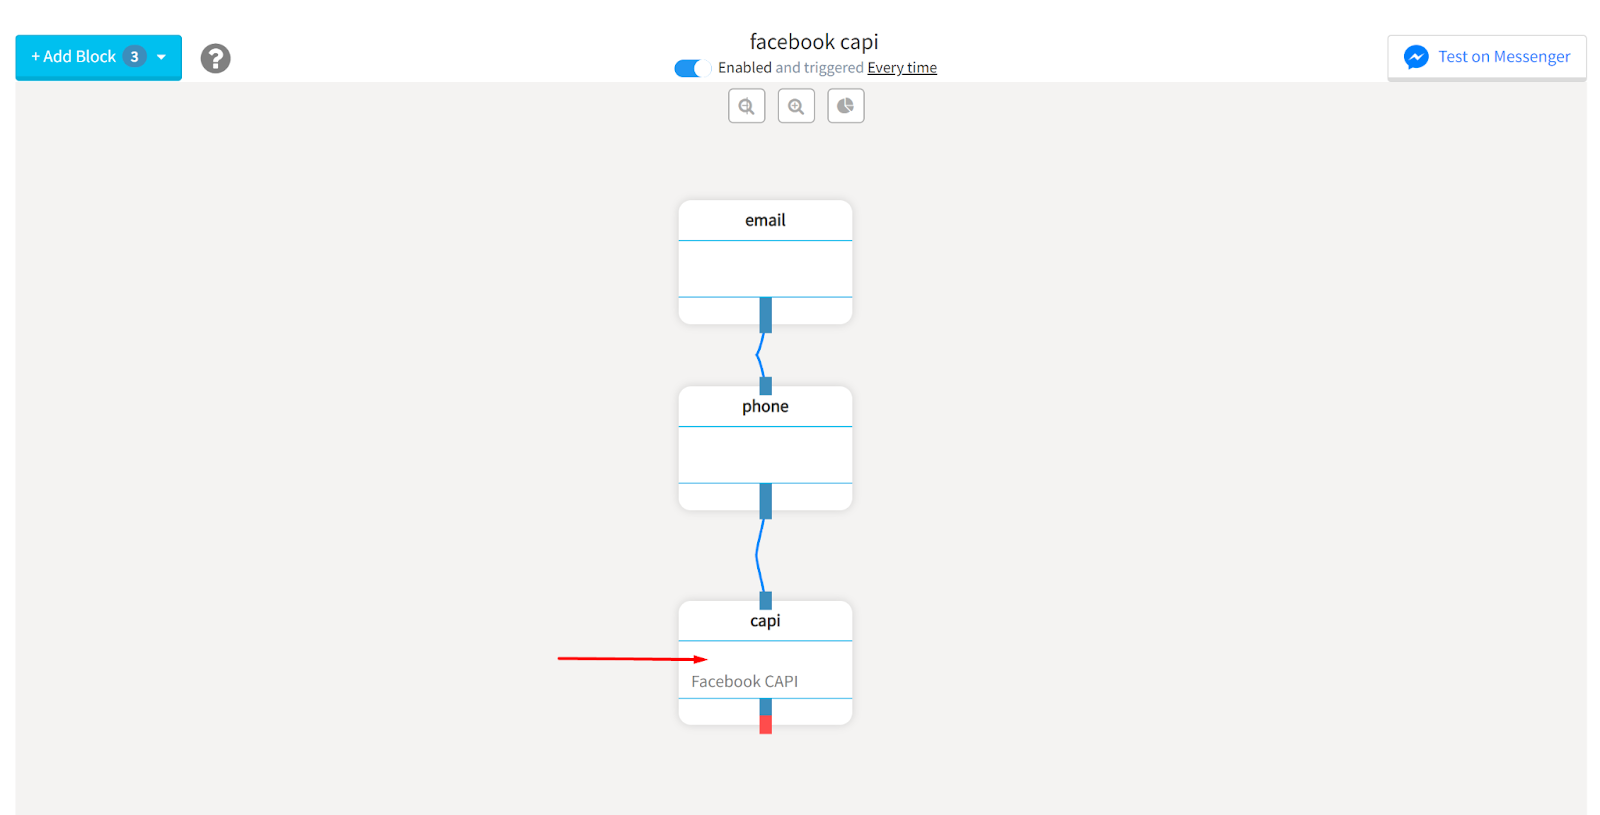
Open the block and select the event listed in the Facebook CAPI block.
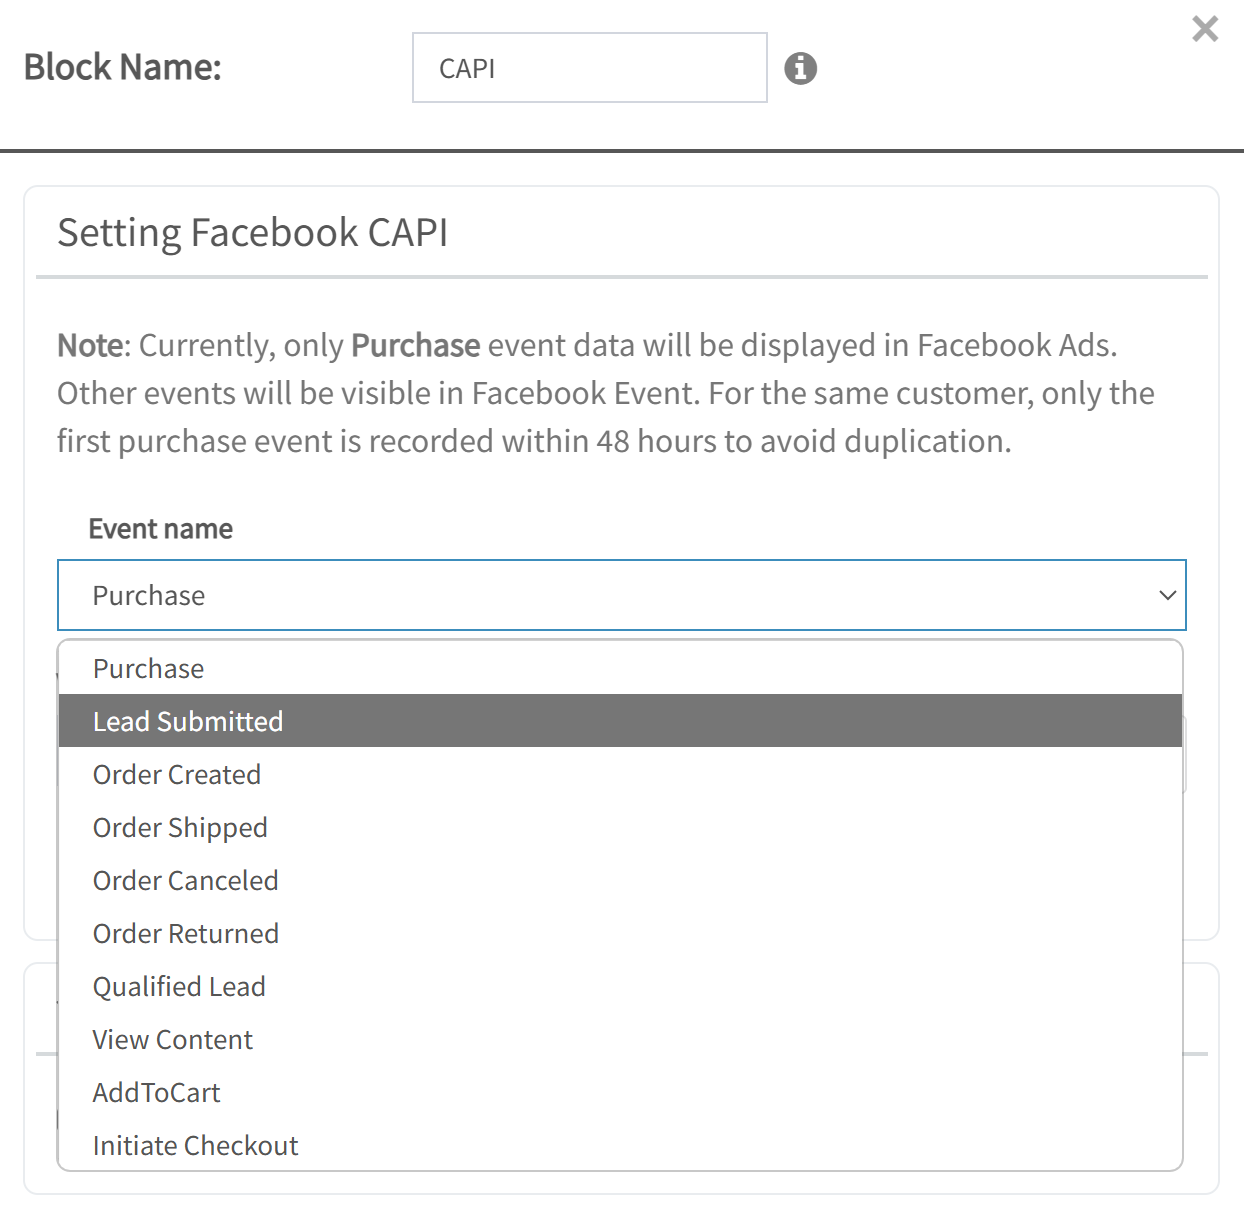
In this case, the user leaves an email or phone number. You select the event Lead Submitted
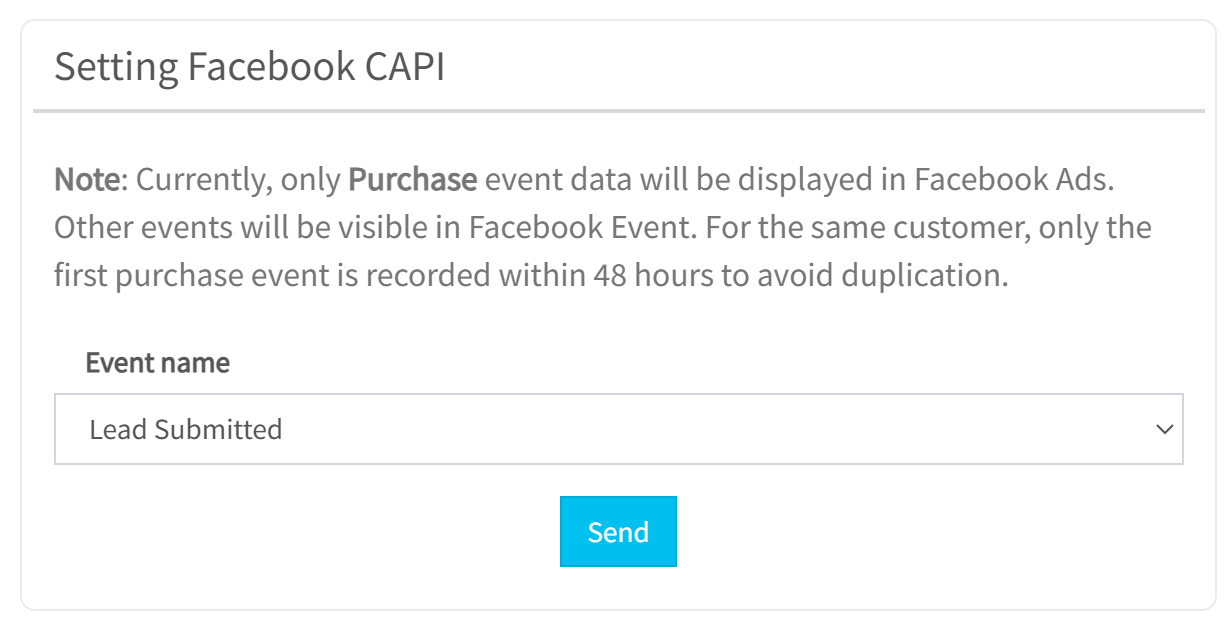
Congratulations! You’ve set up a conversion event that will be sent from AhaChat to your Ads Manager, which will help improve your ads campaign and optimize your ROI!
Click Send to check if the event is successfully sent. You will receive the result in JSON format.
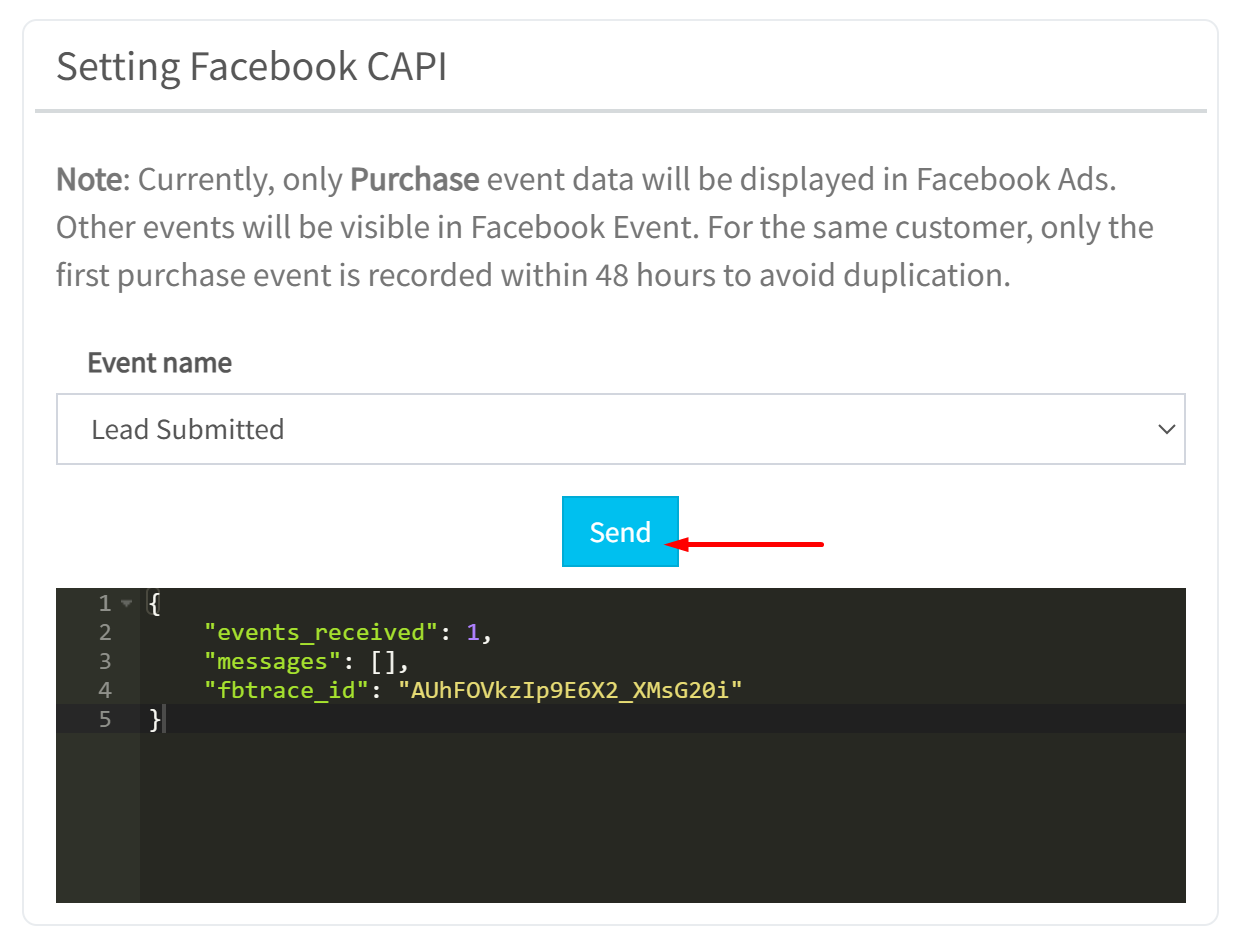
You can create an additional conditional branch to check if the event has run successfully, including error messages, and send notifications to the administrator or another system.
Example:
To get the error notification content:

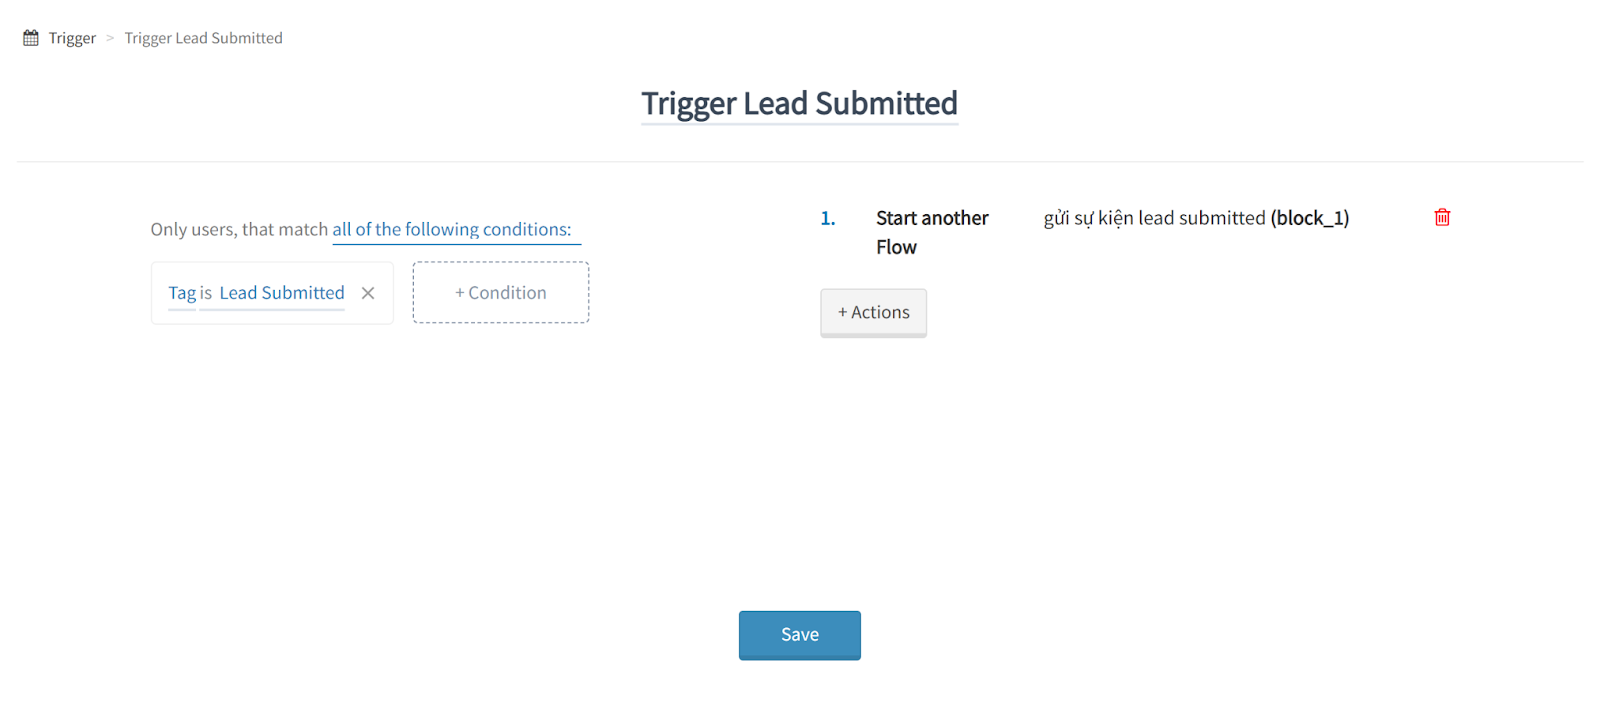
Case 3: Send Lead Submitted event from Live Chat by +Add Tag
In the LiveChat menu on AhaChat, to send the Lead Submitted event you need to create a Tag with the same name as the event and attach it to the customer

Also create a flow containing the CAPI block to send the Lead Submitted event
Finally, create a Trigger to catch the condition that when a customer is tagged with the Lead Submitted tag, the flow will be activated.
Case 4: Send events from an external CRM source.
To send events from an external source, you need to use AhaMake to send data to the Chatbot.
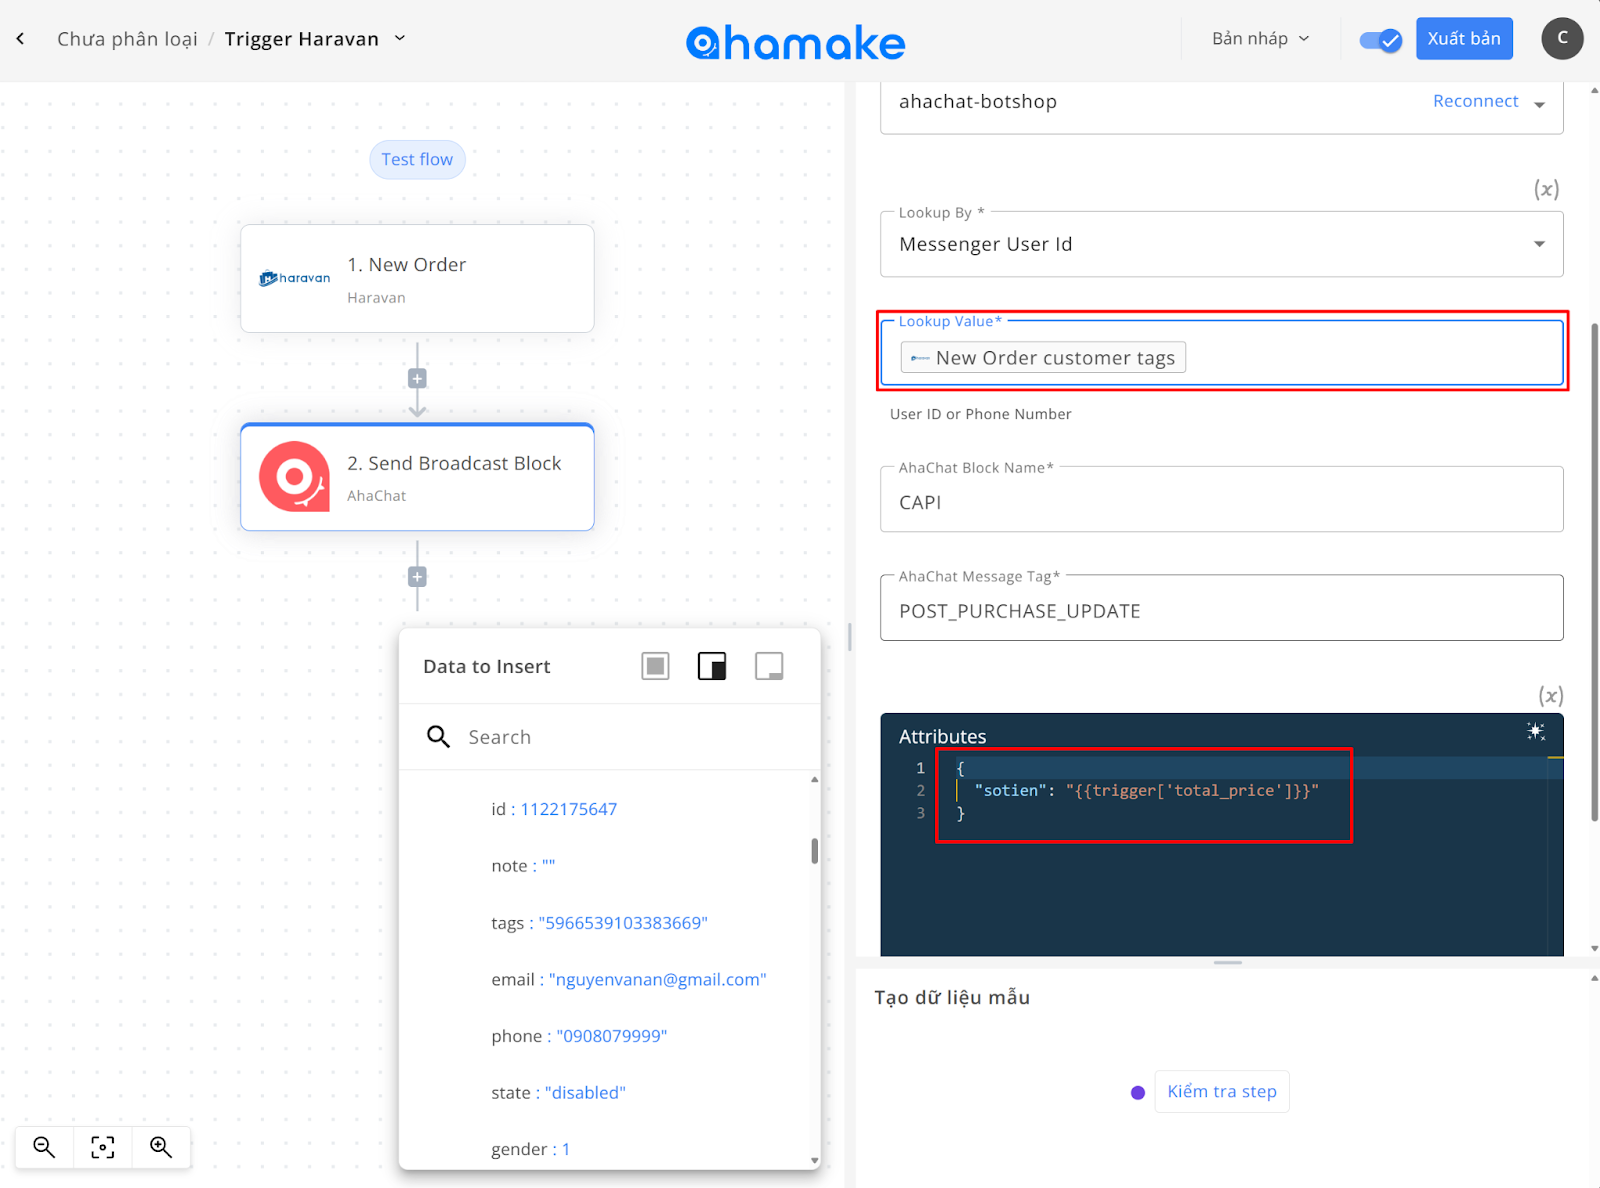
In this example, we use AhaMake to receive information from Haravan when a new customer is created, and then send it to the Chatbot to trigger the CAPI block.
On AhaChat → Create a CAPI flow with Lead Submitted event
On AhaMake, create a Flow with the Trigger "New Customer" from the Haravan app (see the Haravan user guide here).
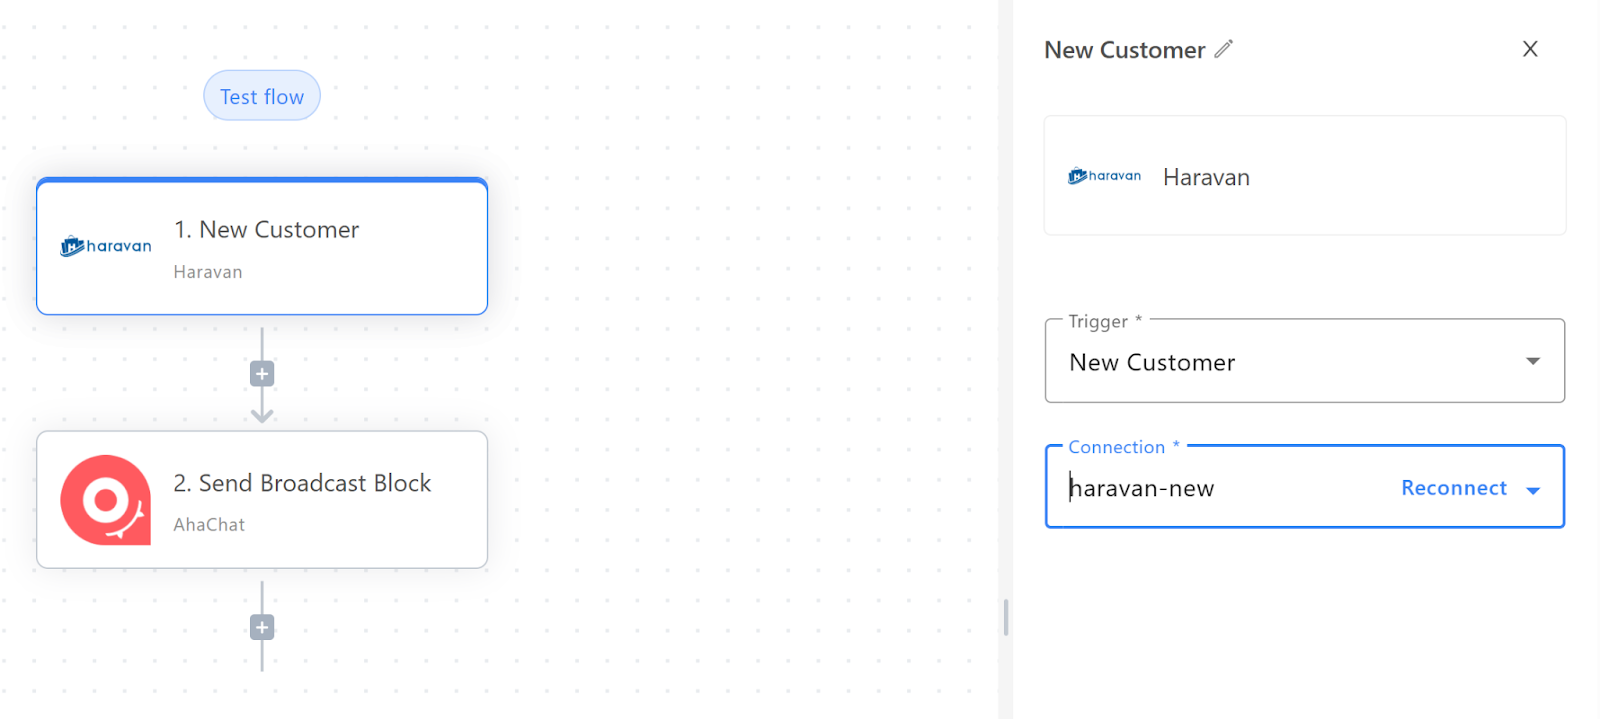
Next, create the AhaChat app with the action "Send Broadcast Block." Retrieve the information from the Haravan Trigger to pass it along (see the guide for using actions with AhaChat here).
Note: To send the data to the Chatbot, you need to synchronize the MESSENGER_USER_ID of the customer between AhaChat and the CRM (Haravan).
With just 2 steps like that, when you create a new customer on Haravan, the customer's information will be sent via Trigger from AhaMake and then sent to Chatbot to activate the CAPI block and send the event to Meta.
3. Results
If everything is done correctly, you will be able to view the results in the overview report section of the Event Manager.
