Attributes
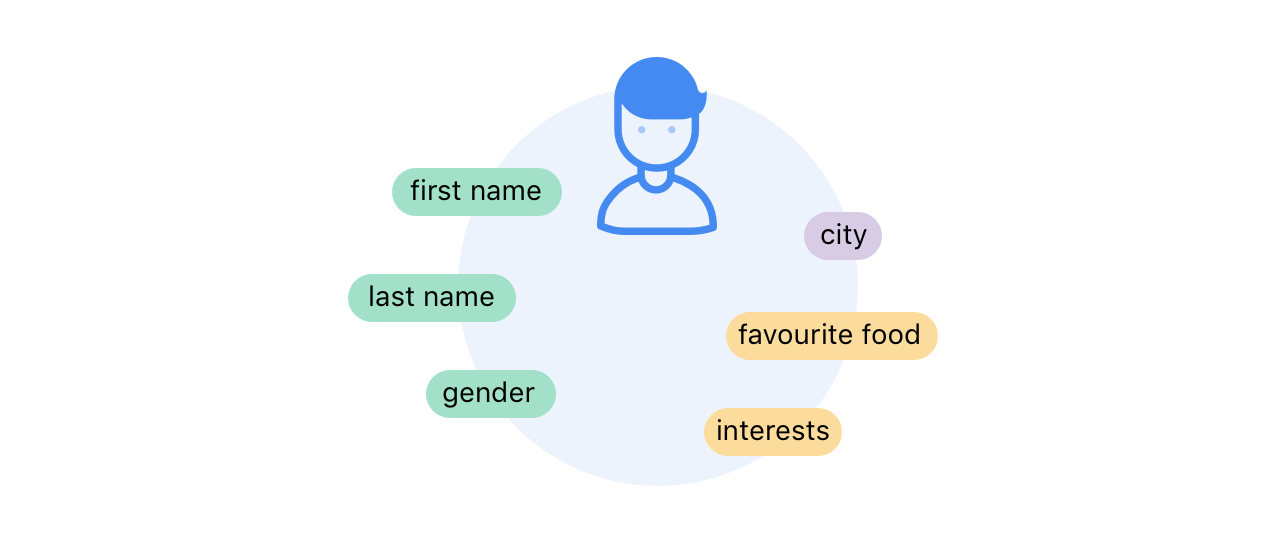
You can use the system attributes available in every bot like {{first_name}} or {{gender}} to greet users or to segment them in the user filter for Broadcasting, but you can also create your own custom attributes using Audience menu, Attribute Block and more.
1. Type of Attributes
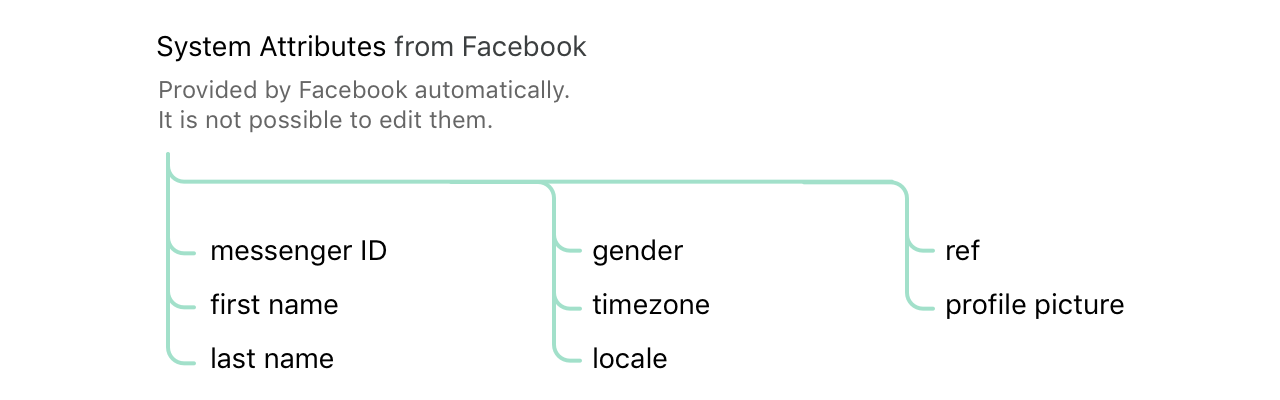
1.1 System Attributes
System attributes are available in every bot and contains all the information the bot receives about a user from Facebook, which you can't modify. They show up as purple, while the attributes you create yourself, and which you can modify, are brown.
1.2 Custom Attributes (User Attribute & Bot Attribute)
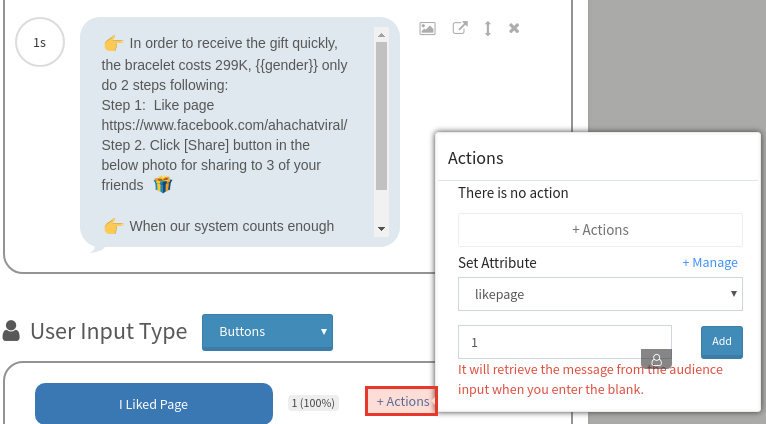
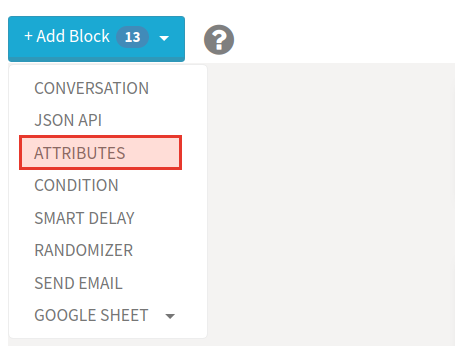
You can create your own attributes using the Attribute Block or Audience menu, JSON API plugin, but also by having a user select a quick reply.
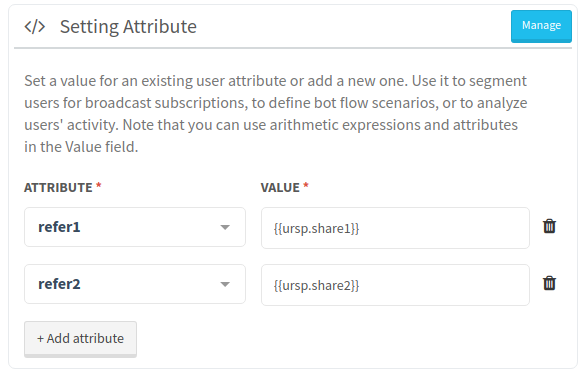
You can overwrite existing values of an attribute by assigning another value to it.

Please note that user attributes can not contain multiple values.
1.3 User's Response Attributes
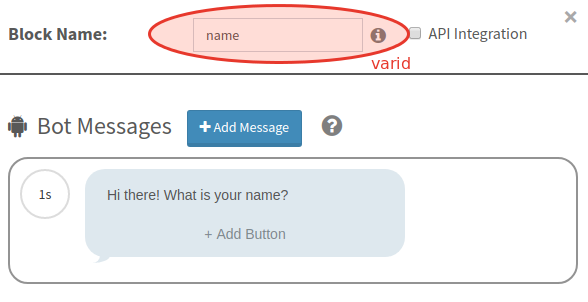
There are times when you want to use the user's response, somewhere later in the
conversation. Like you have asked the user's name in the first gambit, and want to refer him by his name.
See sample conversation below:
Nice to meet you John, where are you from?
To do this, simply replace John with {{ursp.name}}, where name is the varid of the block on which you have asked for the user's name. varid of a block is at the top.
So the statement will become:
Nice to meet you {{ursp.name}}, where are you from?
So, anything between the double braces will be replaced by whatever the user has responded on that block.
ursp means it is a user's response on that block
Not just that you can use the double braces format anywhere in the Bot. In the messages, in the button text, even in the API-Config section.
1.4 Date and Time Attributes
The timeline in AhaChat contains day month year, day of the week and the sessions of the day. Greetings to customers that include time will help personalize and impress customers more.
{{NOW()}}: 17/07/2019 10:00:12
{{TODAY()}}: 17/07/2019
{{DAY()}}: 17
{{WEEKDAY()}}: Monday, ..., Sunday
{{YEAR()}}: 2019
{{MONTH()}}: 1, 2, ..., 12
{{TIME()}}: 10:00 AM, 02:00 PM
{{HOUR()}}: 1, 2, 3, ..., 24
{{DAYTIME()}}: morning, noon, afternoon, evening, night
The morning starts from 00:00 to 10:59.
The noon starts from 11:00 to 12:59.
The afternoon starts from 13:00 to 18:59.
The evening starts from 19:00 to 21:59.
The night starts from 22:00 to 23:59.
Other date and time formats refer here
1.5 Math Operations
Among other things, Attribute Block can also be used to do some basic math operations, such as addition, subtraction, multiplication and division.
First, you need to get the numbers from the user, which can easily be done with Attribute Block plugin. The numbers sent by the user will then be saved in the form of attributes you create.
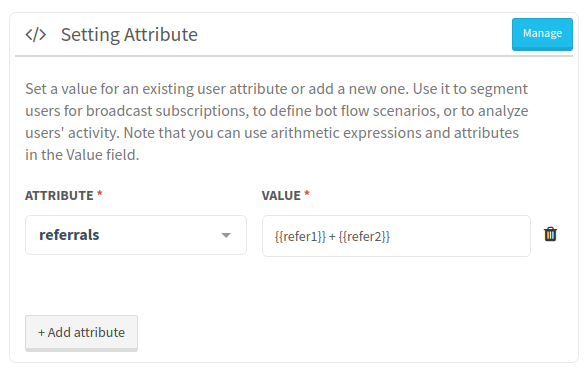
Next thing you need is another set of user attributes that will show the total of the math operation. This is where you create an Attribute Block. The Value section is the one that should contain the operations themselves, while in User attribute section you need to create attributes that will display the total.
To get the total, use the numerical attributes the bot acquired in User Attribute and either add, subtract, multiply or divide them using the “+”, “-”, “*”, “/” symbol respectively.

2. Create new Attribute
2.1 Click on Manage Attributes at the Audience menu

2.2 Create a new or edit existing attribute

2.3 Select the attribute name and type (text, number, boolean)

3. Save Attributes
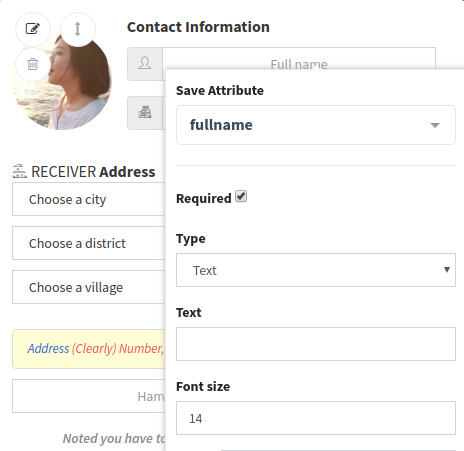
3.1 Use Attribute Block to save attributes.
Save values to attributes. The +, -, *, / operators can be used here.