Meta Business AI
Meta Business AI lets you create an AI consultant directly on your Fanpage. However, when you use it together with a chatbot, you need AhaChat's Meta Business AI feature to smoothly hand over the conversation from Meta AI to your automation scenarios or support staff.
What Meta Business AI Does
When a customer messages a Fanpage that has Meta Business AI enabled, Meta AI is prioritized to reply first. Meta only allows one platform to respond at a time. This means that when Meta AI is active, other chatbot or livechat systems must pause.
Meta Business AI in AhaChat helps you take back control of the conversation from Meta AI. After Meta AI ends its consultation session, AhaChat automatically takes over and triggers the Flow you prepared to collect feedback, create an order, or transfer the customer to a support agent.
How to Set Up Meta Business AI
Go to: Meta Business Suite
Switch to the Fanpage where you want to set up Meta AI
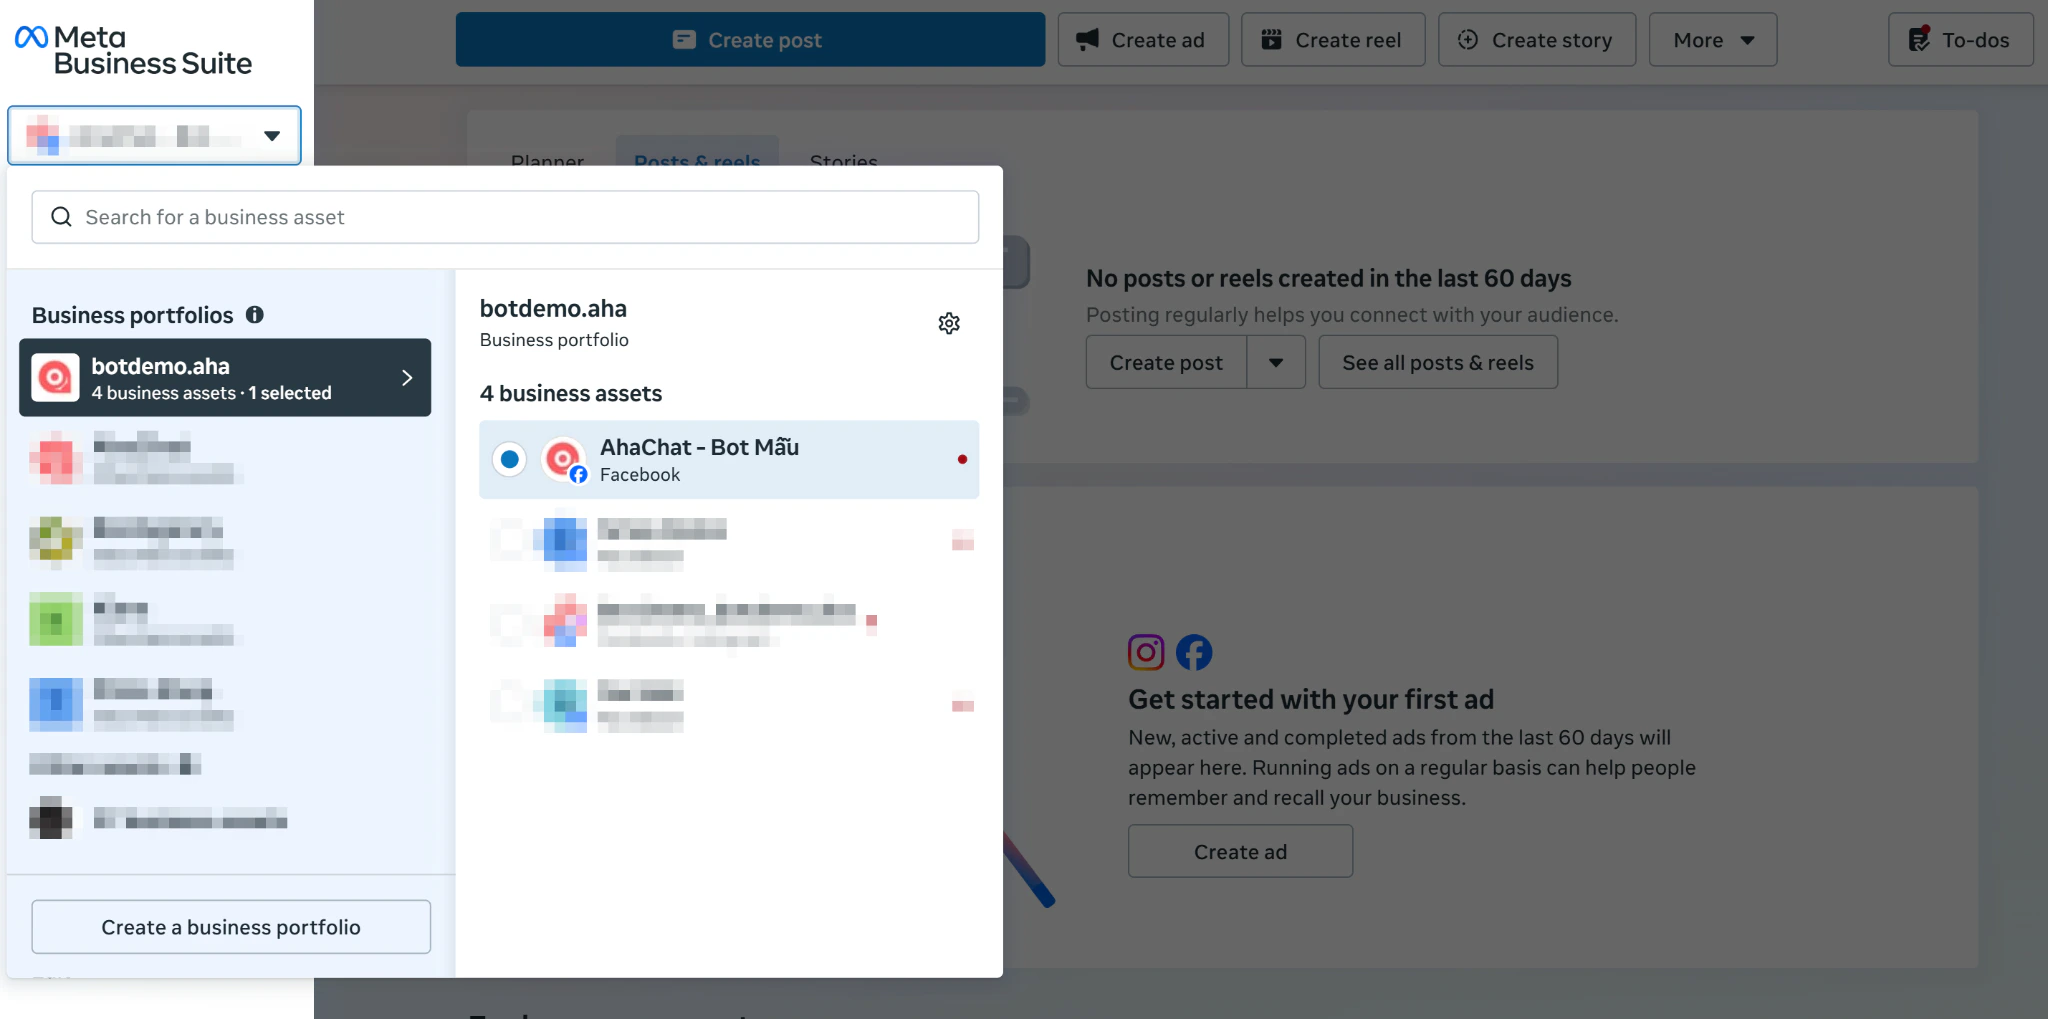
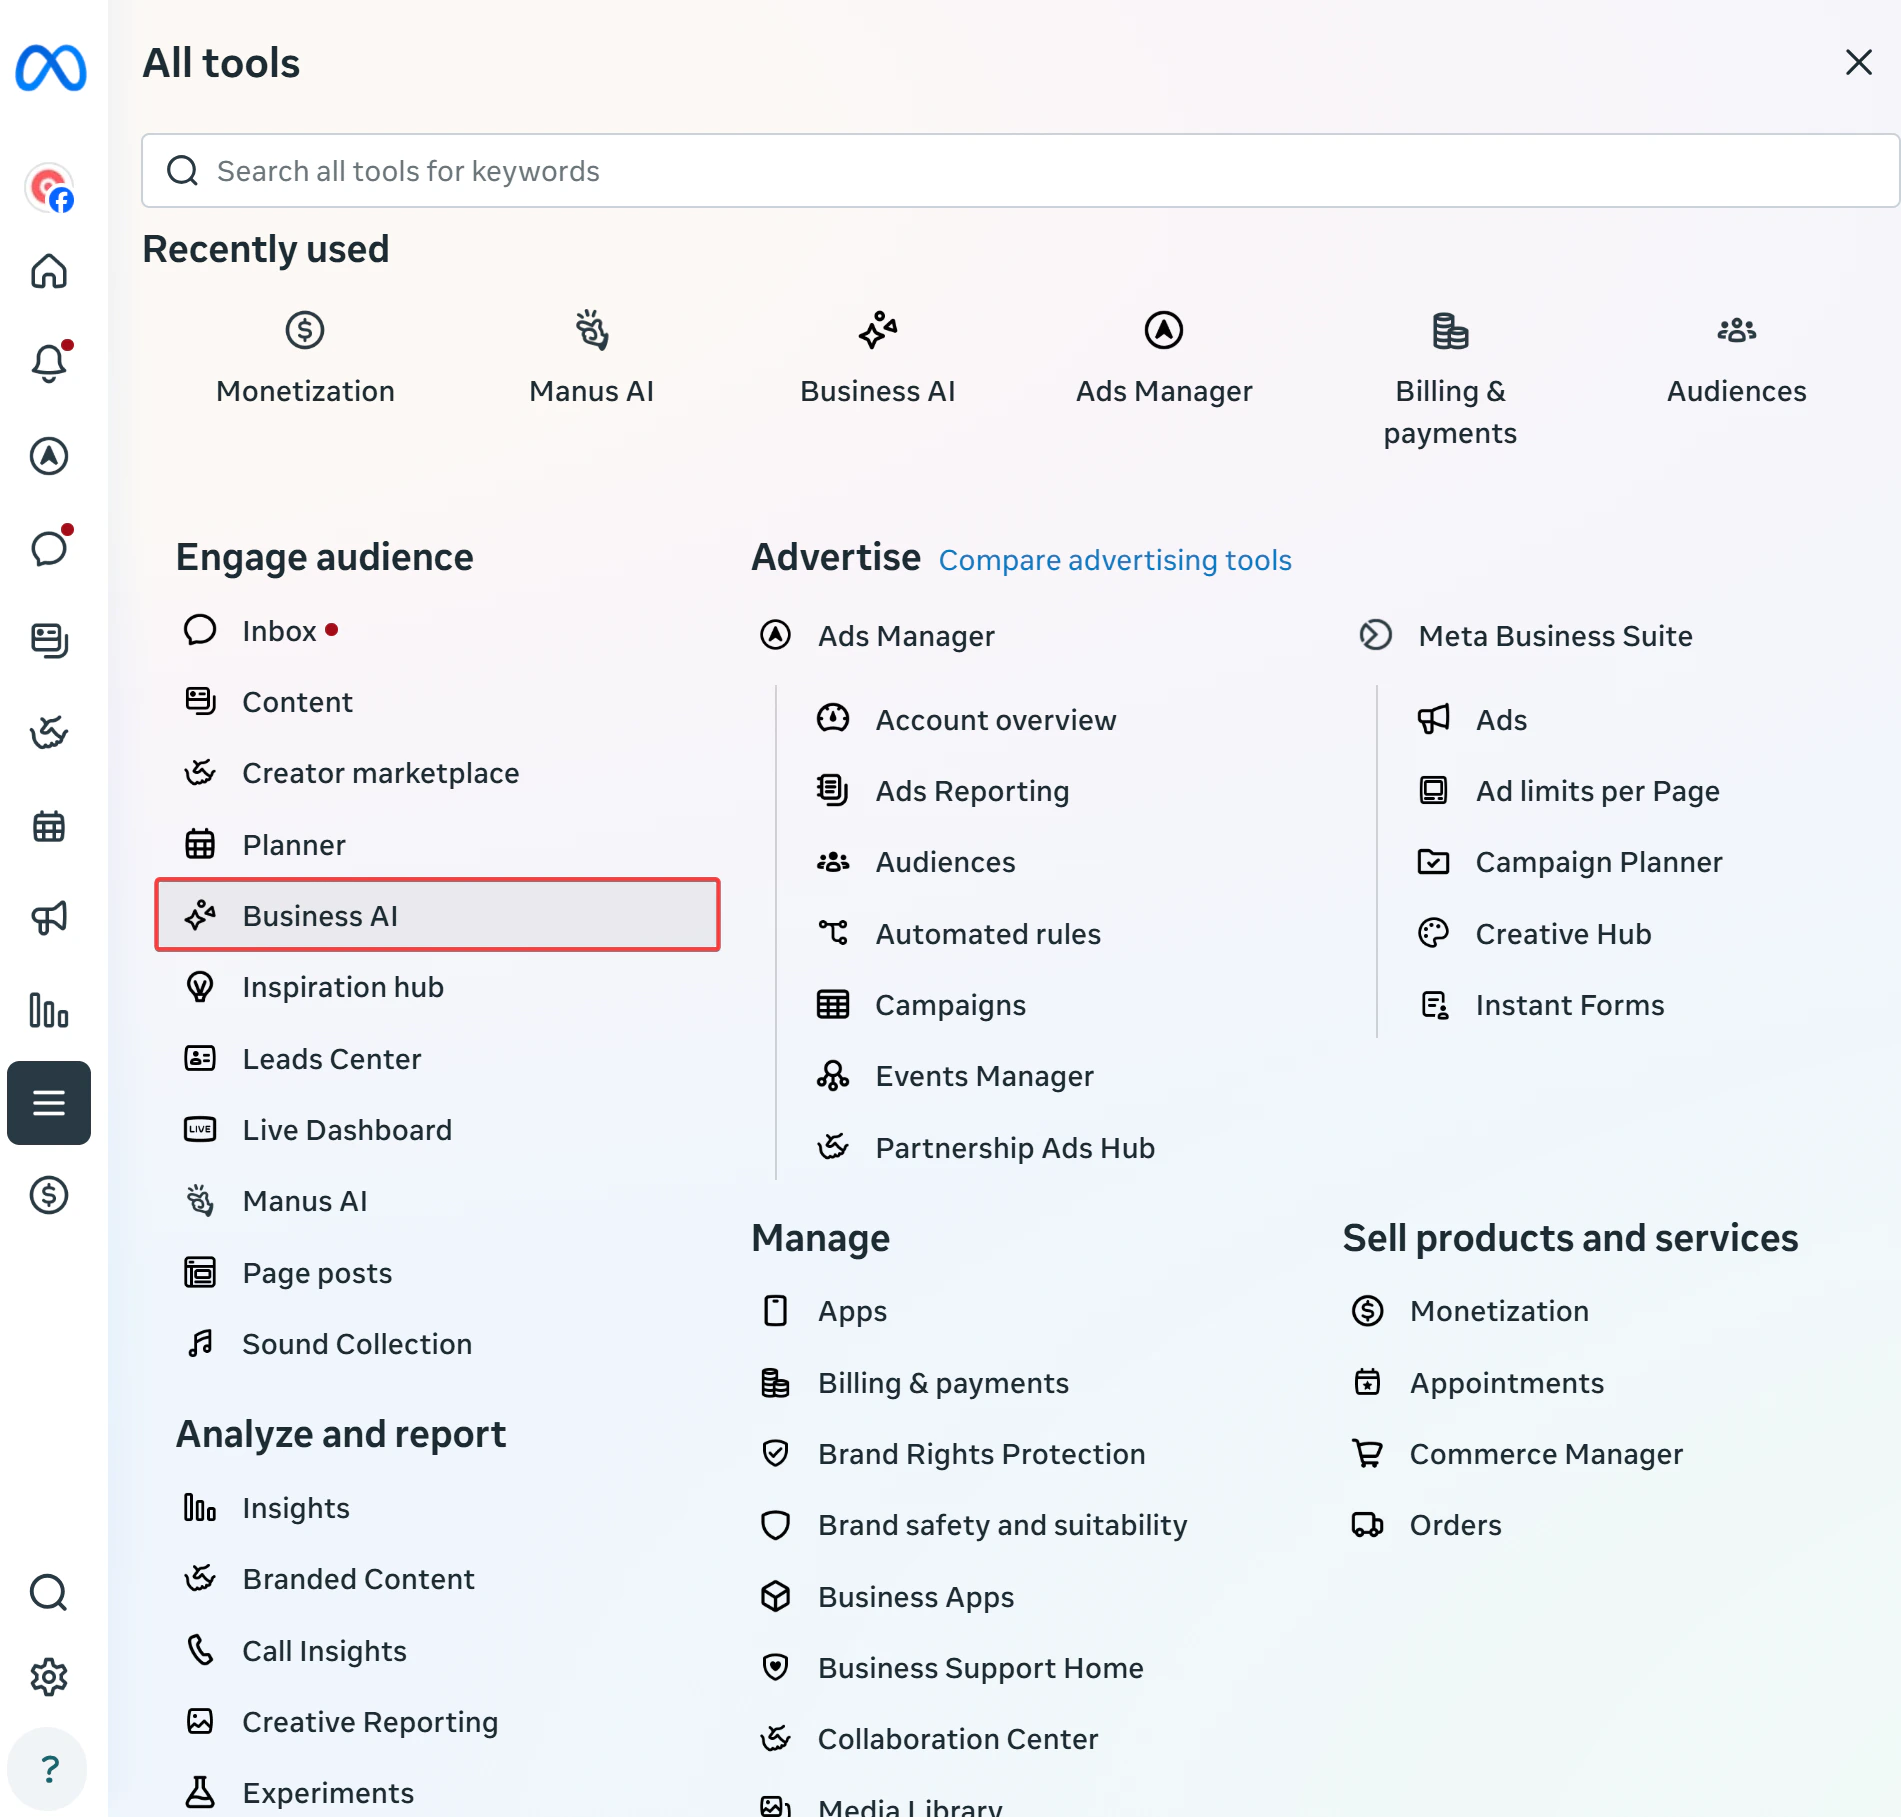
Then select All tools → Business AI.
Note: You must be an admin of both the BM and the Page for this feature to appear.
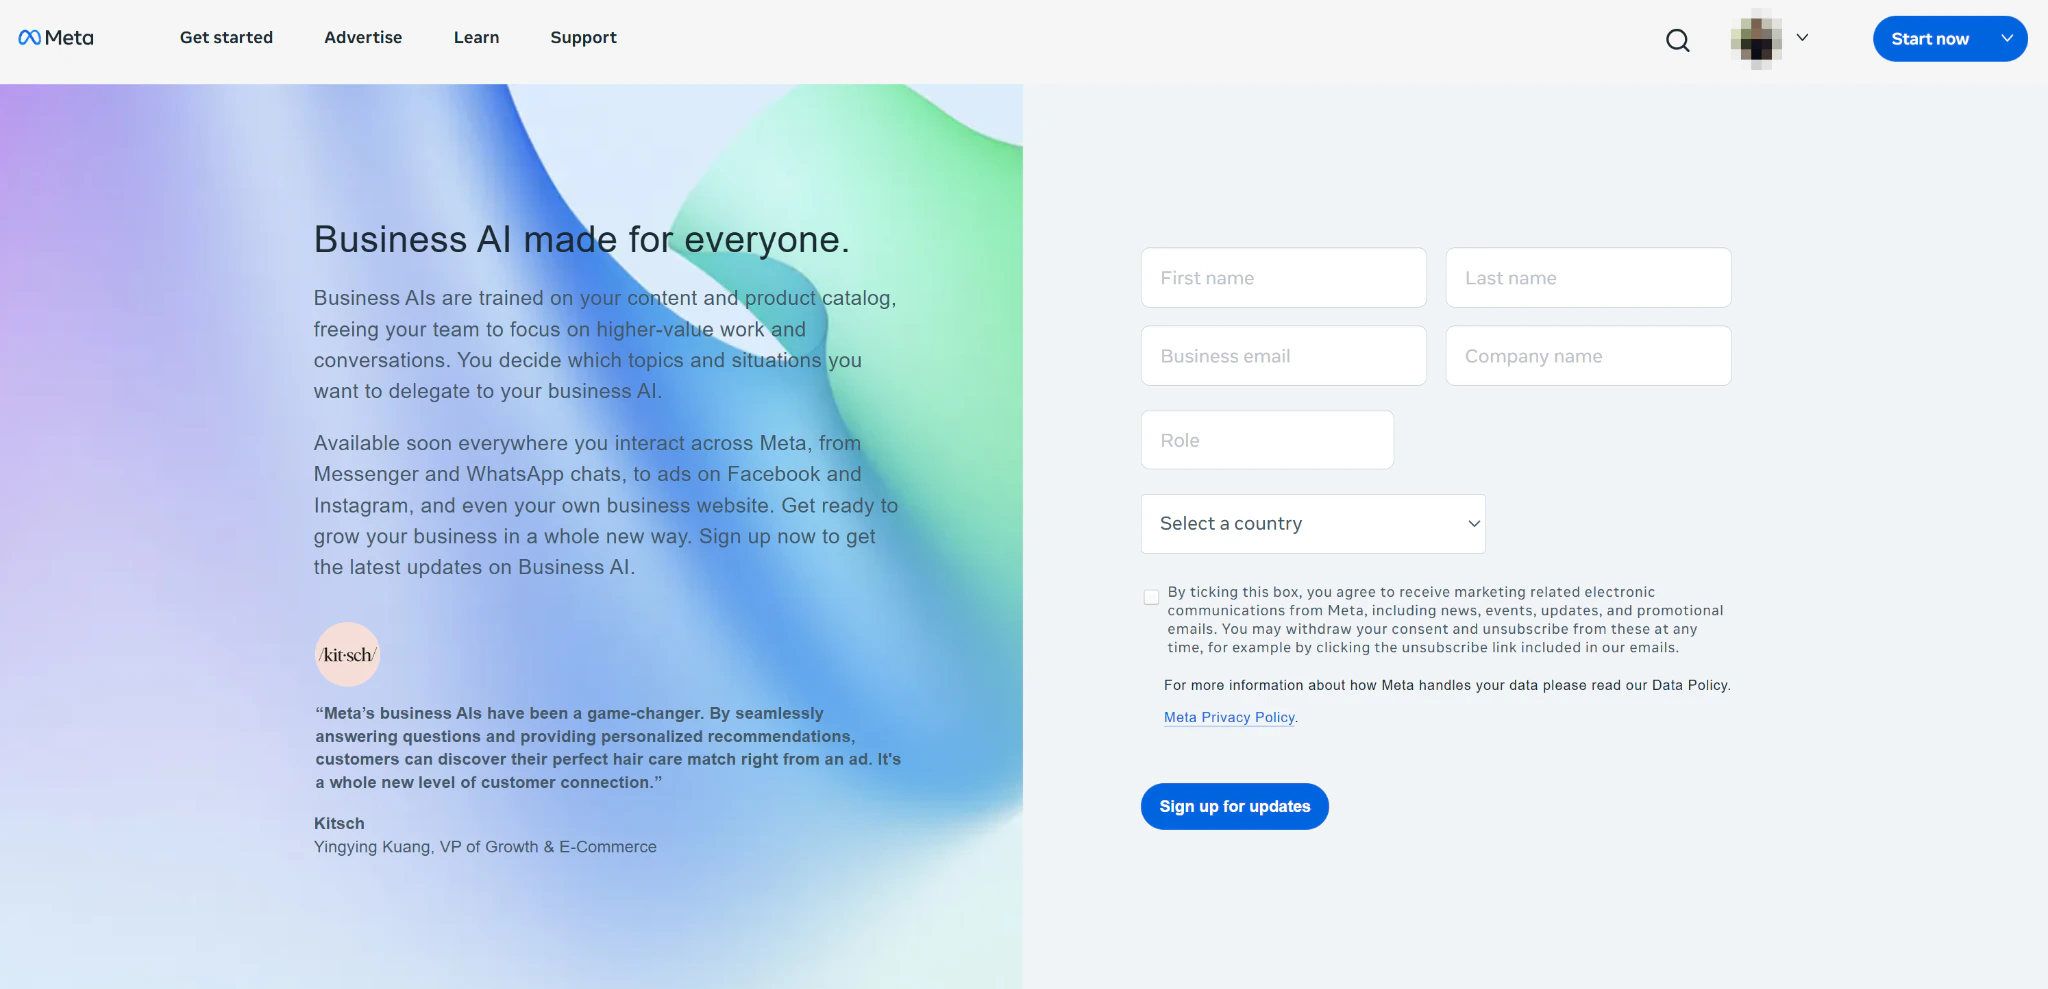
If your Fanpage has not been enabled to use Meta Business AI, you will see a notice like the screenshot below. You need to register and wait for Meta to enable the feature.
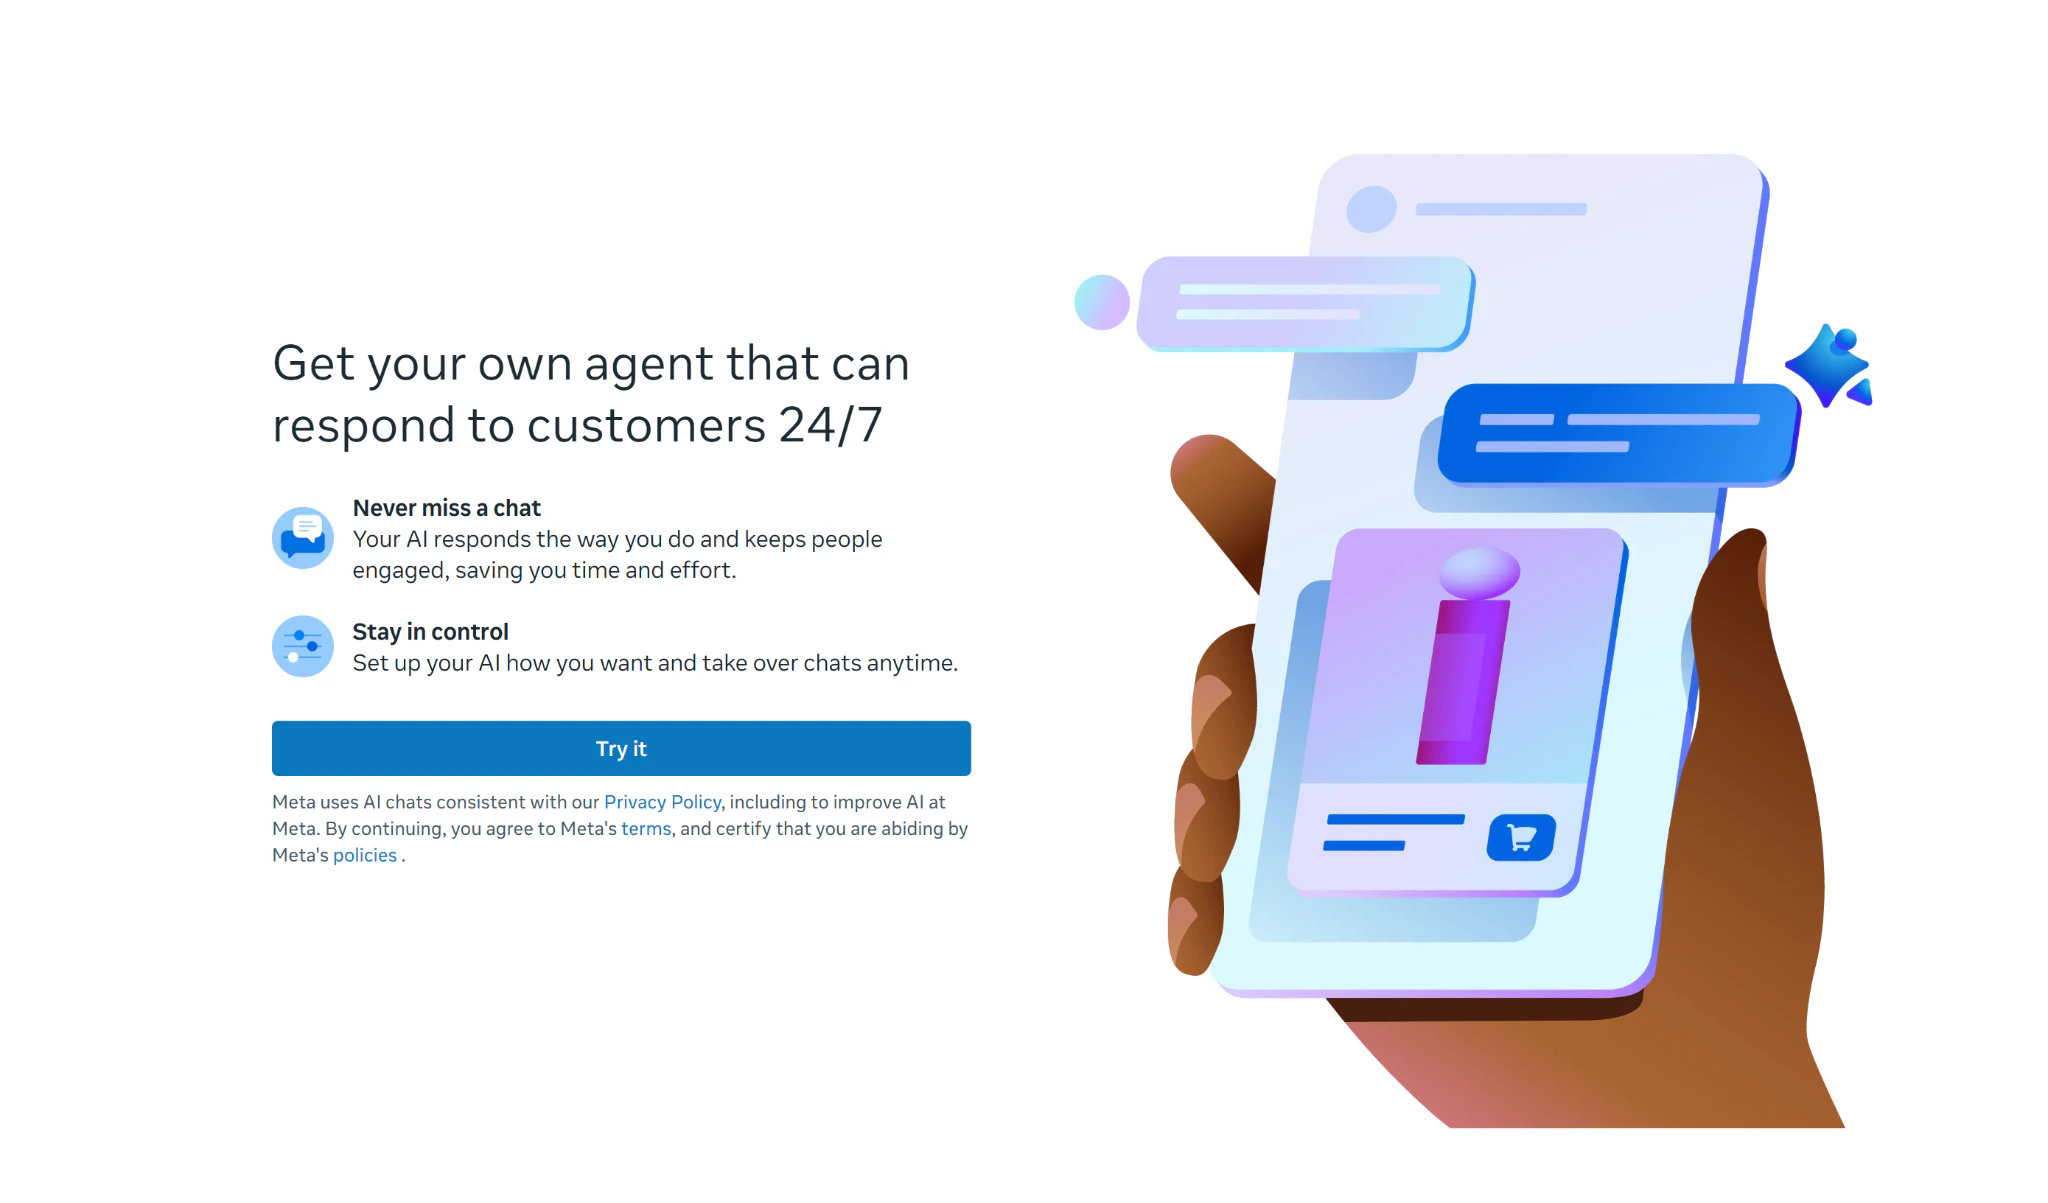
For Fanpages that have already been enabled, click Try it to start setting up Meta AI.
Go to the Instructions menu and add training information for Meta AI as guided.
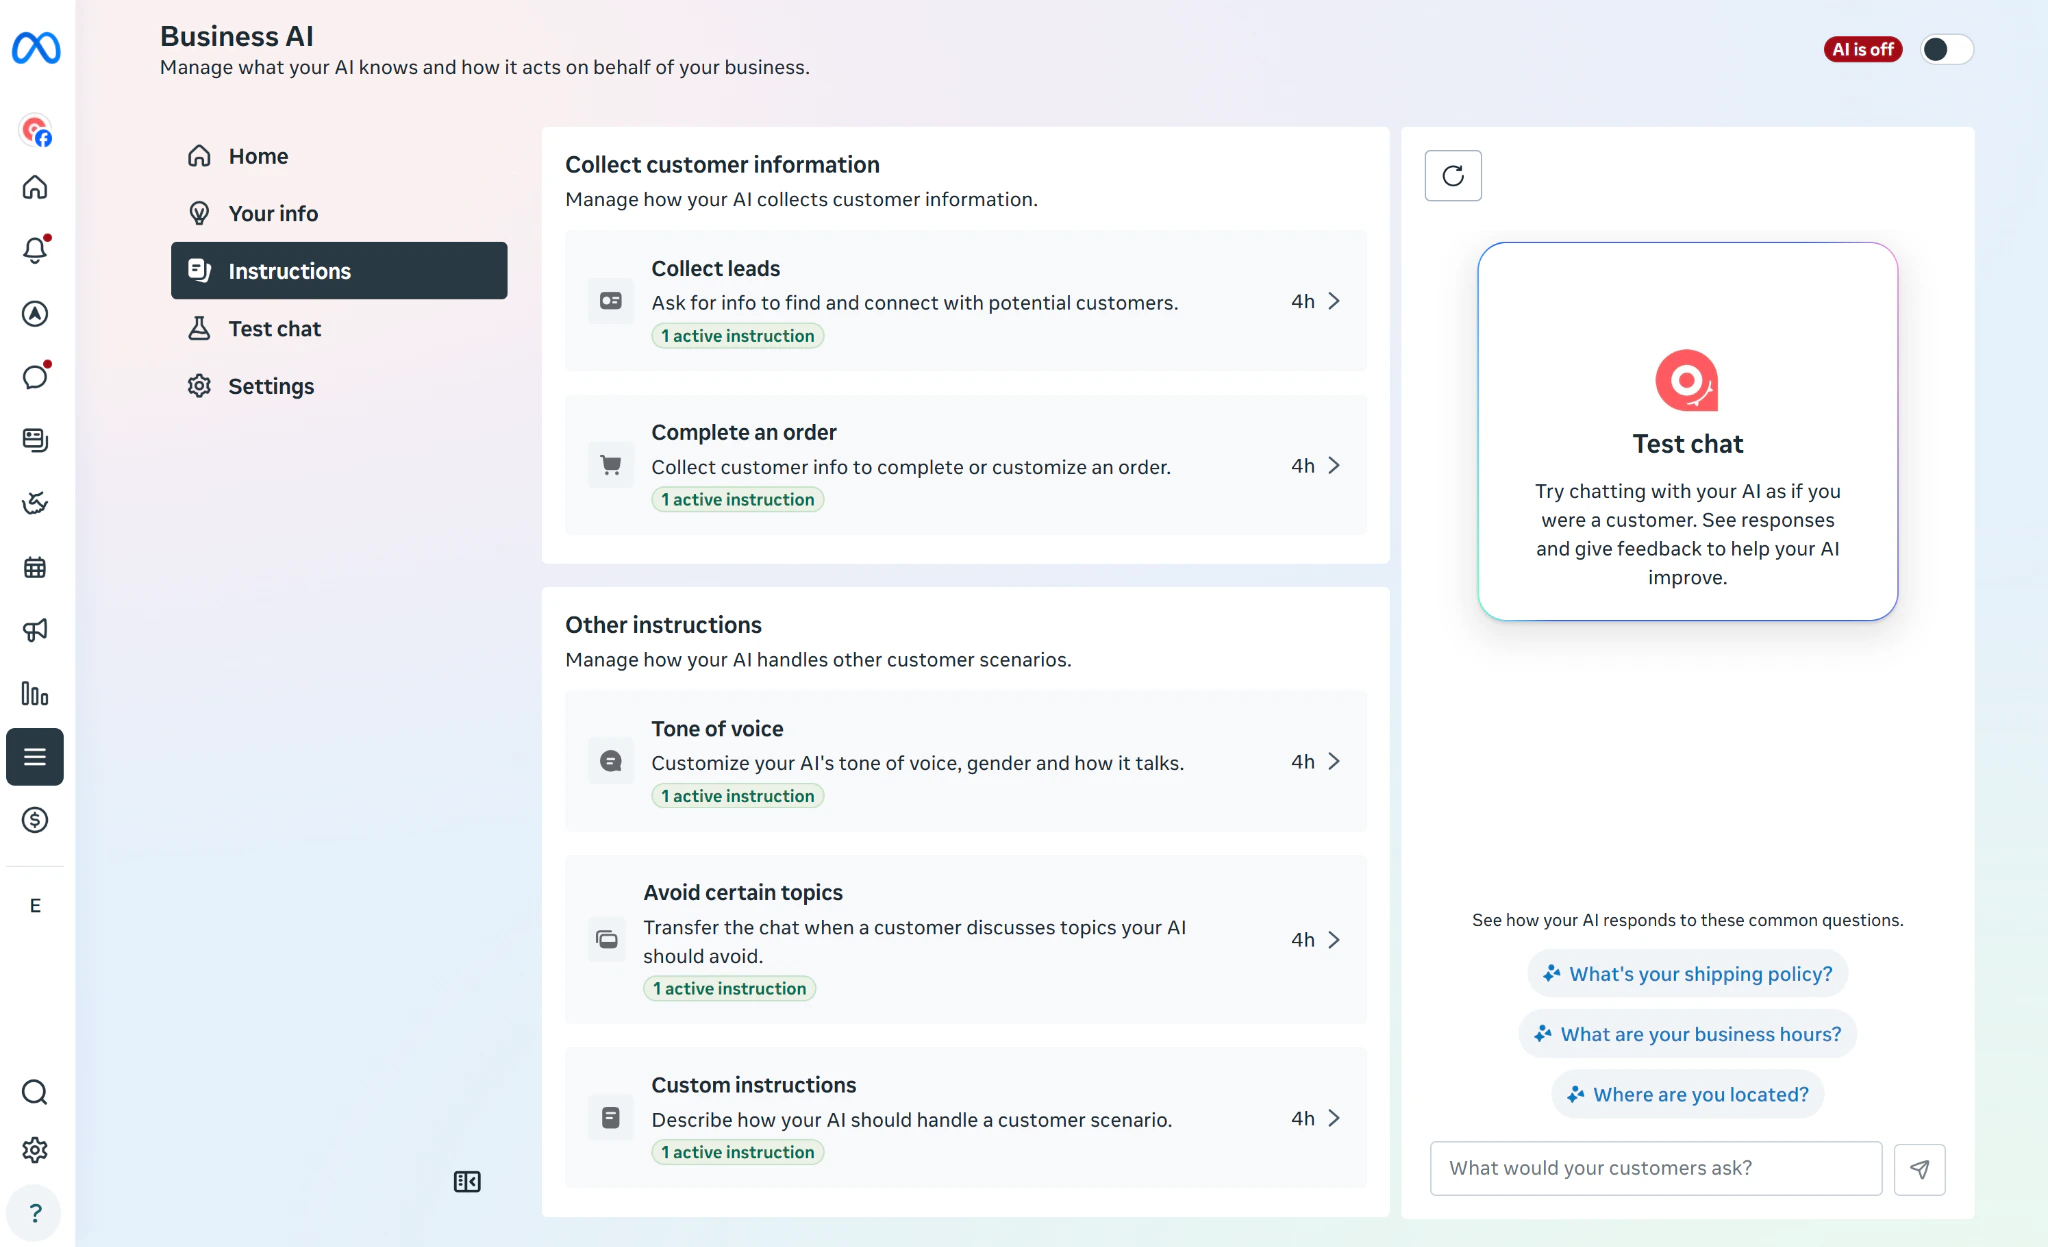
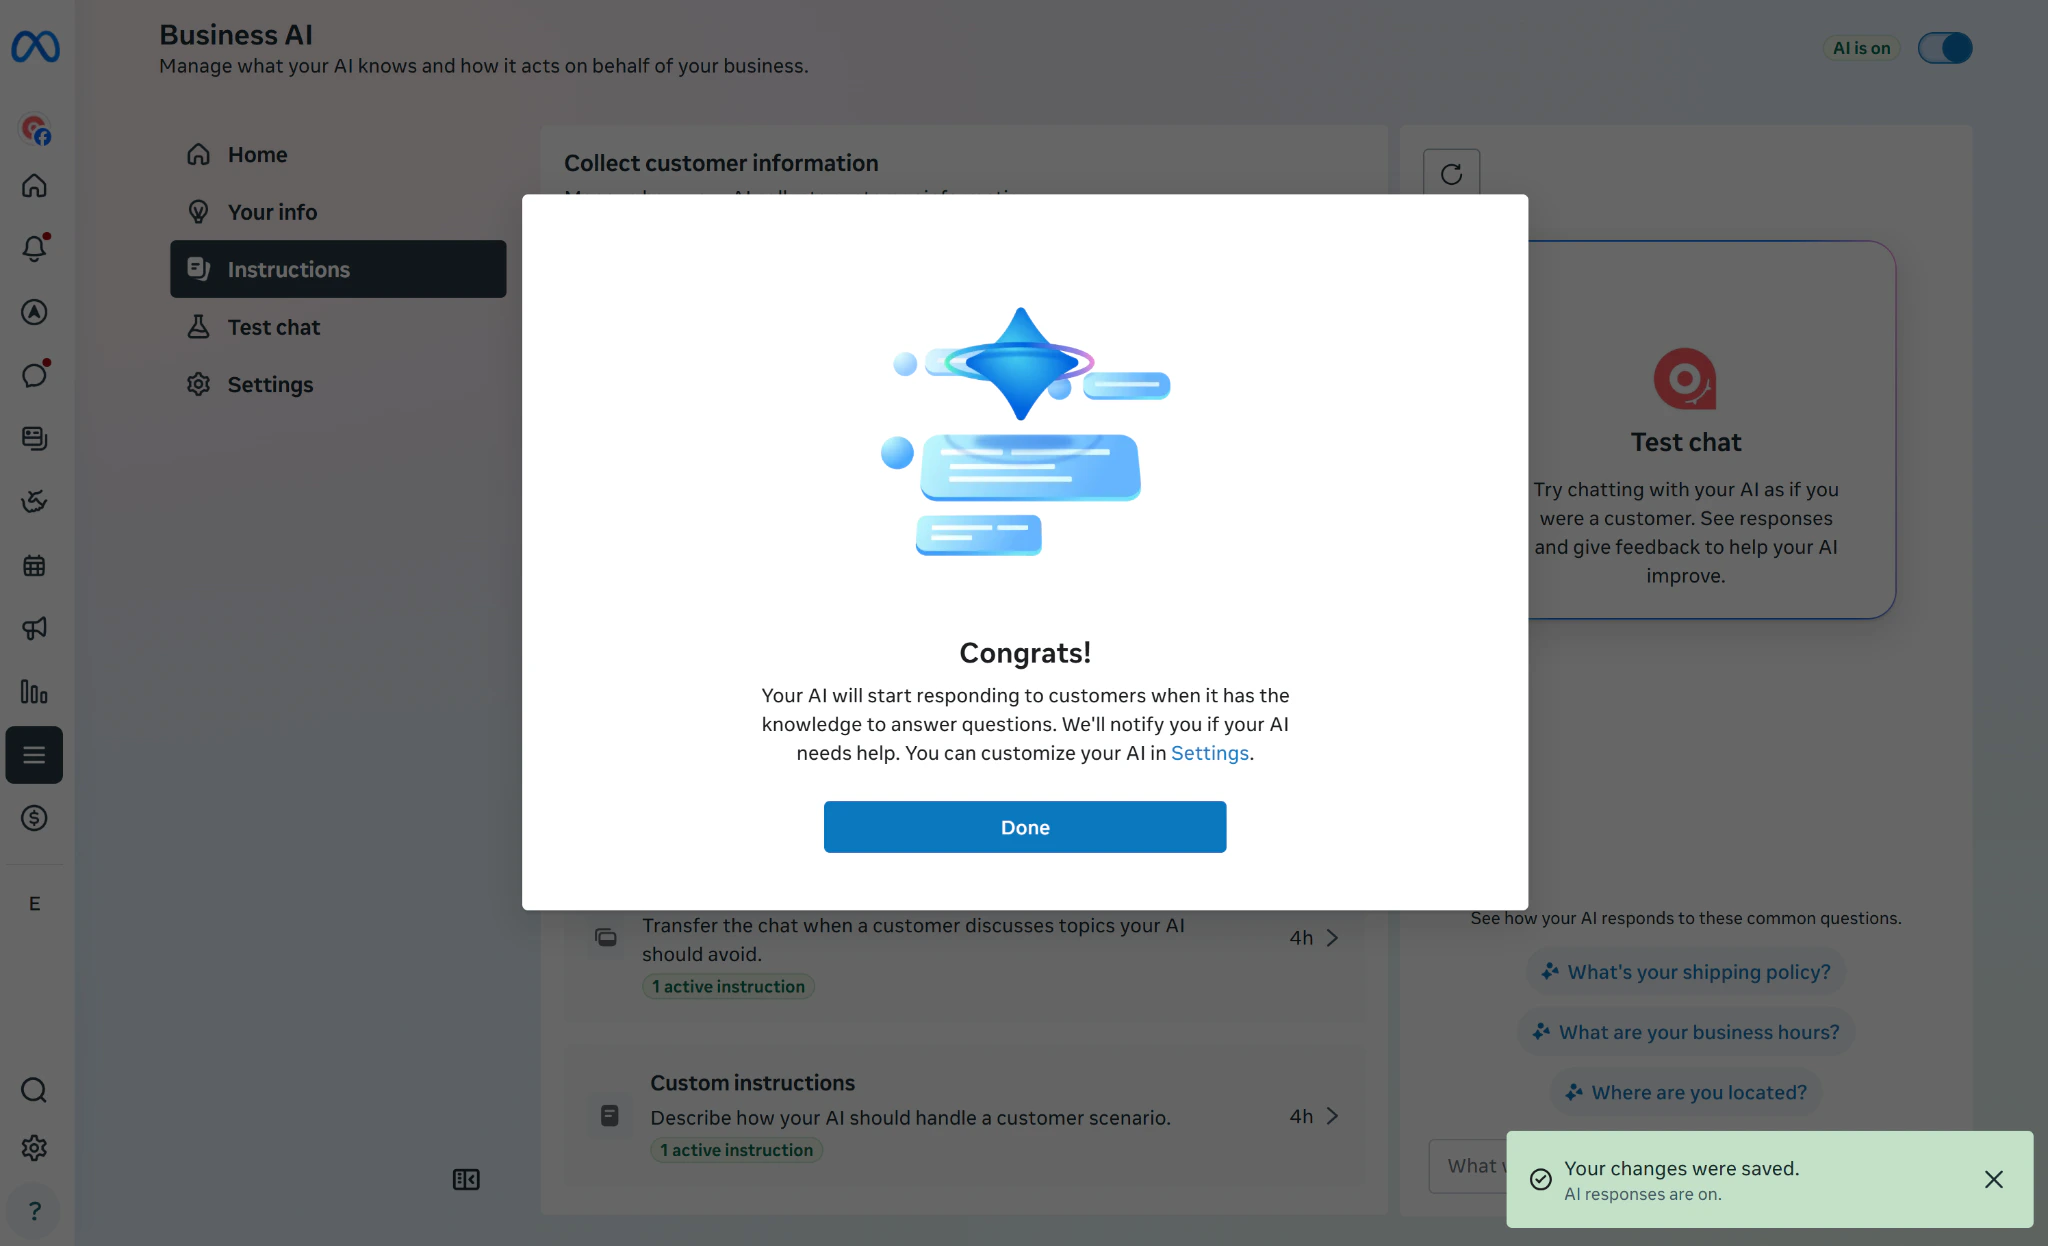
After you complete the Meta AI setup steps, turn on AI to activate and use it. At this point, the setup is complete.
Set Up Meta Business AI in AhaChat
Open AhaChat and go to Settings > Integrations. Scroll down to find the Biz AI card, select Meta Business AI, and switch the toggle on so it turns blue.
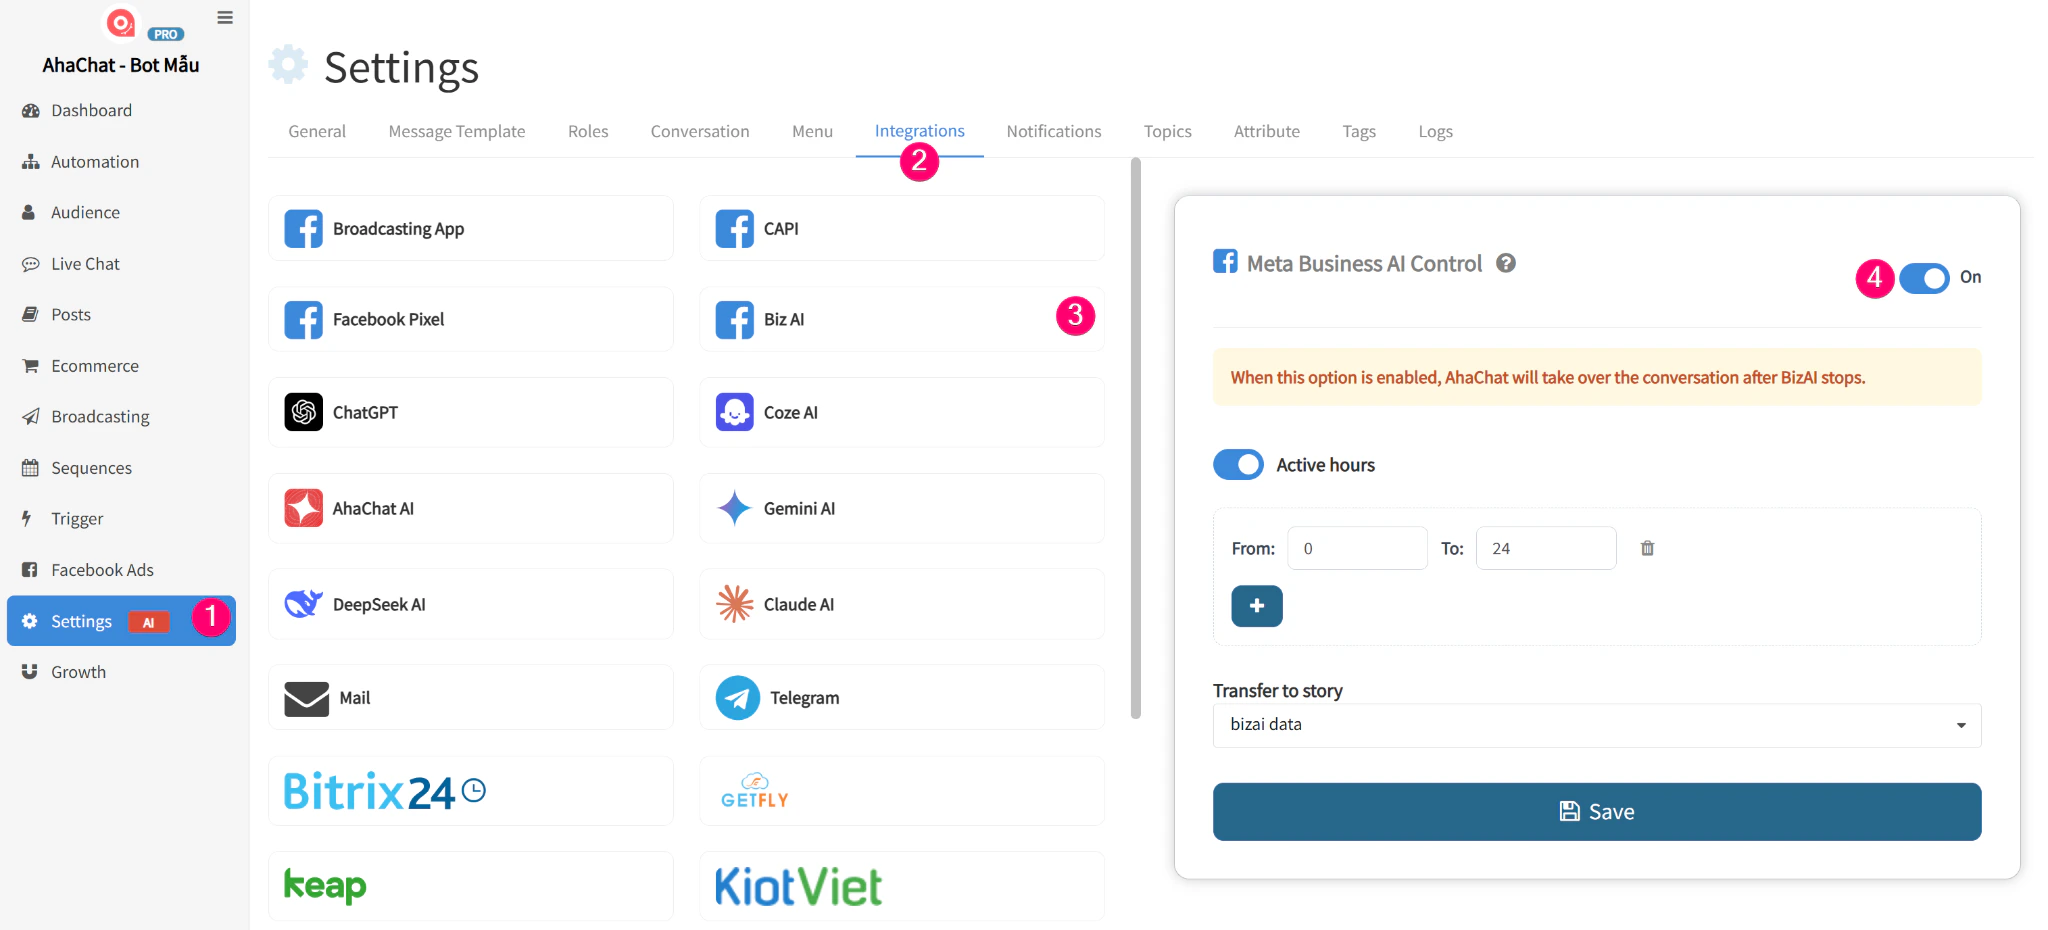
- Set the Active hours: Turn on the Active hours option if you want to limit the specific time window when AhaChat receives control. Click the + icon to add time ranges based on your business operations.
- Transfer to a Flow: In the Transfer to Flow section, click the dropdown list and choose the Flow you want to run. For example, you can choose the
user feedbackFlow or send a notification to a staff member.
Then click Save to finish.
Set Up Messenger Conversation Routing
Some Fanpages may not trigger the selected Flow after the Meta AI consultation session ends. When this happens, set up Messenger Conversation Routing so AhaChat can regain control of the conversation and run the configured Flow.
Step 1: Open Messenger Conversation Routing
Switch your personal account to the Fanpage profile, then open Page Settings.
Click Messenger Conversation Routing.
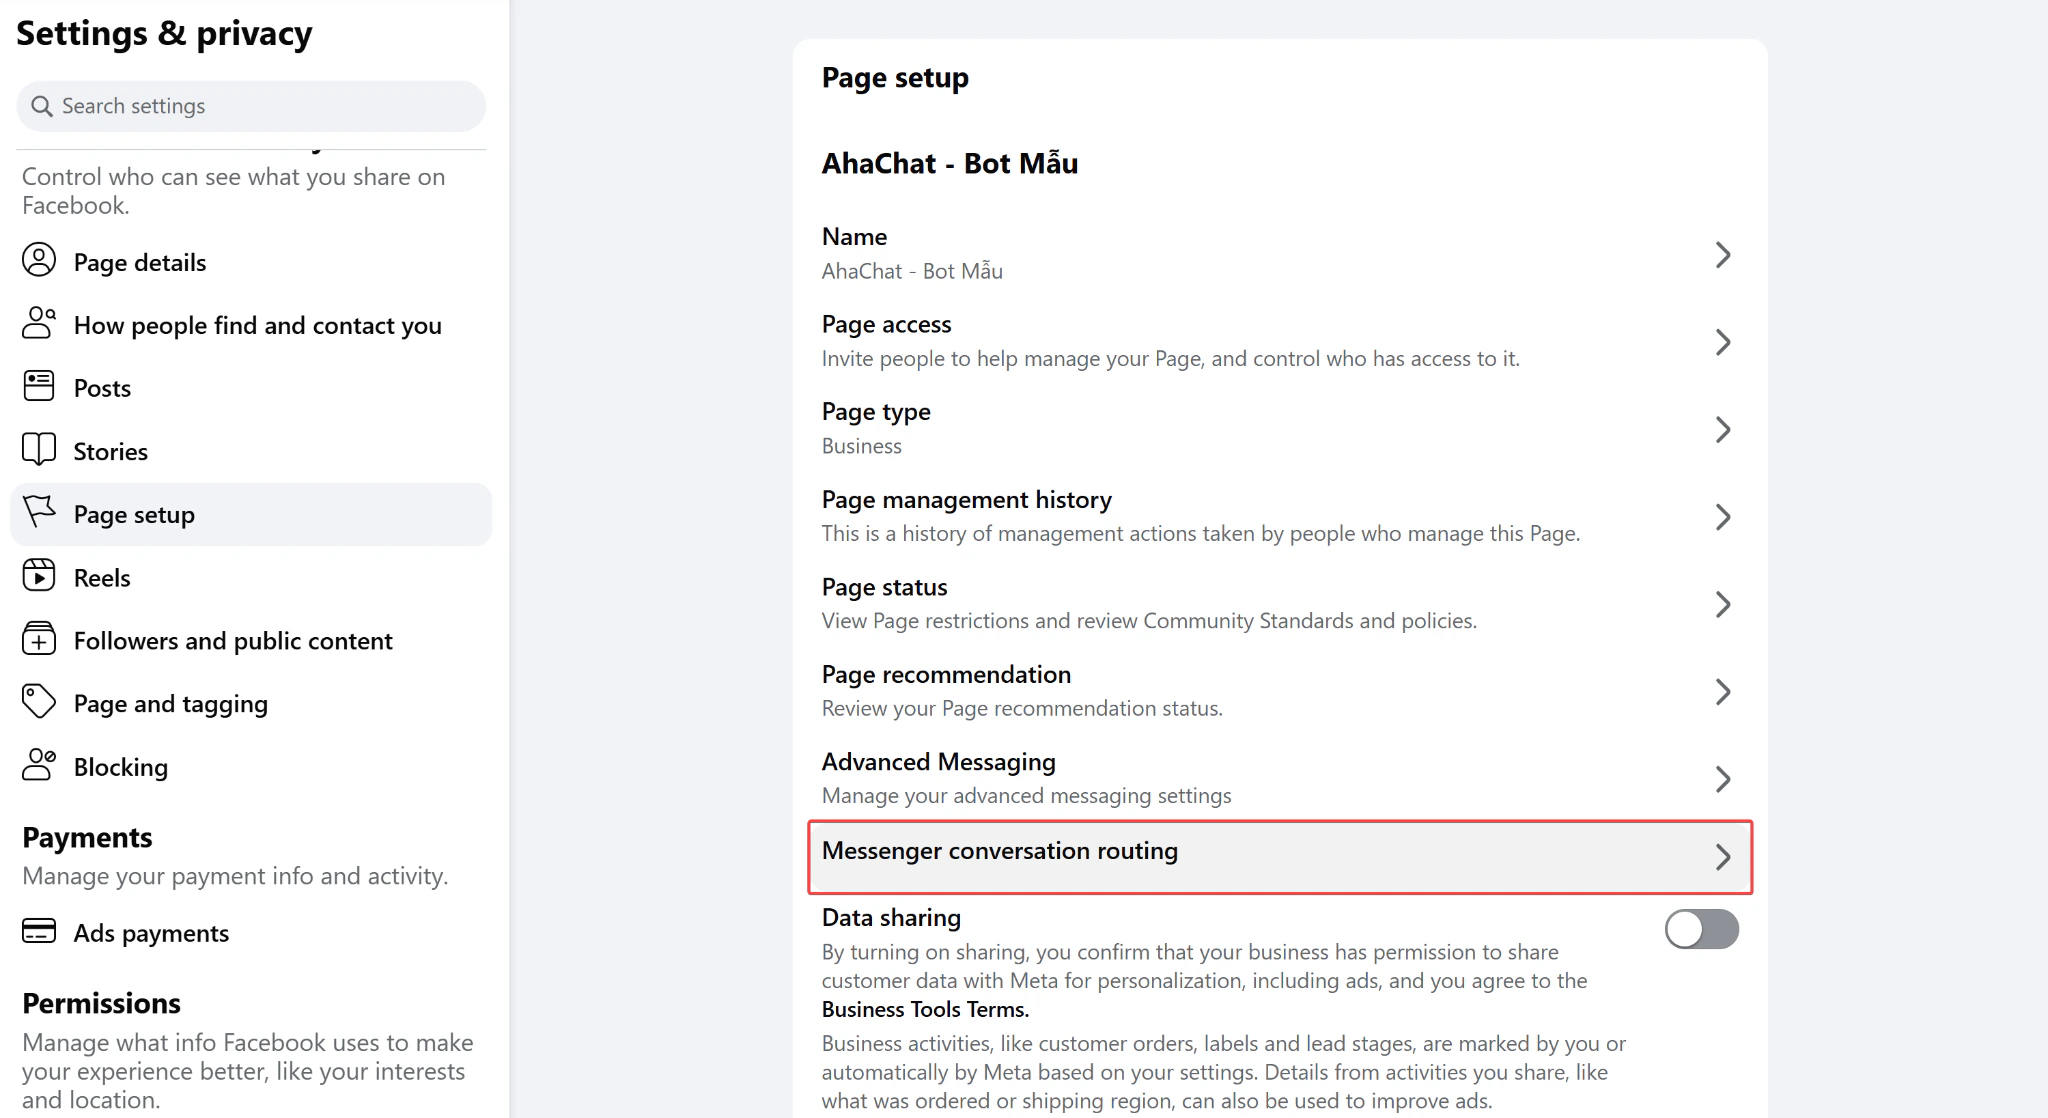
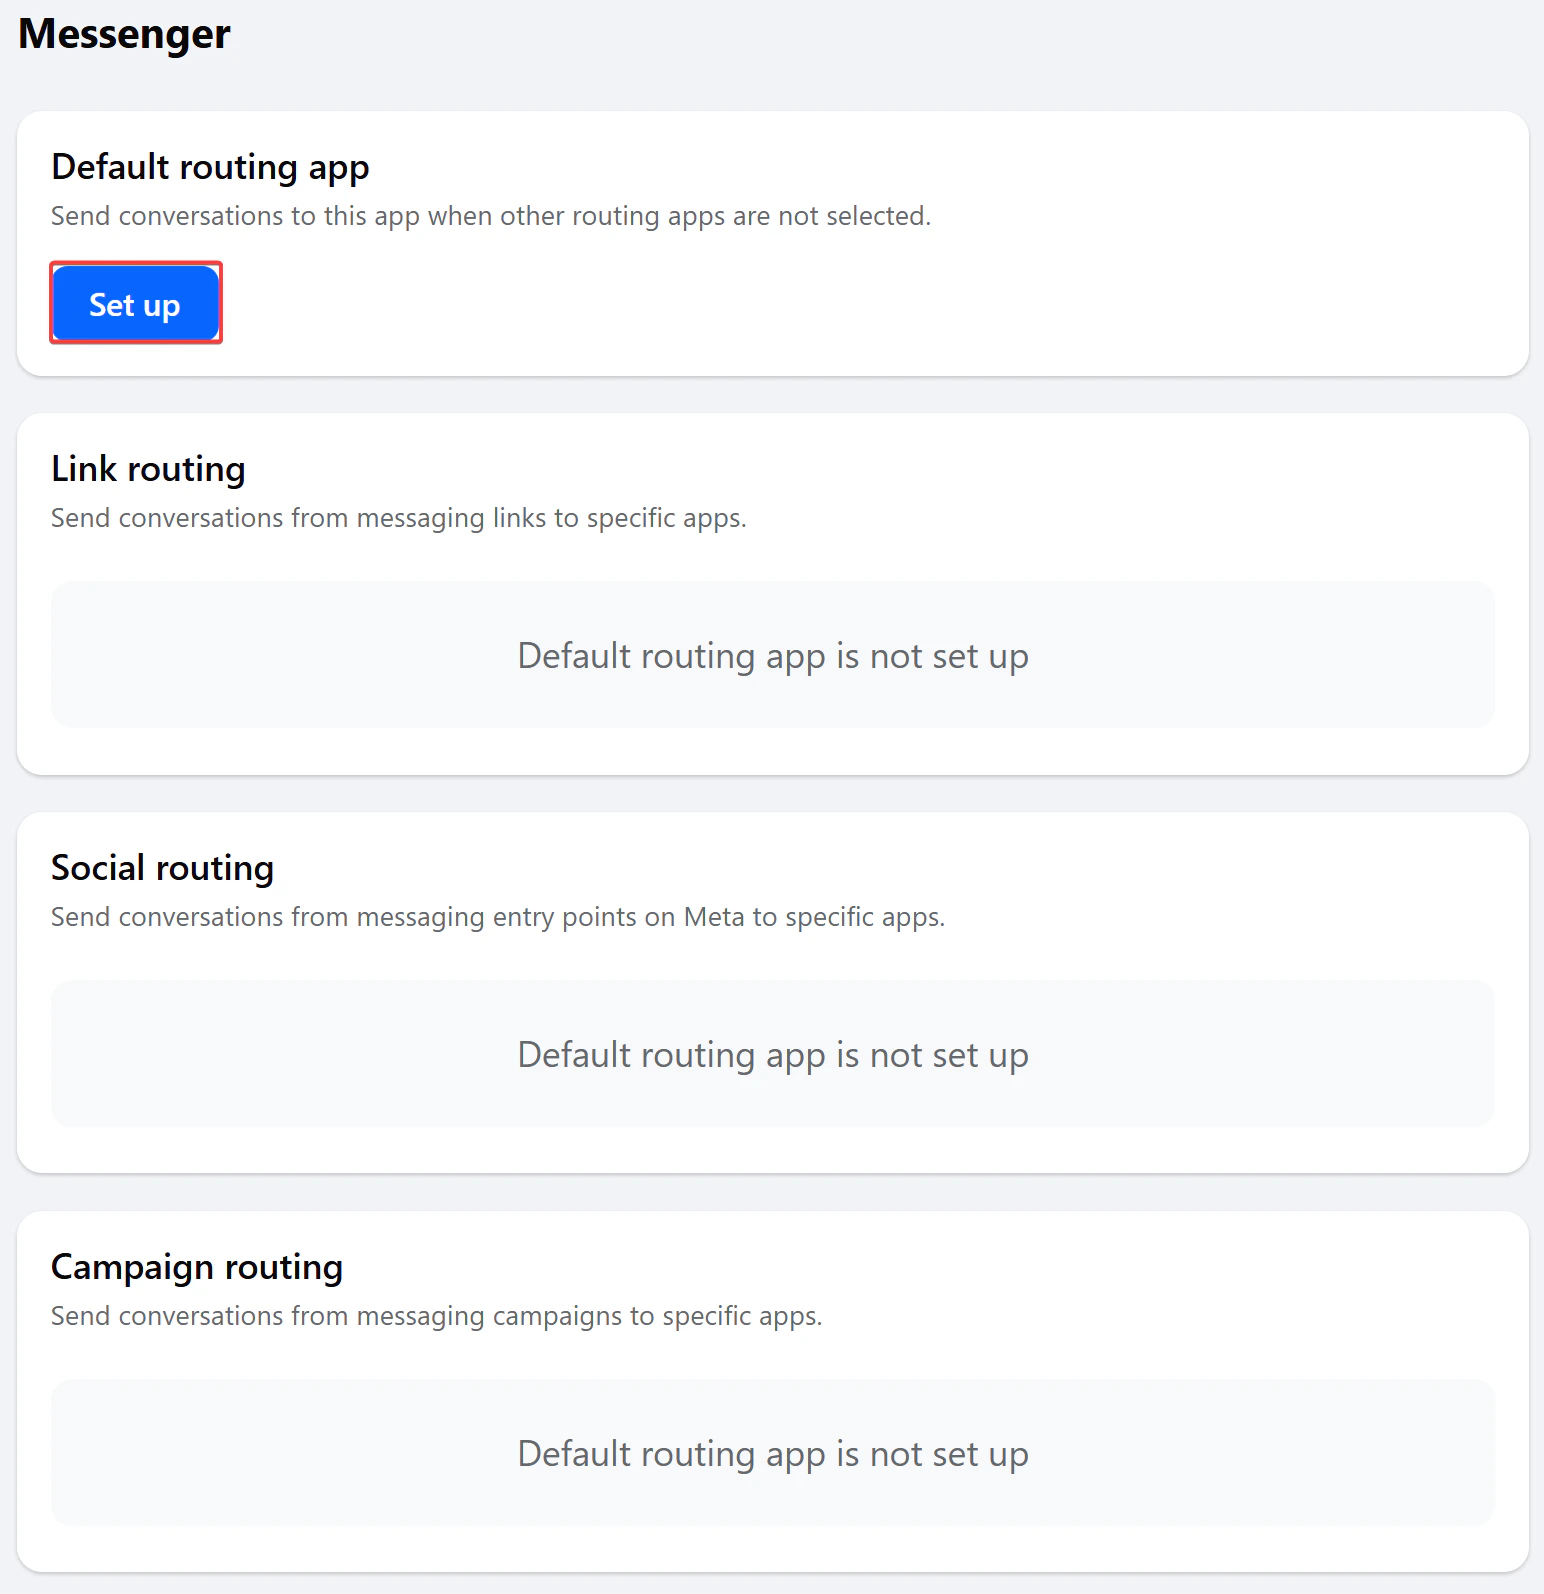
On the Messenger screen, in Default routing app, click Set up.
Step 2: Choose the default routing app
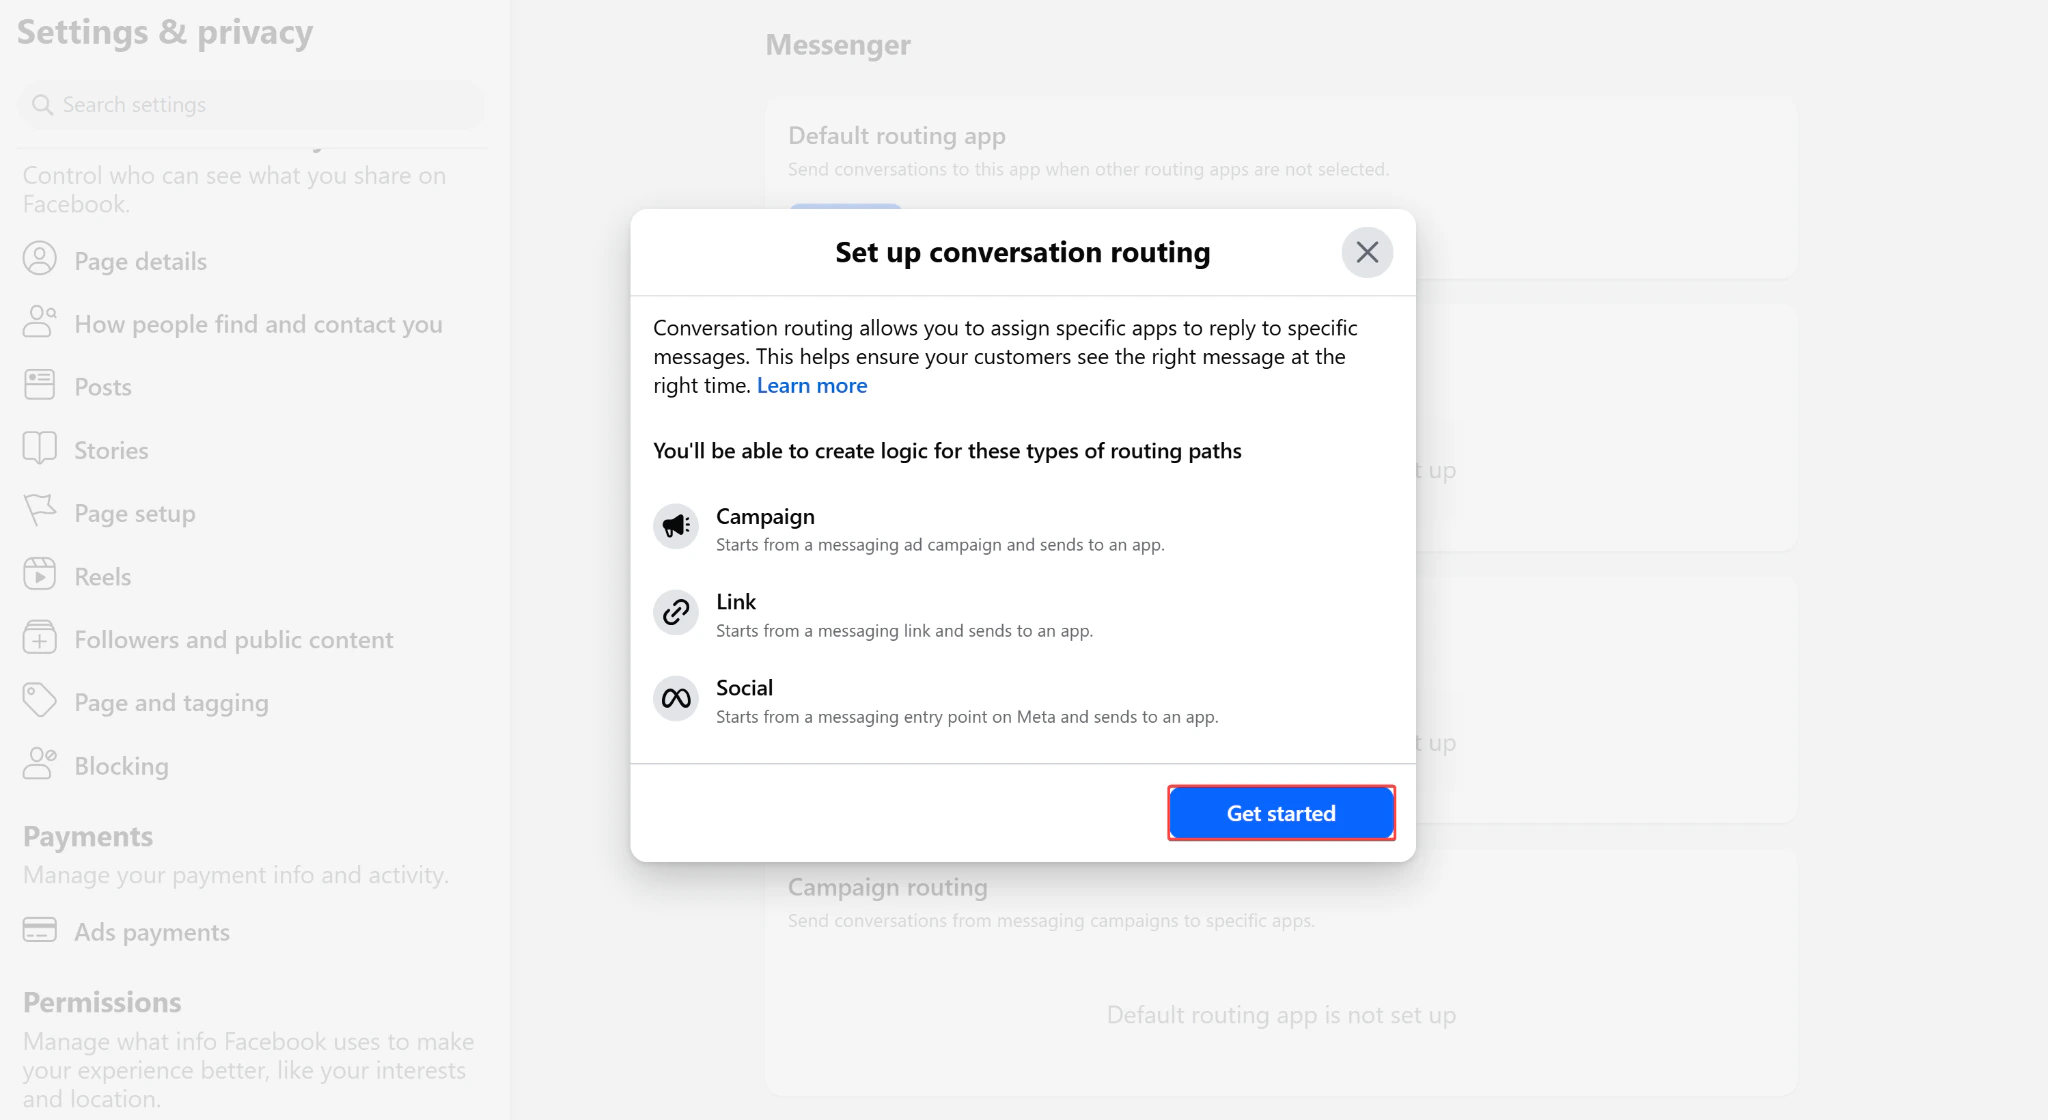
In the conversation routing setup dialog, click Get started.
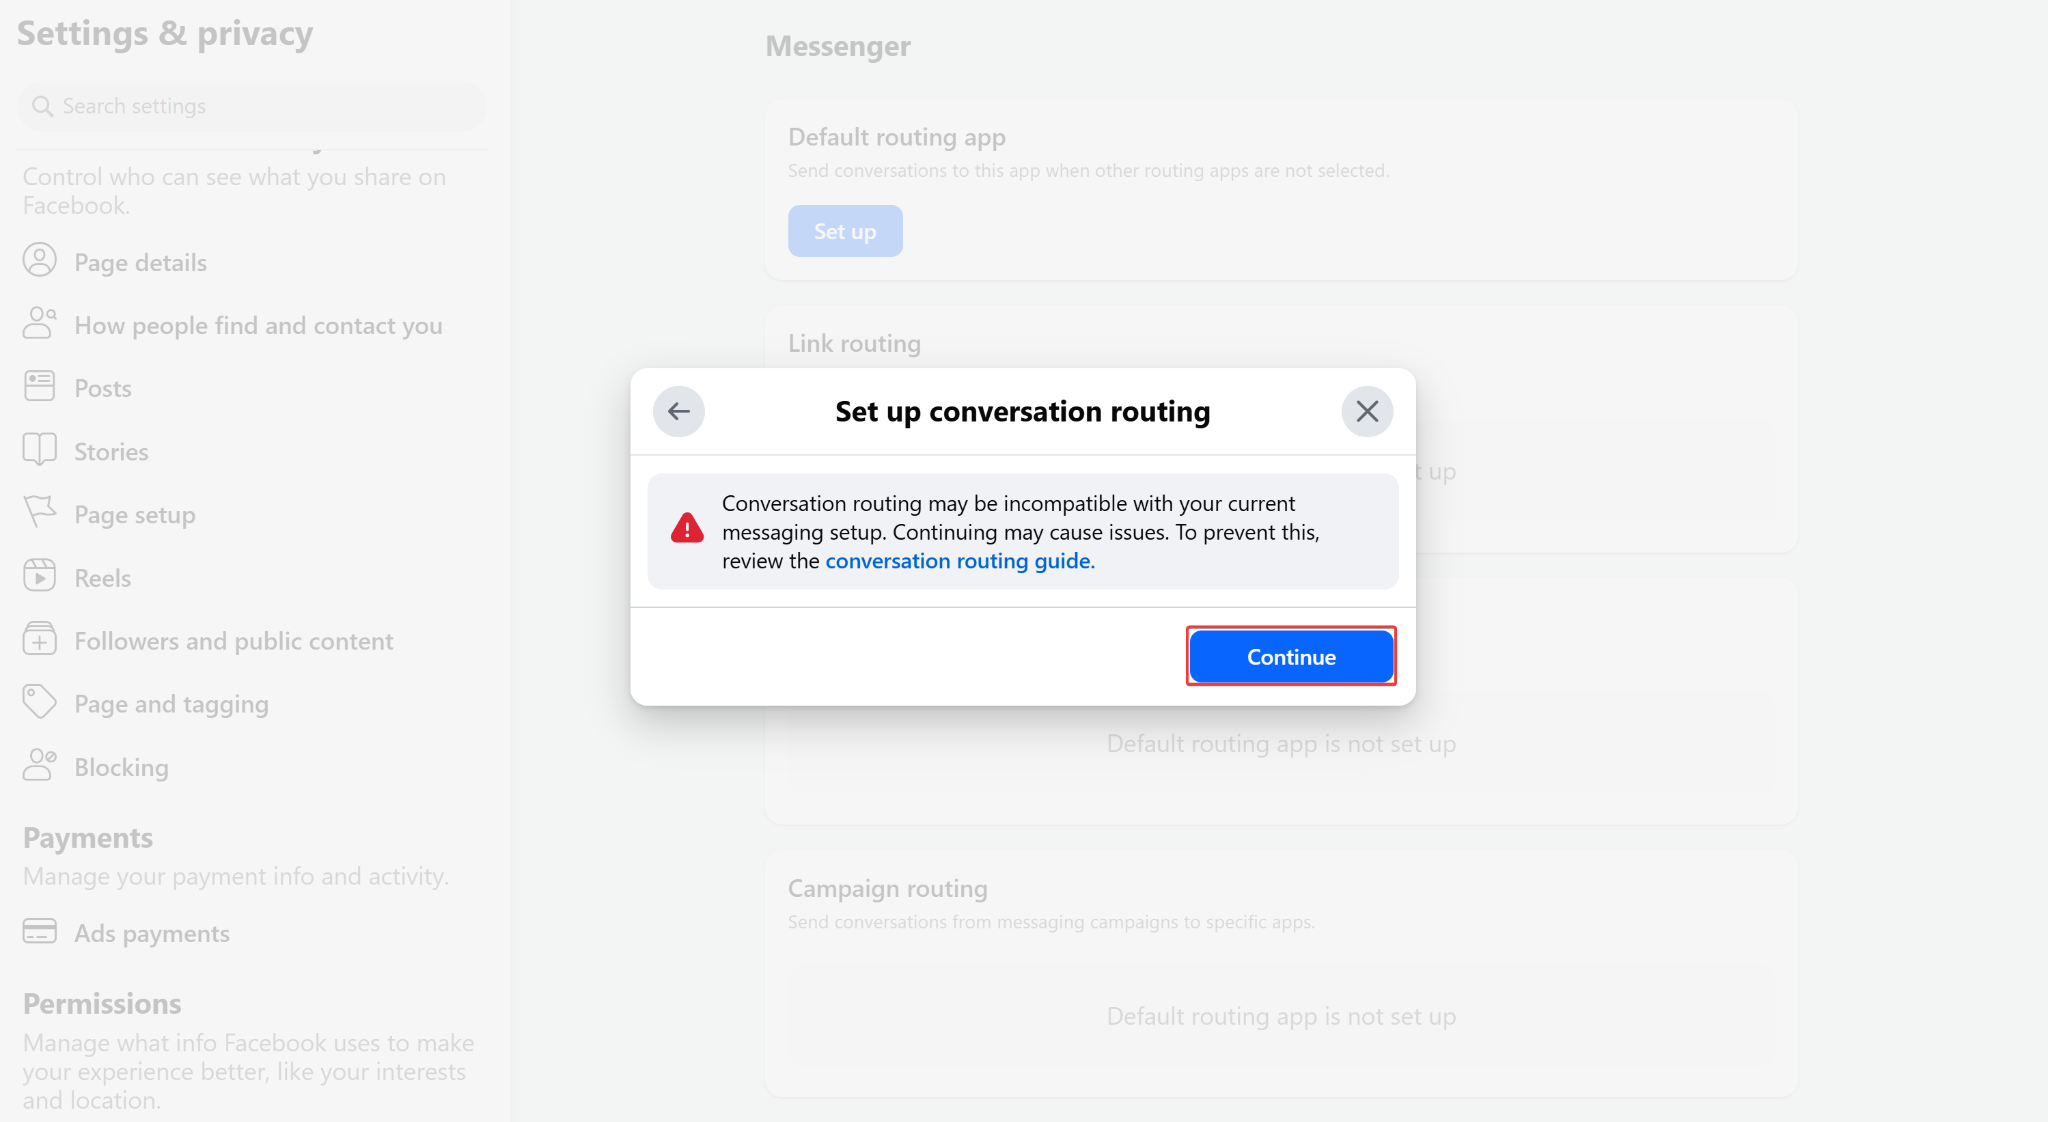
If Meta shows a warning that this feature may not be compatible with your current messaging setup, click Continue.
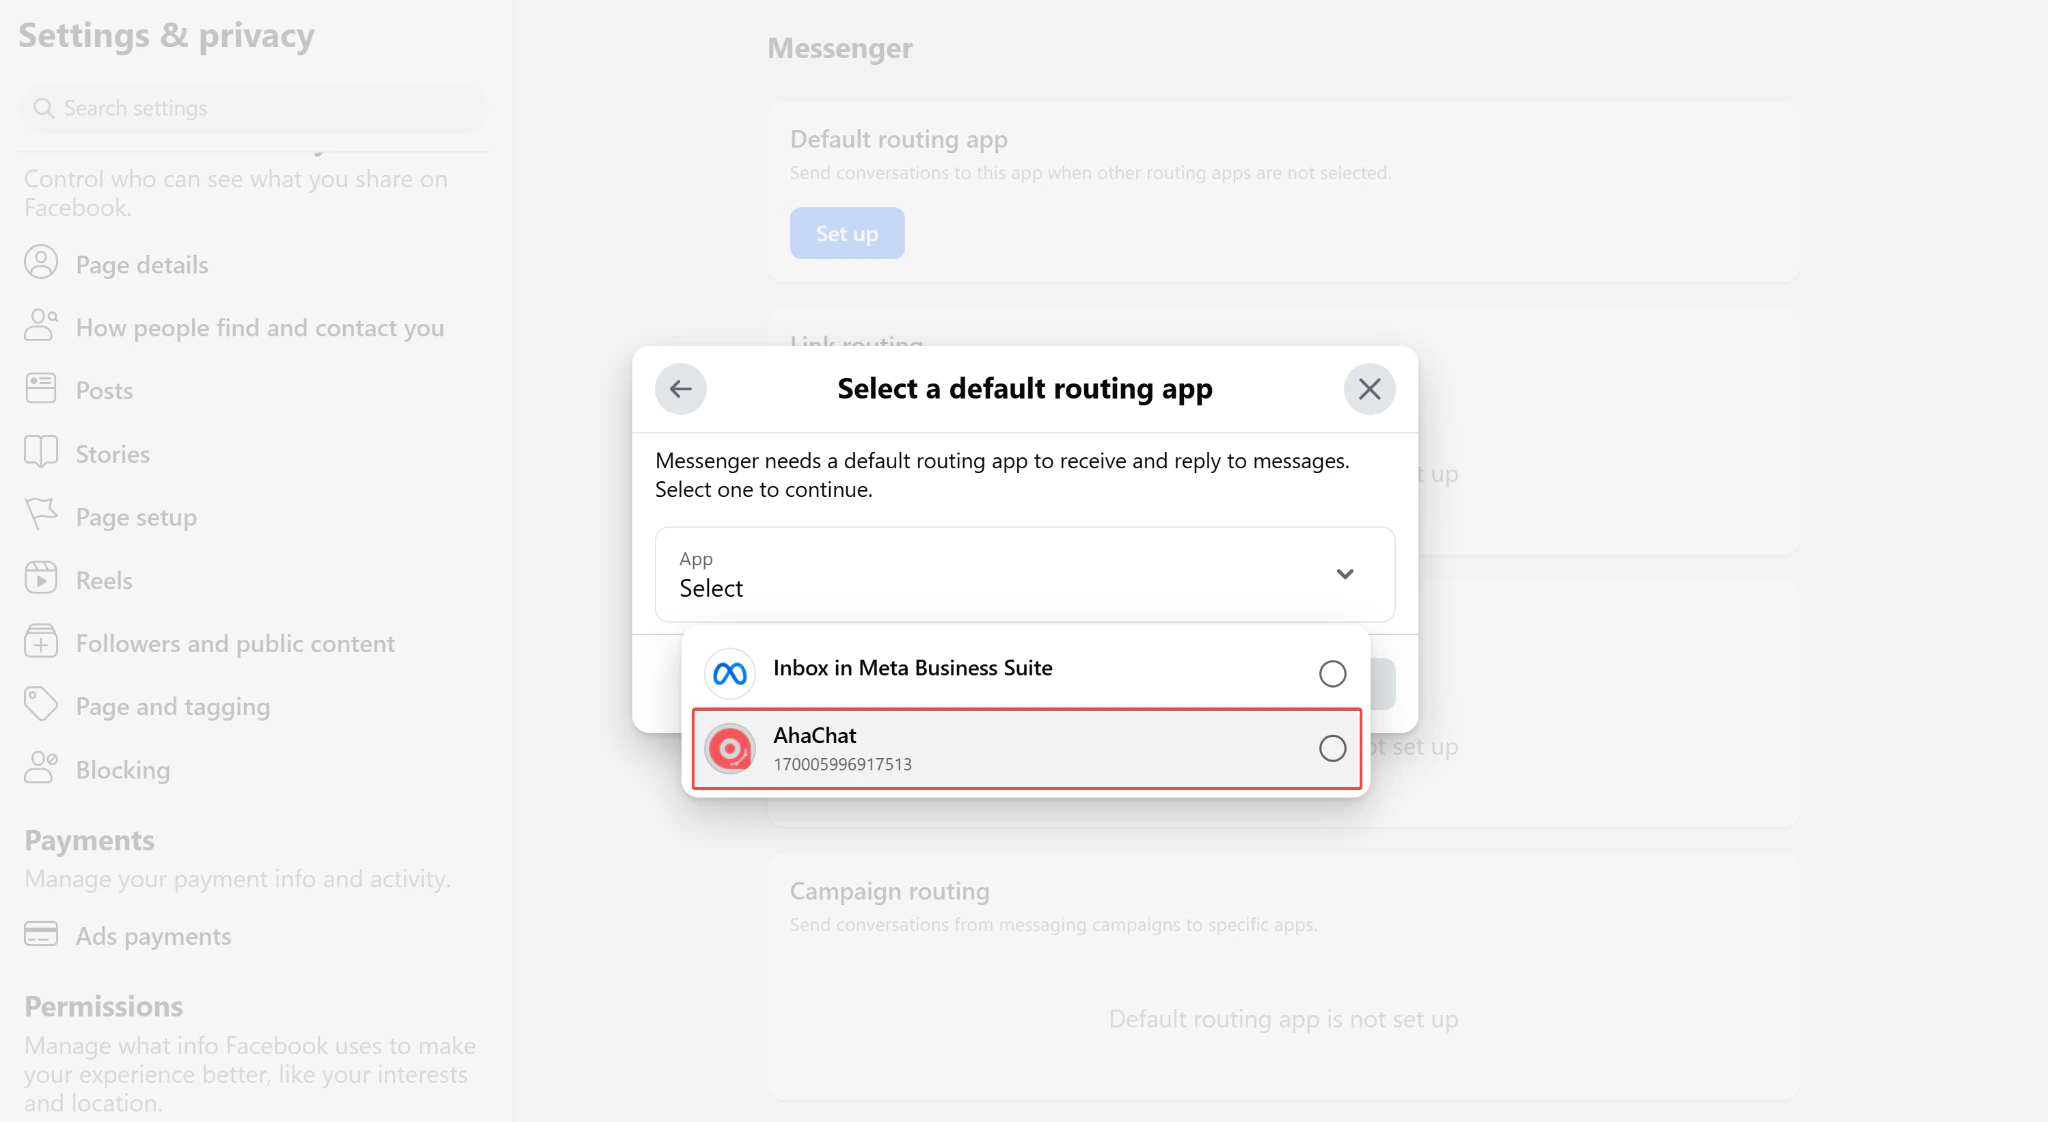
In the default routing app step, select AhaChat, then click Continue.
After you finish, go back to AhaChat and check the Flow selected in Meta Business AI. When Meta AI ends the consultation session, AhaChat can regain the conversation and trigger the Flow based on your setup.
Automatically Extract Information with AI
With the information collection feature, after Meta AI ends and hands over control, the full conversation history from that session, including both AI and customer messages, is saved into an attribute. You can pass this data to a Flow so AI can analyze it, extract customer information, and store it. AhaChat supports many leading AI platforms such as ChatGPT, Claude, and Gemini. This guide uses ChatGPT as the example.
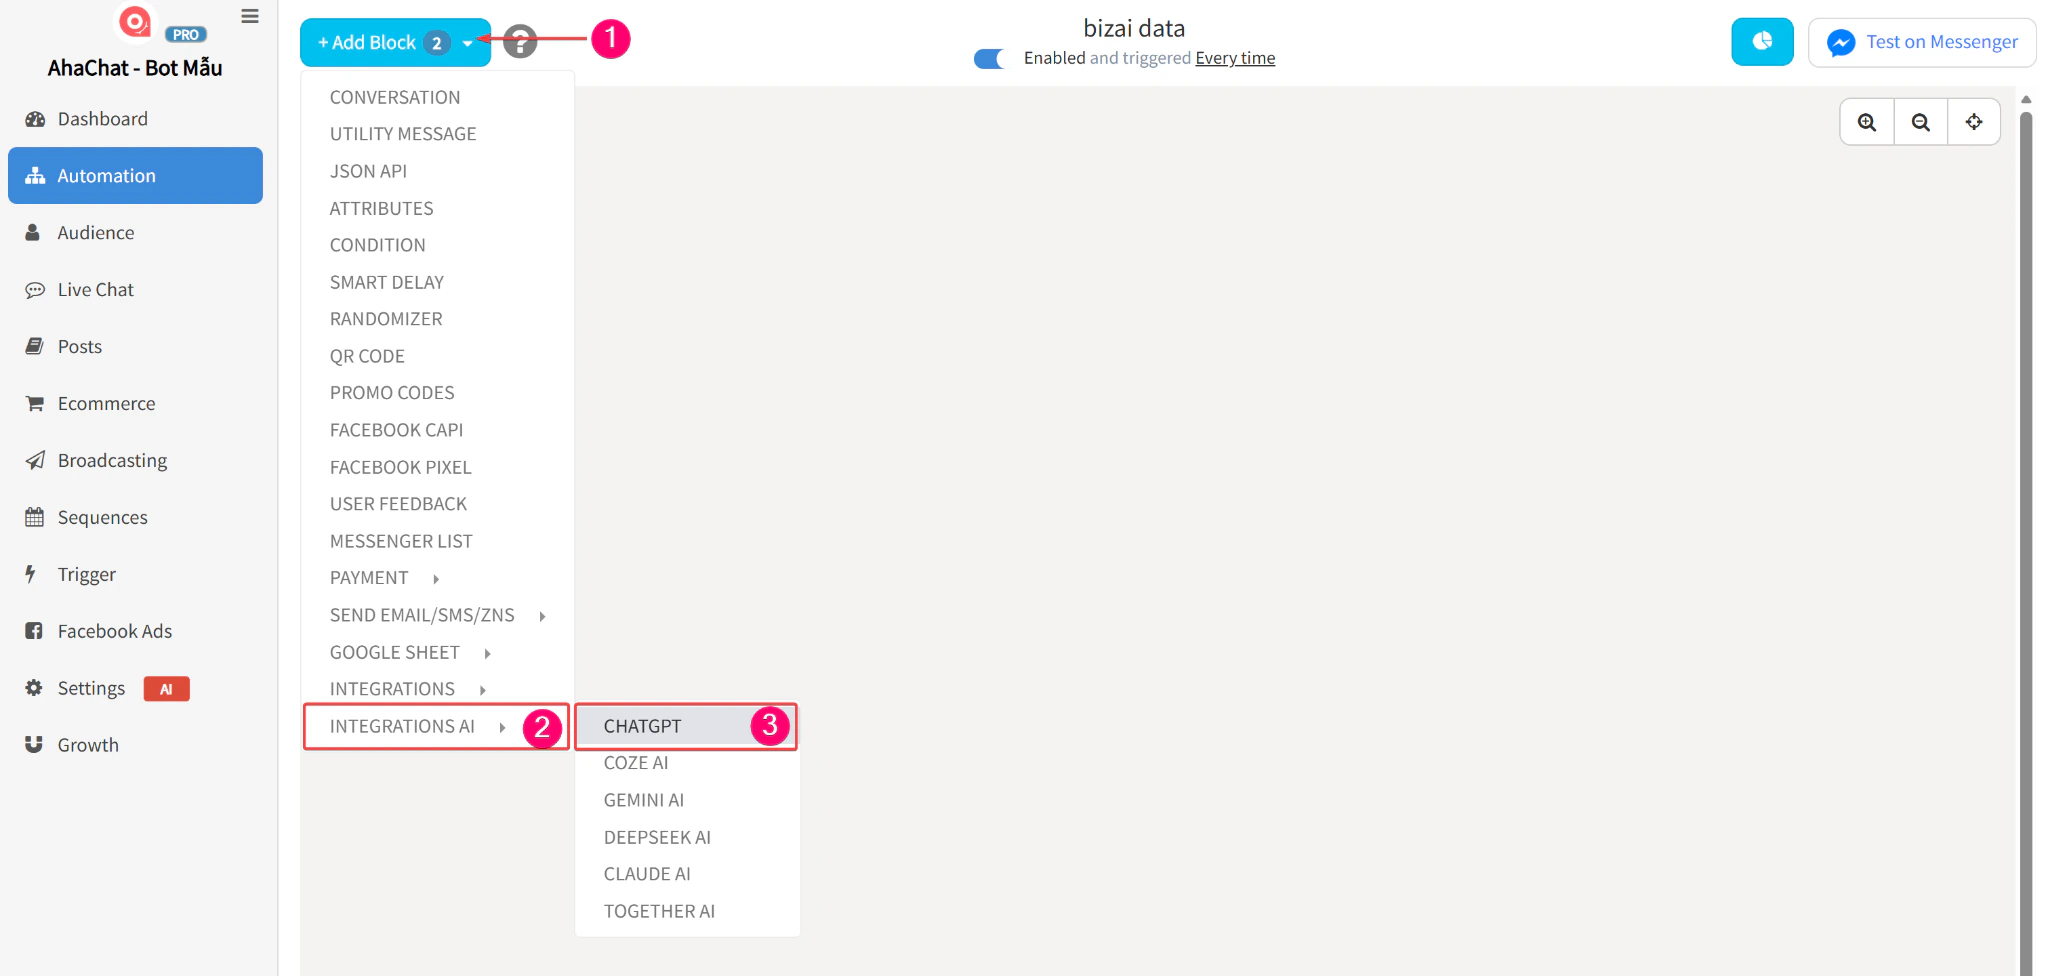
Step 1: Create a ChatGPT block
In the Flow that receives the conversation, create a ChatGPT block.
Step 2: Set up information extraction
For AI to analyze accurately, configure both parts: Bot training information (Prompt) and Message sent to OpenAI.
- Bot training information (Prompt):
Copy and paste the following prompt to guide how AI returns data. It should return raw data only, without extra wording:
- Message sent to OpenAI:
Add instructions that ask AI to extract information from {{bizai_chat_history}} and save it to the matching attribute:
- Enter the instruction:
Extract the customer's phone number from {{bizai_chat_history}}
👉 (Save the returned value to the attribute: phone_number)
- Enter the instruction:
Extract the customer's specific delivery address from {{bizai_chat_history}}
👉 (Save the returned value to the attribute: address)
- Enter the instruction:
Extract the customer's full name from {{bizai_chat_history}}
👉 (Save the returned value to the attribute: full_name)
- Enter the instruction:
Extract the customer's email address from {{bizai_chat_history}}
👉 (Save the returned value to the attribute: email)
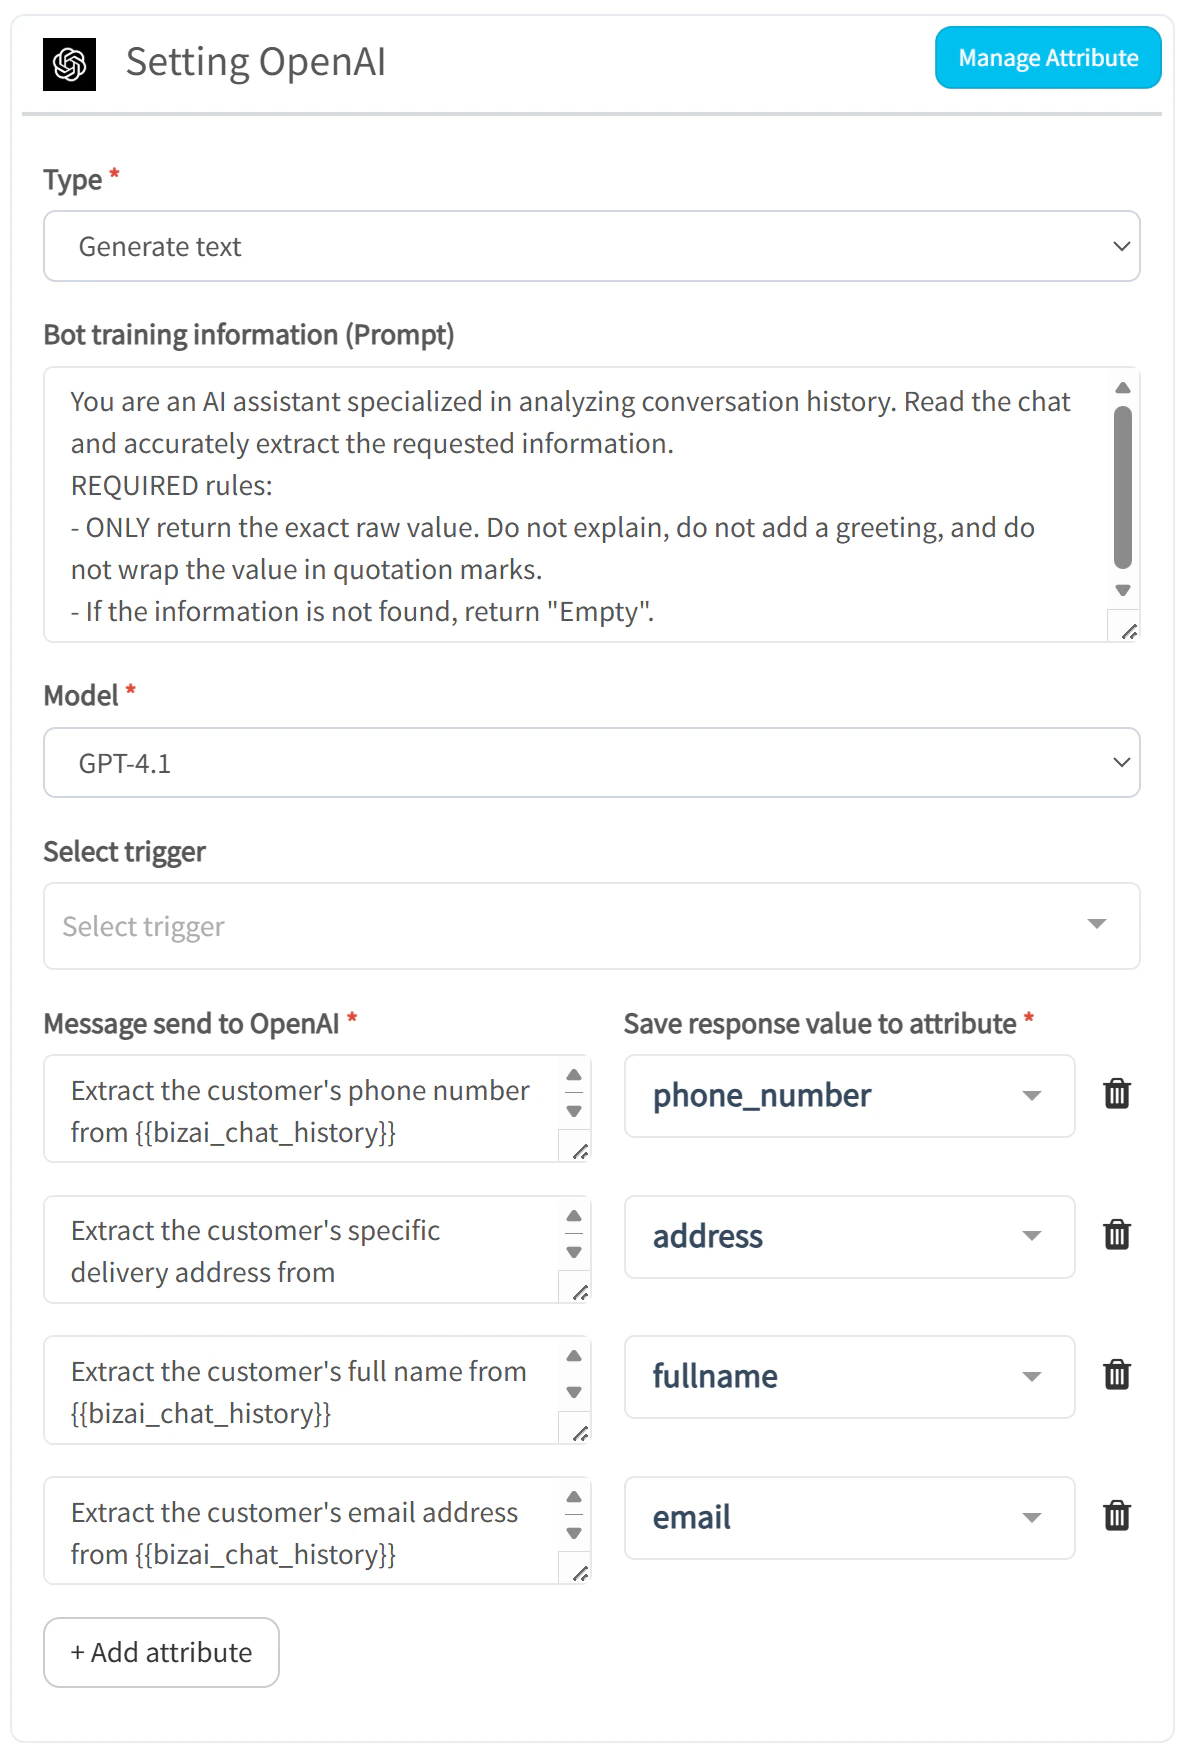
Note: Extracting raw data through OpenAI gives you full control over the information you collect. You can easily customize the instruction to extract any other customer-specific data, such as interested product code, company size, or estimated budget, without being limited by a fixed structure.
Save the data to Google Sheet
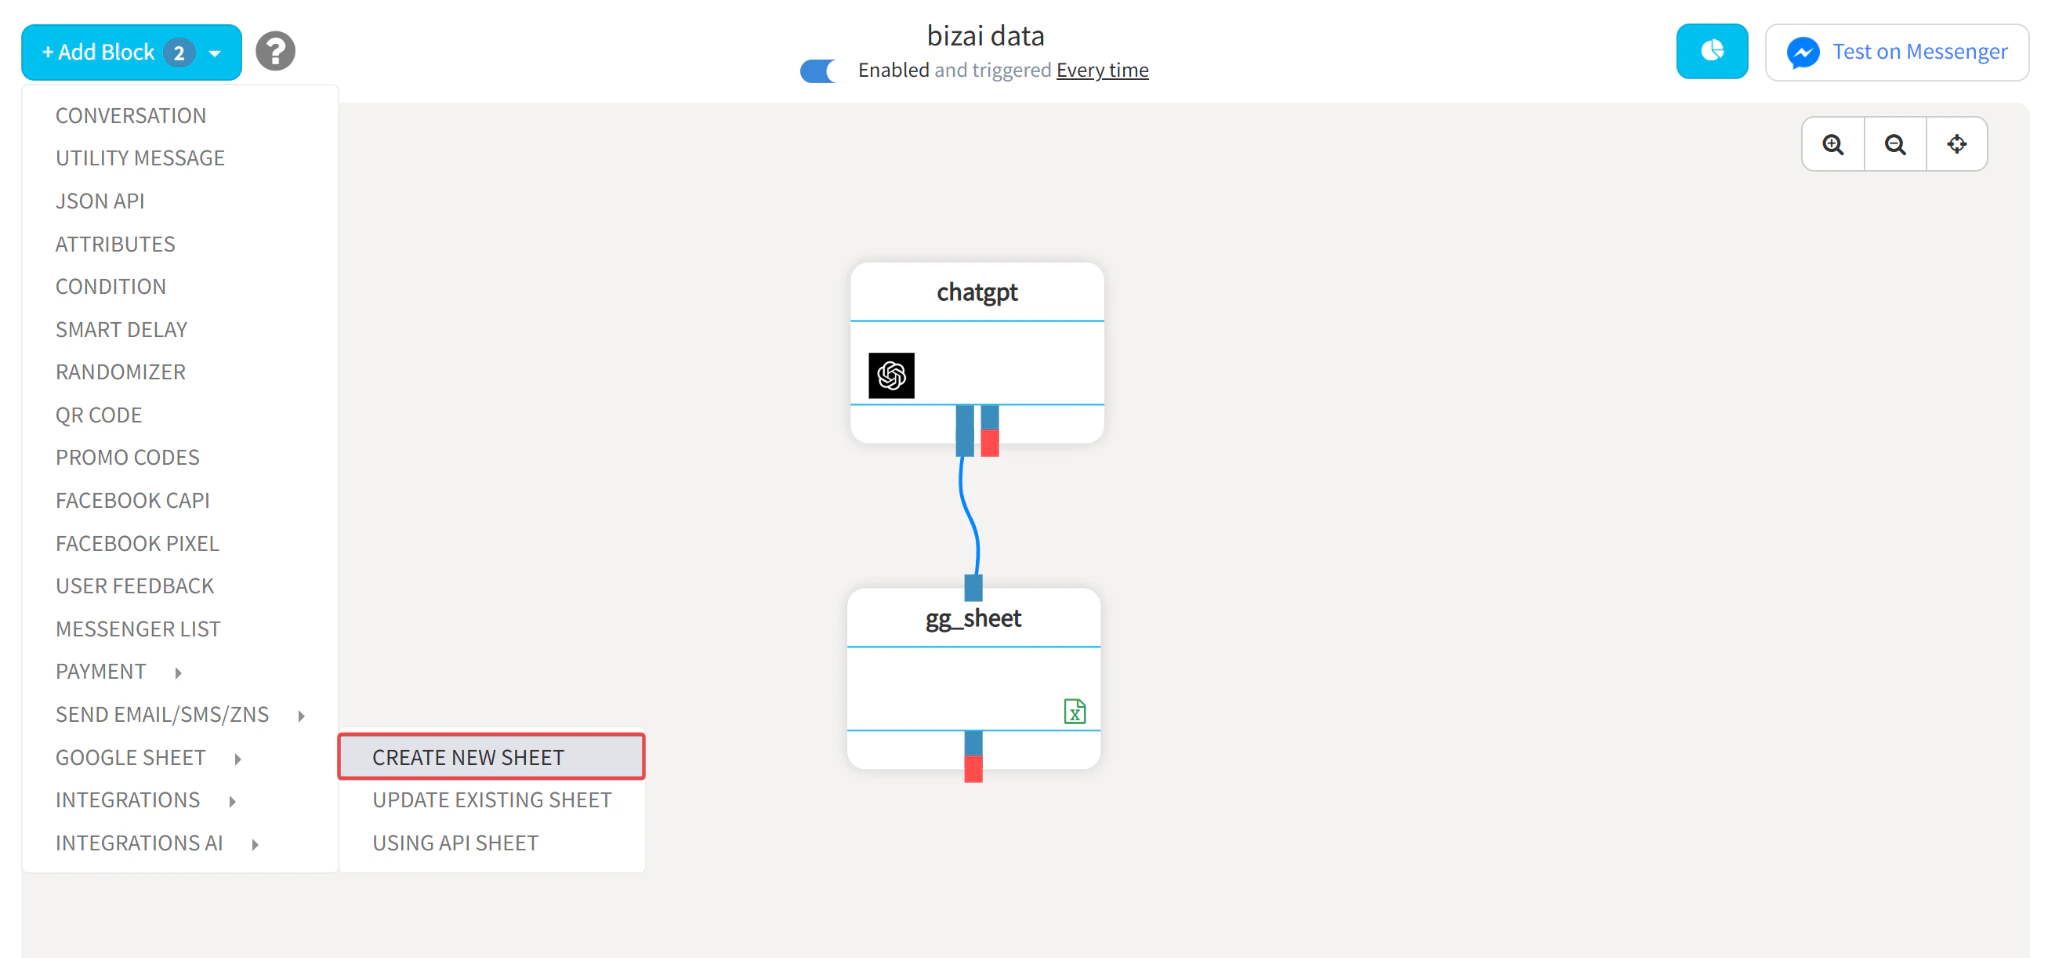
From the successful AI call branch, which is the branch on the left, connect it to a Google Sheet block. Configure this block to store the extracted attributes (fullname, phone_number, email, address) in your spreadsheet.
Control AI in Livechat
In addition to running automated Flows, your staff can actively step into a conversation that Meta AI is handling directly from AhaChat's Livechat screen.
Monitor Meta AI status
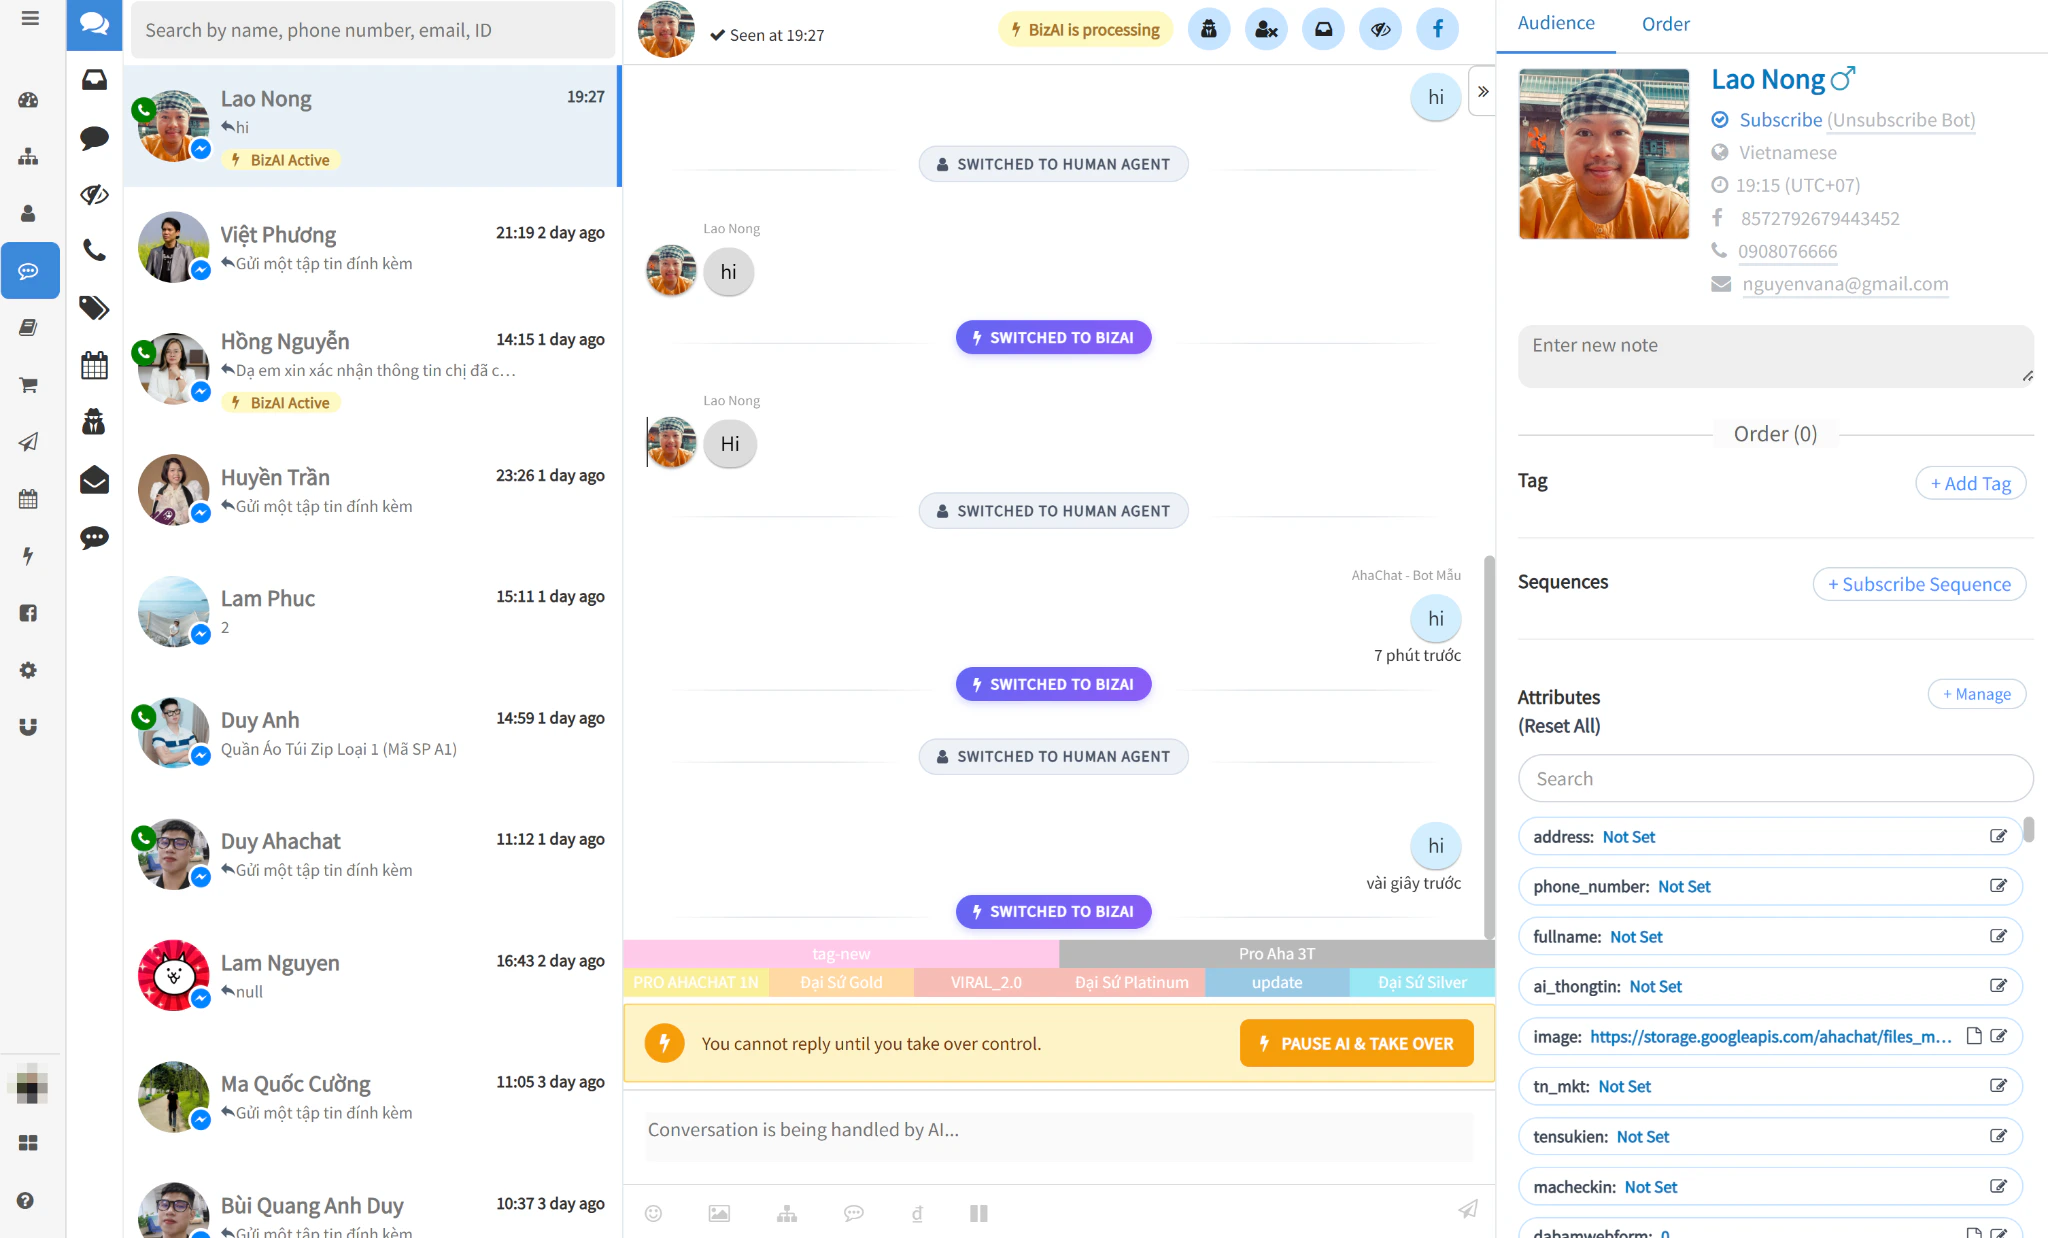
In the Livechat inbox, conversations currently handled by AI show the orange ⚡ BizAI Active label in the customer list and the ⚡ BizAI is processing status line at the top of the chat window.
Pause AI and take over manually
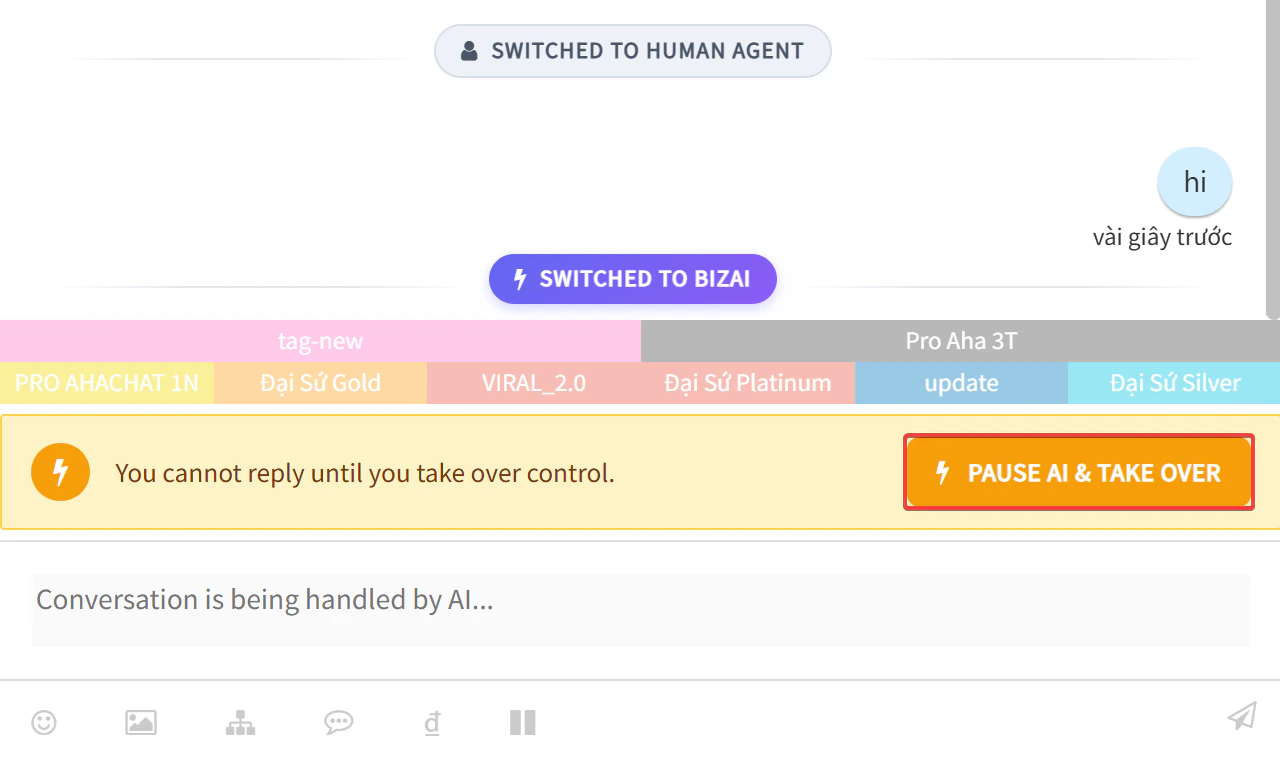
To stop AI and join the chat directly, click the orange ⚡ PAUSE AI & TAKE OVER button at the bottom of the chat window. The system keeps the message input locked until you click this button.
Chat with the customer
After you take over, the screen shows the 👤 SWITCHED TO HUMAN AGENT notice. You can now type and send messages to the customer as usual.
Reactivate Meta AI
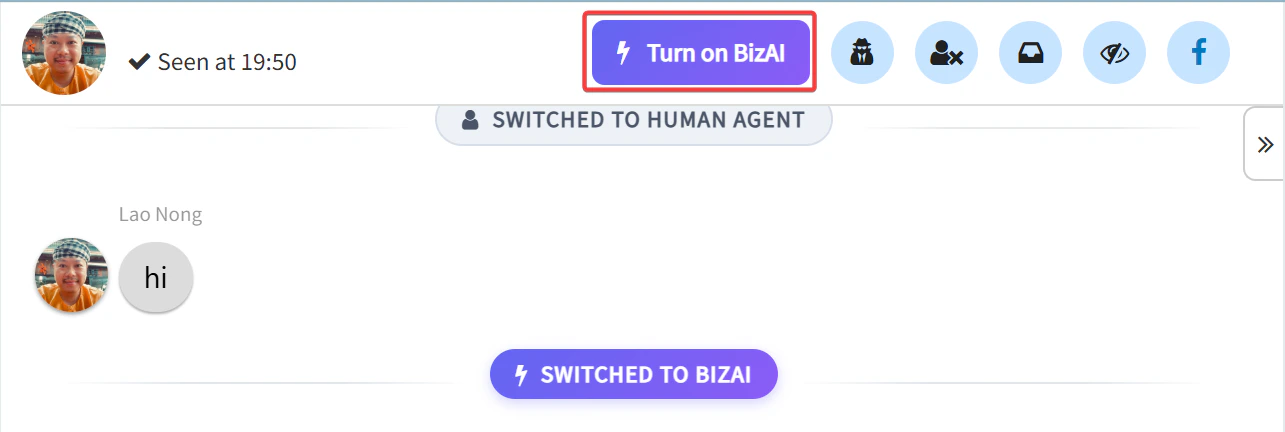
When you finish supporting the customer and want to hand the conversation back to AI, click the ⚡ Turn on BizAI button at the top of the chat window. The conversation shows the ⚡ SWITCHED TO BIZAI notice, and AI continues its work.
Note: You must be an Admin of both Business Manager (BM) and the Fanpage to activate the native Meta Business AI feature on Facebook.
See also:
- Compare with ChatGPT Integration and Gemini AI Integration to choose the AI tool that best fits your chatbot.